Types of Greenhouses
Types of Greenhouses
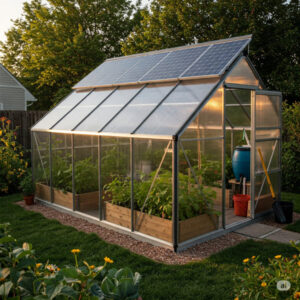
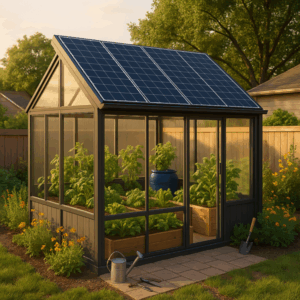
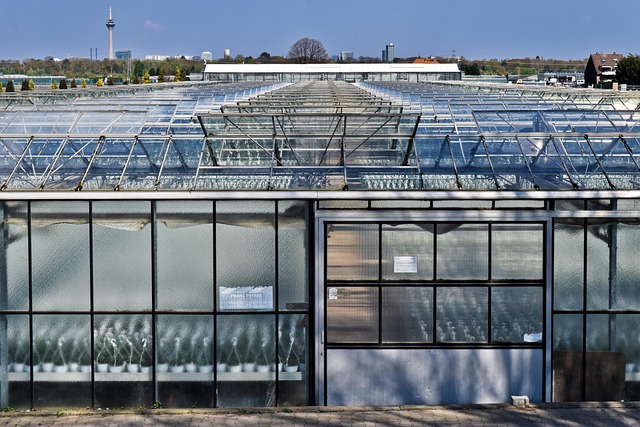
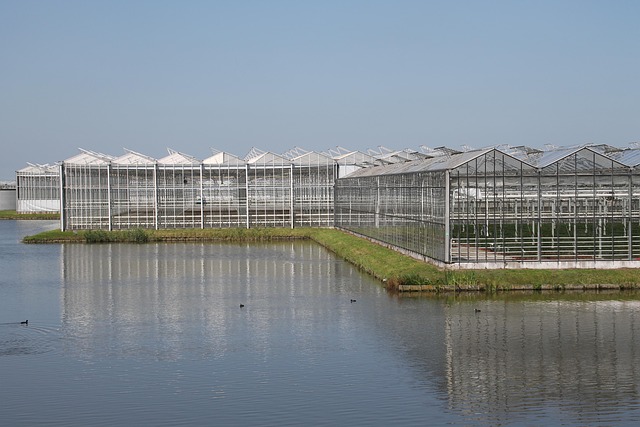
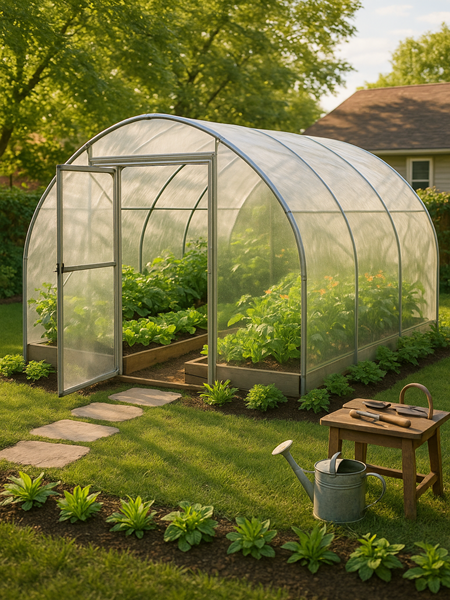
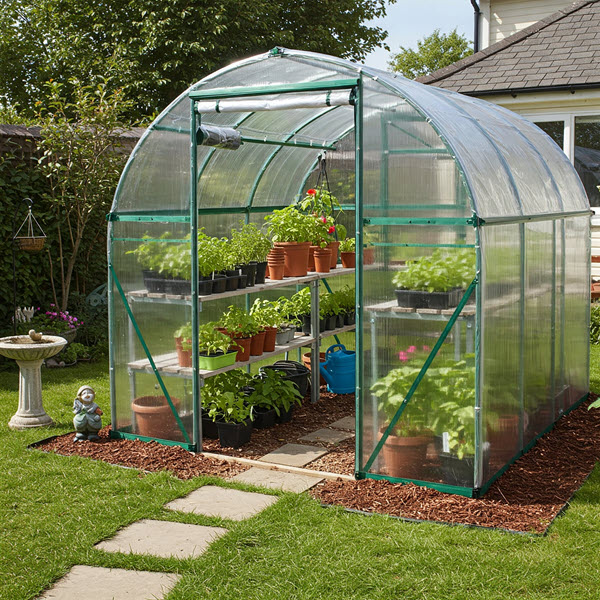
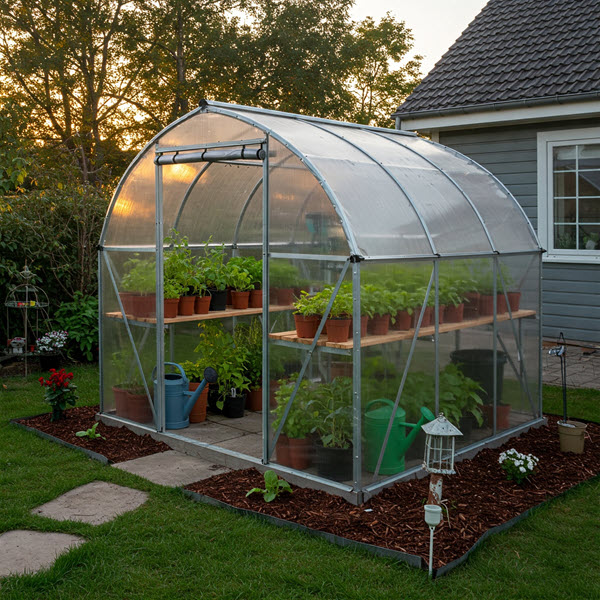
Solar Greenhouse
Solar Greenhouse 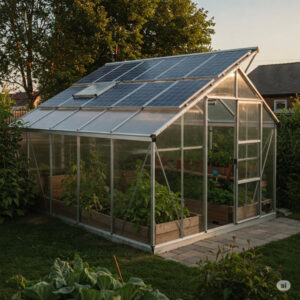
Harness the Sun: The Complete Guide to Solar Greenhouses
| Feature | Solar Greenhouse | Traditional Greenhouse |
| Energy Use | Mostly sun | Needs electricity/gas |
| Heating Cost | Low | High |
| Year-Round? | Yes | Not always |
| Off-Grid Ready | Yes | No |
| Start-Up Cost | Higher | Lower |
| Eco-Friendly | Very | Not really |
| Easy to Manage | Yes | Needs more upkeep |
So, What Exactly Is a Solar Greenhouse?
A solar greenhouse is a plant-growing haven that takes full advantage of the sun. Unlike the usual greenhouses that need extra heating or lighting, this one is designed to be energy efficient from the start. With walls and roofs made of clear materials like glass or polycarbonate, it lets sunlight pour in. Inside, materials like bricks, stone, or water barrels soak up the heat during the day and release it at night—keeping things cozy for your plants.
This kind of greenhouse doesn’t just save energy. It extends your growing season so you can enjoy homegrown herbs, veggies, and flowers even when there’s snow outside.
How Does a Solar Greenhouse Actually Work?
The magic of a solar greenhouse is in how it captures and holds onto heat. The structure usually faces south, which is ideal for soaking up as much sunlight as possible. The transparent panels let light in to warm up the interior. Inside, things like water barrels or concrete floors act like heat batteries. They store warmth during the day and slowly release it when the temperature drops at night.
The north wall and sometimes the sides are insulated to keep the heat from escaping. Good ventilation is also part of the deal—openable windows or roof vents help keep the air flowing, especially when it gets too hot during the day. And if you want to go all out, you can add solar panels to power fans or run an irrigation system.

Why Use a Solar Greenhouse?
- Year-round harvests: With a solar greenhouse, you can grow crops even during the winter months.
- Lower energy costs: Since it uses the sun’s energy, there’s less need for heating or artificial lighting.
- Sustainable living: Solar greenhouses are great for reducing your carbon footprint and embracing a more eco-friendly lifestyle.
- Food independence: Whether you’re living off-grid or just want to grow your own produce, this setup helps make that possible.
- Adaptable to any climate: Whether you’re in a cold, snowy area or a dry, sunny one, you can tailor a solar greenhouse to fit your conditions.
What Should a Solar Greenhouse Include?
- South-facing orientation: You’ll get the most sun exposure if your greenhouse faces true south.
- Sloped roof glazing: The angle of the roof matters. It helps capture sunlight more effectively in the winter months.
- Insulated north wall: This wall should be sealed and well-insulated to hold in heat. Painting it white reflects sunlight back onto your plants.
- Thermal mass inside: Use water barrels, bricks, or stone to absorb and slowly release heat.
- Insulated foundation: Foam board around the greenhouse base helps trap heat and keep the soil warm.
- Well-sealed joints: Make sure all windows, doors, and edges are sealed tight to avoid cold air leaks.
- Ventilation system: Install vents or solar-powered fans to circulate air and keep the temperature balanced.
How Is It Different from a Regular Greenhouse?
A regular greenhouse typically relies on electricity or gas to provide heat and light, which can get expensive. A solar greenhouse, however, is designed to work with nature, not against it.
- Energy source: Solar greenhouses use the sun and store heat naturally, while traditional ones often need artificial heating.
- Climate control: Solar setups regulate temperature better through passive heating and cooling.
- Operating cost: Over time, solar greenhouses are cheaper to run since they use minimal energy.
- Adaptability: They perform better in extreme weather conditions because of their efficient design.
Should You Build or Buy One?
- DIY approach: If you like hands-on projects, building your own solar greenhouse is a great option. It gives you full control over the design and can save money if you already have tools or materials.
- Pre-fab kits: If you’re not into building from scratch, buying a ready-to-assemble kit makes setup easier and faster.
Things to consider:
- Make sure the location gets full sun for most of the day.
- Check for zoning regulations and permits.
- Choose a site with good drainage and flat ground.
- Think about future needs like space for expansion or tool storage.
What Can You Grow in a Solar Greenhouse?
Even in the middle of winter, your solar greenhouse can support a wide range of crops.
- Cold-weather crops: You can grow kale, spinach, carrots, beets, green onions, and Swiss chard without much trouble.
- Warm-season crops: With proper heat storage, you can grow tomatoes, peppers, cucumbers, eggplants, and beans.
- Herbs and perennials: Basil, rosemary, mint, thyme, and lemongrass thrive in solar greenhouses year-round.
What Problems Might You Run Into?
- Too much heat in summer: Without ventilation, things can get too warm. Use fans, vents, or shade cloths to help manage the temperature.
- Heat loss in winter: Add more thermal mass and double-check insulation to keep the space warm overnight.
- High humidity: Poor airflow can lead to mold and mildew. Vents and fans keep air moving and moisture under control.
- Pests: Since greenhouses are warm and cozy, bugs might move in. Use natural pest control like neem oil or bring in beneficial insects.
Tips to Help You Get Started
- Check sunlight patterns: Use a sun-mapping app to find the best placement.
- Buy quality materials: Strong glazing and solid insulation go a long way.
- Track conditions inside: Use thermometers and humidity monitors.
- Plan for growth: Leave room to expand your setup if needed.
- Keep learning: Join gardening forums and watch videos to pick up new tricks and advice.
Conclusion
A solar greenhouse is a smart way to grow food year-round, reduce energy bills, and lessen your environmental impact. Whether you build it yourself or buy a kit, planning and setup are key. With a solid design and some patience, you’ll have fresh produce all year, no matter the weather.
🔑 Key Takeaway
A solar greenhouse isn’t just a cool structure—it’s a clever, energy-smart way to grow your own food all year long. By using sunlight as the main heat source, you can cut down on energy costs and keep those veggies thriving even in the dead of winter.
Frequently Asked Questions (FAQs): Solar Greenhouses
Q1. Can I turn my regular greenhouse into a solar one?
Yes! You can upgrade a standard greenhouse into a solar greenhouse by:
Adding insulation to retain heat
Incorporating thermal mass (like water barrels or stone) to store warmth
Reorienting the structure for better sun exposure
With these changes, your greenhouse will capture and hold more solar energy, making it more efficient and extending your growing season.
Q2. How long before a solar greenhouse pays for itself?
Most people see a return in 3–7 years. The payback period depends on:
Your initial investment
Local energy savings
How much food you grow
If you grow high-value crops or have high energy costs, you might see returns even sooner.
Q3. Will a solar greenhouse still work if I live in a cloudy climate?
Definitely.
Even in areas with limited sunlight, a solar greenhouse can maintain warmth if it’s well-insulated and includes sufficient thermal mass (such as water barrels or stone walls) to absorb and slowly release heat.
Insulation minimizes heat loss during cold or cloudy days.
Thermal mass stores heat during sunny periods and releases it when temperatures drop.
For additional support, solar panels can power supplemental heating, fans, or lighting to ensure plants thrive year-round.
Q4. Do I need electricity to run a solar greenhouse?
Not always.
A well-designed passive solar greenhouse can operate without any external electricity by relying on:
Strategic insulation and thermal mass to regulate temperature naturally
Natural ventilation to control humidity and airflow
However, adding solar panels allows you to:
Power fans to improve air circulation
Automate watering systems for consistent irrigation
Use supplemental lighting to boost plant growth during short winter days
This combination gives you more precise environmental control and convenience without relying on grid power.
Q5. Is it possible to use a solar greenhouse for a small business?
Absolutely!
Solar greenhouses are ideal for small-scale commercial growing because they:
Enable year-round production of herbs, greens, and specialty crops, increasing your market opportunities
Reduce energy costs by harnessing the sun’s free energy, improving your bottom line
Support sustainable and eco-friendly branding, which appeals to many customers
Allow you to sell fresh, local produce at farmers markets, restaurants, or through community-supported agriculture (CSA) programs
With the right setup, a solar greenhouse can be a profitable and environmentally responsible business asset.
Recommended Reading
Smart Greenhouse Humidity Control: Tips for Healthy, Happy Plants Crop RH Range Quick Tip Tomatoes 65–75% Avoid rot, keep airflow up Lettuce 50–60% Too much moisture = mildew Cucumbers 70–80% Likes it moist, vent well Herbs 60–70% Lower RH keeps leaves crisp Peppers 60–70% Don’t let it swing too much Strawberries 60–75% Watch for mold … Continue reading “Greenhouse Humidity Control”
Greenhouse Watering System Parts
Greenhouse Watering System Parts Main Components of an Efficient Greenhouse Watering System An efficient greenhouse watering system consists of several key components that ensure uniform, reliable, and resource-conscious irrigation. The main components are: Water Supply: The primary source of water can be a municipal supply, a well, or a storage tank. An intermediate storage … Continue reading “Greenhouse Watering System Parts”
Greenhouse Watering System Smart Greenhouse Watering Solutions That Actually Work System Best For Pros Cons Drip Beds, rows, containers Precise, water-saving Needs setup, can clog Capillary Mats Seedlings, small pots Even moisture, no wet leaves Not for big plants, clean often Soaker Hose Rows, garden beds Easy to use, covers a lot Not super precise, … Continue reading “Greenhouse Watering System”
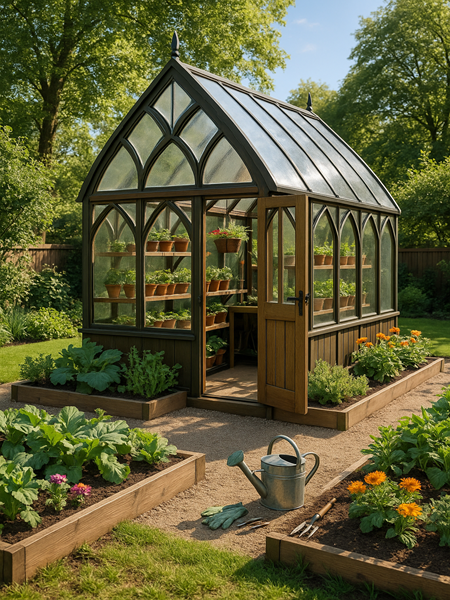
Best Victorian Greenhouses for Your Backyard
Introduction Best Victorian Greenhouses for Your Backyard. Victorian greenhouses are renowned for their timeless beauty and unmatched charm. These structures, popular during the Victorian era, continue to captivate gardening enthusiasts with their intricate designs and elegant features. If you’re considering adding a greenhouse to your backyard, a Victorian-style structure could be the perfect choice. In … Continue reading “Best Victorian Greenhouses for Your Backyard”
Sawtooth Greenhouse
Sawtooth Greenhouse 
Why Sawtooth Greenhouses Are a Game-Changer for Growers
| Greenhouse Type | Ventilation | Energy Use | Best For | Expandability |
| Sawtooth | Excellent (natural) | Very low | Hot climates, commercial growing | Easy |
| Gable | Moderate | Medium | Mild zones, small-scale farms | Moderate |
| Hoop/Tunnel | Fair | Higher | Budget setups, quick builds | Limited |
| Dome | Moderate | High | Niche use, visual appeal | Hard |
What Is a Sawtooth Greenhouse?
- Definition: A sawtooth greenhouse gets its name from the sharp, jagged shape of its roof—like the teeth of a saw. This design isn’t just for looks. Those vertical roof segments actually work to move hot air out and pull cool air in, giving you a natural ventilation system that’s way more efficient than traditional setups.
- Comparison: You’ll find this type of greenhouse really stands out compared to others like the gable, hoop, or dome styles. Thanks to its shape and ventilation capabilities, it gives you better control over the internal climate with less effort and fewer tools.
What Makes the Design So Effective
- Natural ventilation: As hot air rises, it escapes through the vertical sections of the roof while cooler air comes in from the sides. This keeps the interior cool and comfortable without using expensive mechanical fans.
- Durability: The frame is usually made of galvanized steel, which means it’s built to last and can handle tough weather.
- Light penetration: The transparent cladding—typically polyethylene film, glass, or polycarbonate—lets in plenty of sunlight, which is crucial for healthy plant growth.
- Rainwater collection: The roof design also makes rainwater harvesting easy. That water can then be stored and used to irrigate your crops.
- Customization: Whether you need a small space or a massive multi-bay greenhouse, sawtooth structures can be built to match your exact needs. Orientation is also key—ideally, the roof should face the wind to make the most of natural airflow.
Why Growers Love the Sawtooth Setup
- Climate control: Since the design promotes natural airflow, the internal climate stays relatively stable without relying on heaters or air conditioning. This means your plants are less likely to suffer from temperature swings.
- Energy savings: You’ll save on energy bills because you won’t be running mechanical systems all day long.
- Better growth: Because airflow and light are evenly distributed, your plants will have a consistent environment to thrive in, leading to better yields and healthier produce.
- Fewer pests and diseases: Proper ventilation helps control humidity levels, which can otherwise cause diseases and attract unwanted bugs.
- Scalability: Their modular design means you can add on more space without starting from scratch.
Where They Work Best
- Climate suitability: Sawtooth greenhouses are versatile, but they really shine in warm, humid regions. Their natural cooling system is perfect for handling temperature spikes and sticky conditions.
Crop compatibility:
- Tomatoes, peppers, and cucumbers
- Leafy greens and herbs
- Flowers and ornamentals
- Tech-ready: If you’re into hydroponics or aquaponics, the climate control in these greenhouses can help keep everything running smoothly.
- Educational use: Because of the visibility and environmental consistency, sawtooth greenhouses are also great for research and educational purposes.
Getting It Set Up the Right Way
- Orientation: You want the open part of the roof facing the prevailing wind to make the most of natural airflow. A north-south alignment ensures that light gets evenly spread out during the day.
- Foundation: A solid foundation—like concrete—is recommended, especially if you’re dealing with heavy winds or rain. The roof slope and drainage should be adjusted to your local weather too.
- Irrigation setup: If you’re going to install a drip or misting system, it’s best to do it during the build.
Common issues to avoid:
- Improper vent positioning can reduce natural ventilation
- Leaks or drafts caused by poorly sealed joints
Pro tip: Working with experienced greenhouse builders helps ensure your setup is solid from day one.
Keeping It in Top Shape
- Routine checks: Each week or so, take a walk through and check for debris on the vents, loose bolts, or anything that might block airflow. Cleaning the roof panels regularly will keep sunlight coming in strong.
Seasonal care:
- Recheck waterproofing before the rainy season
- Clear out rainwater tanks
- Make sure auto systems like vents or fans are working properly
- Longevity: If you keep up with maintenance, your greenhouse could last anywhere from 15 to 25 years, depending on the materials you’ve used.
How It Stacks Up Against Other Greenhouses
- Gable greenhouses: Sawtooth models offer better ventilation, though both perform similarly when it comes to lighting.
- Hoop greenhouses: Hoop structures might cost less upfront, but don’t last as long and offer limited control over the internal environment.
- Dome greenhouses: Domes are nice to look at, but sawtooth greenhouses are more practical for serious growing, especially when space and efficiency matter.
Should You Go With a Sawtooth Greenhouse?
- Climate factor: If you live in a warm or humid area, this setup will naturally handle your airflow and cooling needs.
- Crops and goals: For temperature-sensitive crops or year-round production, the sawtooth design delivers consistent performance.
- Budget: While the initial investment might be higher, you’ll save on energy and maintenance in the long run.
- Room to grow: Planning to expand? This design lets you add more space easily without major renovations.
Conclusion
Sawtooth greenhouses offer a smart, efficient, and scalable solution for today’s growers. They’re built for performance, designed to save you money, and perfect for producing healthy, high-quality crops. Whether you’re growing veggies, flowers, or experimenting with new tech like hydroponics, this structure gives you the tools to succeed. It’s not just a greenhouse—it’s a long-term solution for better farming.
🔑 Key Takeaway
Sawtooth greenhouses offer excellent natural ventilation, lower energy costs, and ideal growing conditions—making them a favorite among serious growers.
Frequently Asked Questions (FAQs): Sawtooth Greenhouses
Can I add automation systems to a sawtooth greenhouse?
Absolutely.
Many growers choose to install automation systems in sawtooth greenhouses to make growing easier and more efficient.
- Automated vents help regulate temperature by opening and closing as needed.
- Climate sensors can monitor humidity, temperature, and light, giving you real-time data to optimize conditions.
- Automated irrigation systems deliver the perfect amount of water to your plants—no manual work required.
Is it okay to build one in snowy areas?
Yes, but you’ll need to make a few adjustments.
Sawtooth greenhouses can be built in snowy regions, but it’s important to:
- Adjust the roof pitch to a steeper angle so snow slides off more easily and doesn’t accumulate.
- Reinforce the frame to handle the extra weight from heavy snow. Stronger materials or additional supports may be needed.
- Regular maintenance is helpful to remove excess snow during major storms, ensuring your structure stays safe and sound.
Can I set up a sawtooth greenhouse on a rooftop?
Generally, sawtooth greenhouses aren’t the best fit for rooftops.
- Their larger size and heavier structure can be too much for most rooftop spaces.
- Rooftops are more exposed to wind, that can be a challenge for the sawtooth design.
- Better alternatives: Smaller greenhouse types, like lean-tos or compact freestanding models, are usually a better choice for rooftop gardening.
What does it typically cost per square foot?
Commercial sawtooth greenhouses usually cost between $15 and $35 per square foot.
The price depends on:
- Materials: Polyethylene is more affordable, while glass or polycarbonate is more expensive.
- Design: The complexity of the greenhouse, including automation and climate control, can increase the cost.
- Size: Larger builds may benefit from bulk savings, but custom features can add to the price.
Do I need heating in the winter months?
It depends on your climate.
- Mild climates: You may not need additional heating, especially if your greenhouse is well-insulated and uses passive solar design.
- Colder climates: Some heating is usually necessary to keep plants healthy and growing during winter. Options include electric, gas, or solar heating systems.
- Extra insulation and thermal mass (like water barrels) can help reduce heating needs, but may not eliminate them in very cold areas.
Recommended Reading
Smart Greenhouse Humidity Control: Tips for Healthy, Happy Plants Crop RH Range Quick Tip Tomatoes 65–75% Avoid rot, keep airflow up Lettuce 50–60% Too much moisture = mildew Cucumbers 70–80% Likes it moist, vent well Herbs 60–70% Lower RH keeps leaves crisp Peppers 60–70% Don’t let it swing too much Strawberries 60–75% Watch for mold … Continue reading “Greenhouse Humidity Control”
Greenhouse Watering System Parts
Greenhouse Watering System Parts Main Components of an Efficient Greenhouse Watering System An efficient greenhouse watering system consists of several key components that ensure uniform, reliable, and resource-conscious irrigation. The main components are: Water Supply: The primary source of water can be a municipal supply, a well, or a storage tank. An intermediate storage … Continue reading “Greenhouse Watering System Parts”
Greenhouse Watering System Smart Greenhouse Watering Solutions That Actually Work System Best For Pros Cons Drip Beds, rows, containers Precise, water-saving Needs setup, can clog Capillary Mats Seedlings, small pots Even moisture, no wet leaves Not for big plants, clean often Soaker Hose Rows, garden beds Easy to use, covers a lot Not super precise, … Continue reading “Greenhouse Watering System”
Best Victorian Greenhouses for Your Backyard
Introduction Best Victorian Greenhouses for Your Backyard. Victorian greenhouses are renowned for their timeless beauty and unmatched charm. These structures, popular during the Victorian era, continue to captivate gardening enthusiasts with their intricate designs and elegant features. If you’re considering adding a greenhouse to your backyard, a Victorian-style structure could be the perfect choice. In … Continue reading “Best Victorian Greenhouses for Your Backyard”
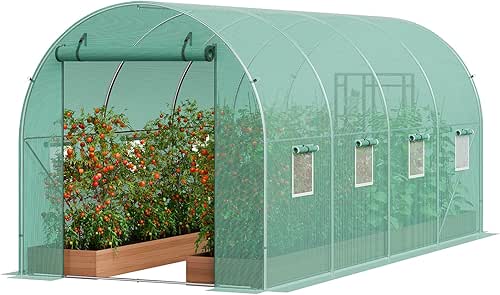
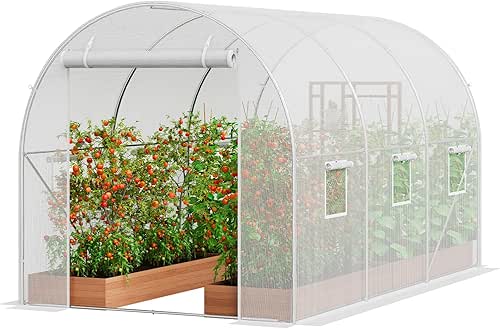
Hoop House Greenhouse
Hoop House Greenhouse 
Hoop House Greenhouses: The Budget-Friendly Way to Grow More Year-Round
| Type | Cost | Setup Difficulty | Best For | Insulation |
| Hoop House | Low | Easy | Budget growers, beginners | Moderate |
| Glass Greenhouse | High | Hard | Serious year-round gardening | Excellent |
| Polytunnel | Medium | Moderate | Medium-scale growers | Good |
| Cold Frame | Very Low | Very Easy | Seed starting, tiny gardens | Low |
What’s a Hoop House Greenhouse, Anyway?
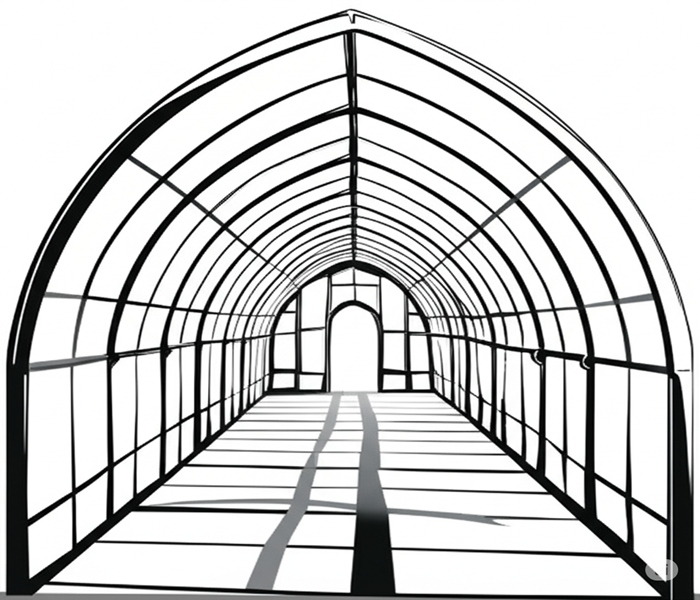
A hoop house greenhouse—also called a high tunnel—is basically a series of bent pipes covered with plastic sheeting. It looks like a giant tunnel and works by trapping heat and moisture inside to create a cozy environment for your plants.
Unlike more complex greenhouses with foundations, heaters, and glass panels, hoop houses are lightweight, easy to build, and much more affordable. You can put one together with materials like PVC or metal pipes, cover it with greenhouse plastic, and be ready to grow in no time.
Why People Love Hoop Houses
- Affordable and accessible: You can build a decent-sized one without spending a fortune. Most of the materials are readily available, and you don’t need professional help to put it all together.
- Extended growing seasons: You can start planting weeks earlier in the spring and keep growing long after summer ends. The structure keeps frost at bay and holds in heat, giving your plants a head start—and a longer life.
- Customizable and expandable: Whether you have a small backyard or more space, you can adjust the size to fit your needs. Since they’re not permanent, you can expand, move, or remove them whenever you like.
- Improved crop health and yield: The steady environment reduces stress and helps them flourish. That means stronger plants, better harvests, and more food on your table.
- Simple ventilation and pest control: Many hoop houses have roll-up sides so you can control the ventilation, and you can use mesh to keep bugs away without relying heavily on chemicals.
How You Can Use a Hoop House
- Grow vegetables year-round: Leafy greens, root veggies, and herbs do great—even in the colder months. Spinach, lettuce, carrots, and beets love the protected environment.
- Start seeds early: You don’t have to wait for the last frost. Get your seeds going early and transplant them when the time is right. This gives your garden a serious jumpstart.
- Protect delicate crops: Crops like tomatoes, peppers, and eggplants do much better in a hoop house. They grow stronger, faster, and with fewer issues.
- Grow seasonal flowers: Flowers like tulips and dahlias thrive inside a hoop house, and you can get blooms earlier than usual.

How to Build a Hoop House (Yes, You Can Do It!)
- Pick a good spot: Choose a sunny location with good drainage. Avoid shade from trees or buildings, and pick a place close to a water source.
Grab your supplies:
- PVC or metal piping
- Polyethylene plastic sheeting
- Wooden boards for the base
- Ground stakes or rebar
- Clamps, zip ties, or brackets
- Optional: Door frames and ventilation panels
Build the frame:
- Insert the piping into the ground at regular intervals—about every four feet.
- Bend the pipes into an arch and secure them using stakes or baseboards.
Add the plastic cover:
- Drape the plastic sheeting over the entire frame.
- Pull it tight and secure it using clamps, sandbags, or battens.
Finish it off:
- Add wooden end walls and a door for easy access.
- Consider installing vents or roll-up sides for better airflow.
Keeping Your Hoop House in Great Shape
- Take care of the plastic: Watch for tears or UV damage. Small holes can be patched with repair tape. Plan to replace the covering every 3 to 5 years.
- Keep it secure: Wind and storms can knock things loose. After rough weather, check your anchors and make sure everything’s tight.
- Watch the climate inside: A thermometer and hygrometer help you monitor heat and humidity. Roll up the sides when it’s hot and close them when it’s chilly.
- Rotate crops and refresh the soil: Avoid soil depletion and plant diseases by rotating crops and mixing in compost or organic matter.
Possible Challenges (and How to Handle Them)
- Wind can be a pain: Use ground anchors or drive rebar deep into the soil. Cross-bracing helps add stability and reduce swaying.
- Snow load is no joke: If you’re in a snowy area, go with a peaked or gothic-style hoop house so snow slides off easily. Brush off heavy accumulation to avoid collapse.
- Hot temps inside: Open the sides or use shade cloth during hot spells. Good airflow keeps plants from overheating.
- Wear and tear happens: UV-resistant plastic lasts longer. Avoid letting the plastic rub against sharp edges to prevent early damage.
How a Hoop House Stacks Up Against Other Greenhouses
Compared to glass greenhouses or even polytunnels, hoop houses are way more affordable and easier to build. Cold frames are cheaper but much smaller and less effective for serious gardening. Glass greenhouses offer top-tier insulation, but they cost a lot and take more effort to set up.
Hoop houses hit the sweet spot—they’re practical, budget-friendly, and incredibly versatile.
Here are a few Options for you to enjoy
Greenhouse A:
Walk-in Tunnel Greenhouse, 14.6×6.4×6.3 ft Hoop House Greenhouse Tunnel, Plant Hot House with Galvanized Steel Frame, Green PE Cover, Roll-up Zipper Door and 8 Windows for Outdoor
- Upgraded Heavy-Duty Galvanized Frame: The load-bearing poles of this tunnel greenhouse use reinforced galvanized pipes (Diameter: 1″, Wall Thickness: 0.02″), enhancing overall strength and stability. Reinforced door poles, added diagonal bars, U-shaped stakes, and tie-downs increase stability and protect your plants from harsh weather conditions.
- Thick High-Density PE Cover: This high tunnel greenhouse features a high-quality 140g/m² PE plastic cover that is waterproof, sun-resistant, and insulating, promoting healthy plant growth. The double-stitched seams and reinforced window seams effectively prevent tearing. The extended PE cover edges can be weighted down or buried in soil to enhance insulation, airtightness, humidity, and temperature control.
- Spacious Walk-In Design: With a spacious 14.60×6.36×6.30 ft area, this walk-in greenhouse tunnel is ideal for growing a variety of plants. You can easily access and maintain your plants, or set up multiple plant shelves to meet both home gardening and commercial planting needs.
- Efficient Ventilation Design: This hoop house greenhouse is equipped with 8 windows and a large zipper door for improved airflow. The velcro and mesh net design helps keep small creatures out while maintaining ventilation, ensuring a healthy growing environment for your plants.
- Versatile Use for Multiple Settings: Suitable for home gardens, farms, and small commercial uses, this green house provides an ideal growing environment for various plants. It effectively extends the planting season, allowing you to enjoy gardening throughout the year.
Greenhouse B:
Walk-in Tunnel Greenhouse, 9.6×6.4×6.2 ft Hoop House Greenhouse Tunnel, Plant Hot House with Galvanized Steel Frame, White PE Cover, Roll-up Zipper Door and 6 Windows for Outdoor
- Upgraded Heavy-Duty Galvanized Frame: The load-bearing poles of this tunnel greenhouse are constructed with reinforced galvanized pipes (Diameter: 1″, Wall Thickness: 0.02″), enhancing overall strength and stability. Reinforced door poles, added diagonal bars, U-shaped stakes, and tie-downs increase stability and protect your plants from harsh weather conditions.
- Thick High-Density PE Cover: Featuring a 140g/m² PE cover that is waterproof, sun-resistant, and insulating. Double-stitched seams and reinforced window seams prevent tearing. The extended cover edges can be weighted down or buried for improved insulation and sealing in this high tunnel greenhouse.
- Spacious Walk-In Design: With a roomy 9.58×6.43×6.23 ft space, this walk-in greenhouse tunnel accommodates a variety of plants. Easily access and maintain your plants, or set up multiple plant shelves to meet both home gardening and commercial planting needs.
- Efficient Ventilation Design: This hoop house greenhouse is equipped with 6 windows and a large zipper door to ensure airflow. The velcro and mesh net design helps keep small creatures out.
- Versatile Use for Multiple Settings: Ideal for home gardens, farms, and small commercial uses, this green house extends your growing season and lets you enjoy gardening year-round.
Greenhouse C:
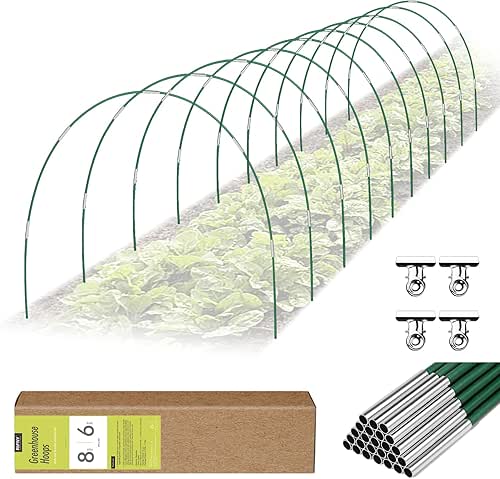
Garden Hoops for Raised Beds, RIFNY Greenhouse Hoops Kit DIY 10 Sets of 8 FT or Long Garden Grow Tunnel,Rust-Free Fiberglass Garden Support Hoops for Row Cover, Plant Cover and Garden Netting
- 60pcs Greenhouse Hoops for Raised Beds: 8ft Plant frame widely used outdoors, great for the yard, vegetable garden, and garden raised beds.RIFNY garden row cover hoops helped to provide the protection your garden needed, improving the quality of your harvests big time! Spring Summer and Fall – Garden hoops with garden netting or sun screen can protect plants from insects, animals and UV rays. Winter – Greenhouse hoops with plant cover can protect your plants from frostbite
- Greenhouse Grow Tunnel DIY Kit: With 60 PCS Rust-Free fiberglass rods, 43.3cm /17 inch length suitable for 2.8 -3.5 FT or wider garden bed or raised beds.60 pcs aluminum connectors and 30 pcs stainless steel clips,Never Rusts,Anti-Oxidation.You can match the size of your garden bed to the size of your garden bed
- Premium & Eco-Friendly Material: Garden hoops made of high-quality fiberglass,Double-layer, inner fiberglass, outer plastic material, which makes it more resilient, can be bent at will and durable. Aluminum connectors and stainless steel clips,all are made of non-rusting, oxidation-resistant materials that can be used over and over again, both in summer and winter, providing the ideal environment for rapid germination and growth of seedlings
- Assemble & Just Bend it: Set up garden hoops is easy,connect the necessary number of rods using the connectors. When you bend the hoops, then connect 3 or more hoops with connector according to your needs,just bend the garden hoops and inserted the other side into the soil, and use the clips to fix your row cover. Garden stakes to DIY different sizes to built garden grow tunnel,mini grow tent, small greenhouse,chicken wire.( Tip:Product came packaged with easy to follow instructions )
- Wide Range of Applications: Garden tunnel hoops are suitable for both and outdoor use, perfect for yards, vegetable gardens, and raised garden beds.Make it suitable for use with garden nets or plant covers to protect plants, fruits, vegetable from frost, insects, birds or intense sun. Greenhouse hoops kit can help extend your plants growing season. Protect your garden all year round
Final Thoughts
If you’re serious about gardening but not ready to splurge on a full greenhouse setup, a hoop house is the perfect middle ground. It gives you more control over your growing environment, boosts your crop yields, and keeps your plants safe from the elements—all while staying easy on your wallet.
Whether you’re growing food for your family or selling at a local market, a hoop house greenhouse makes it easier to grow more, for longer, with less hassle. Build it once, and it’ll pay off season after season.
🔑 Key Takeaway
A hoop house greenhouse is a simple, cost-effective structure that creates a controlled environment for your plants, letting you grow more food for longer without investing in an expensive glass greenhouse.
Frequently Asked Questions (FAQs): Hoop Houses
Q1. How can I keep my hoop house warm without using electricity?
There are several effective, low-tech ways to keep your hoop house warm—even without electricity:
-
- Thermal mass: Place water barrels or large containers filled with water inside the hoop house. These absorb heat from the sun during the day and slowly release it at night, helping to stabilize temperatures and protect plants from overnight chills.
- Compost Heating: Use compost as a natural heat source by creating a “hot bed” inside or beneath your hoop house. As the organic material decomposes, it releases heat that warms both the soil and surrounding air. For smaller setups, dig a shallow pit, fill it with active compost, allow it to heat up, then cover it with soil and plant directly on top for added warmth.
- Internal row covers: Use fabric row covers or frost blankets over your plants for extra insulation, especially on cold nights. This traps more warmth close to your crops.
- Passive solar heating: Take advantage of the sun’s energy by orienting your hoop house for maximum sunlight and using clear plastic to trap heat. Adding insulation (like straw bales or soil mounds along the base) helps retain warmth after sundown.
- DIY solutions: For small spaces, methods like the candle-and-terracotta pot heater can provide a little extra warmth, but always use caution and never leave open flames unattended.
With these techniques, you can successfully extend your growing season and protect your plants from frost—all without plugging anything in.
Q2. What’s a good size for a beginner’s hoop house?
A 10×20 foot hoop house is an ideal starting size for most home gardeners.
-
- Why this size is ideal: It offers plenty of room to grow multiple crops and test out various planting arrangements, yet remains compact enough for easy maintenance and doesn’t require any specialized tools or equipment.
- Flexibility: If you want something even more portable, smaller models (like 8×12 or 12×16 feet) are easier to move and handle, especially if you plan to relocate your hoop house seasonally or as your garden grows.
- Considerations: Larger hoop houses offer more growing space but can be harder to move and require more materials and maintenance. Choose a size that fits your available space, budget, and gardening goals.
Q3. Can I move a hoop house if I need to relocate it?
Absolutely! Most hoop houses are designed to be lightweight and portable.
-
- Small to medium hoop houses: These can often be moved by a few people, either by lifting the frame or sliding it to a new location if your garden layout changes.
- Larger models: For bigger hoop houses, it’s usually necessary to dismantle the structure and reassemble it at the new site. This involves removing the plastic covering, taking apart the frame, and then putting everything back together.
- Tips for moving: Label parts and take photos during disassembly to make reassembly easier. Always prepare and level your new site before moving.
- Why move it? Relocating your hoop house lets you rotate crops, improve soil health, or adapt to changing sunlight and wind patterns on your property.
Q4. Do I need a building permit to set one up?
In most cases, you don’t need a building permit for a hoop house, but always check local regulations first.
-
- Temporary structure: Hoop houses are typically considered temporary agricultural structures and are exempt from permit requirements in many areas.
- Exceptions: Some municipalities may have rules about the size, placement, or use of hoop houses—especially if you’re adding utilities or building on a permanent foundation.
- Best practice: Contact your city or county building office before you start building to confirm the rules in your area. This helps you avoid fines or having to move or modify your structure later.
What type of plastic works best for covering my hoop house?
UV-treated 6-mil polyethylene greenhouse film is the top choice for most hoop houses.
-
- Why it’s best: This plastic is designed to withstand sun exposure, resist tearing, and last three to five years with proper care. It transmits 85–90% of sunlight, creating a bright, warm environment for your plants.
- Features to look for: Make sure the film is UV-stabilized for durability, and consider reinforced or multi-layer options for extra strength in windy or snowy areas.
- Installation tips: Avoid direct contact between the plastic and PVC pipes (use tape or paint as a barrier) to prevent chemical reactions that can degrade the film.
- Alternatives: For permanent or heavy-duty structures, polycarbonate panels or reinforced films offer even longer life, but at a higher cost.
Recommended Reading
Smart Greenhouse Humidity Control: Tips for Healthy, Happy Plants Crop RH Range Quick Tip Tomatoes 65–75% Avoid rot, keep airflow up Lettuce 50–60% Too much moisture = mildew Cucumbers 70–80% Likes it moist, vent well Herbs 60–70% Lower RH keeps leaves crisp Peppers 60–70% Don’t let it swing too much Strawberries 60–75% Watch for mold … Continue reading “Greenhouse Humidity Control”
Greenhouse Watering System Parts
Greenhouse Watering System Parts Main Components of an Efficient Greenhouse Watering System An efficient greenhouse watering system consists of several key components that ensure uniform, reliable, and resource-conscious irrigation. The main components are: Water Supply: The primary source of water can be a municipal supply, a well, or a storage tank. An intermediate storage … Continue reading “Greenhouse Watering System Parts”
Greenhouse Watering System Smart Greenhouse Watering Solutions That Actually Work System Best For Pros Cons Drip Beds, rows, containers Precise, water-saving Needs setup, can clog Capillary Mats Seedlings, small pots Even moisture, no wet leaves Not for big plants, clean often Soaker Hose Rows, garden beds Easy to use, covers a lot Not super precise, … Continue reading “Greenhouse Watering System”
Best Victorian Greenhouses for Your Backyard
Introduction Best Victorian Greenhouses for Your Backyard. Victorian greenhouses are renowned for their timeless beauty and unmatched charm. These structures, popular during the Victorian era, continue to captivate gardening enthusiasts with their intricate designs and elegant features. If you’re considering adding a greenhouse to your backyard, a Victorian-style structure could be the perfect choice. In … Continue reading “Best Victorian Greenhouses for Your Backyard”
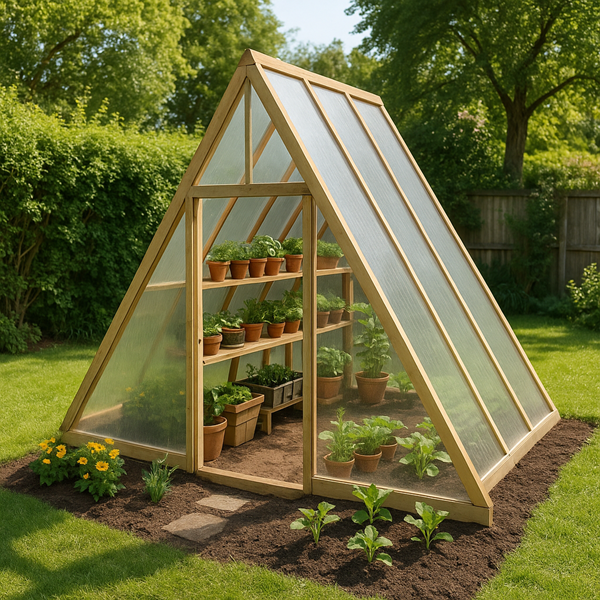
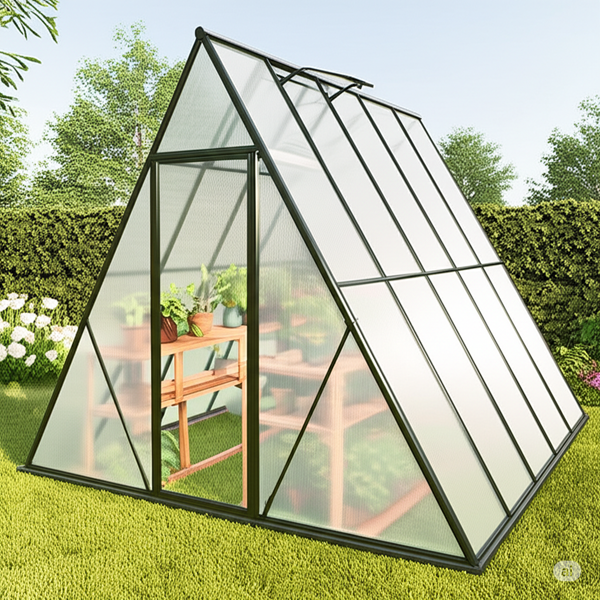
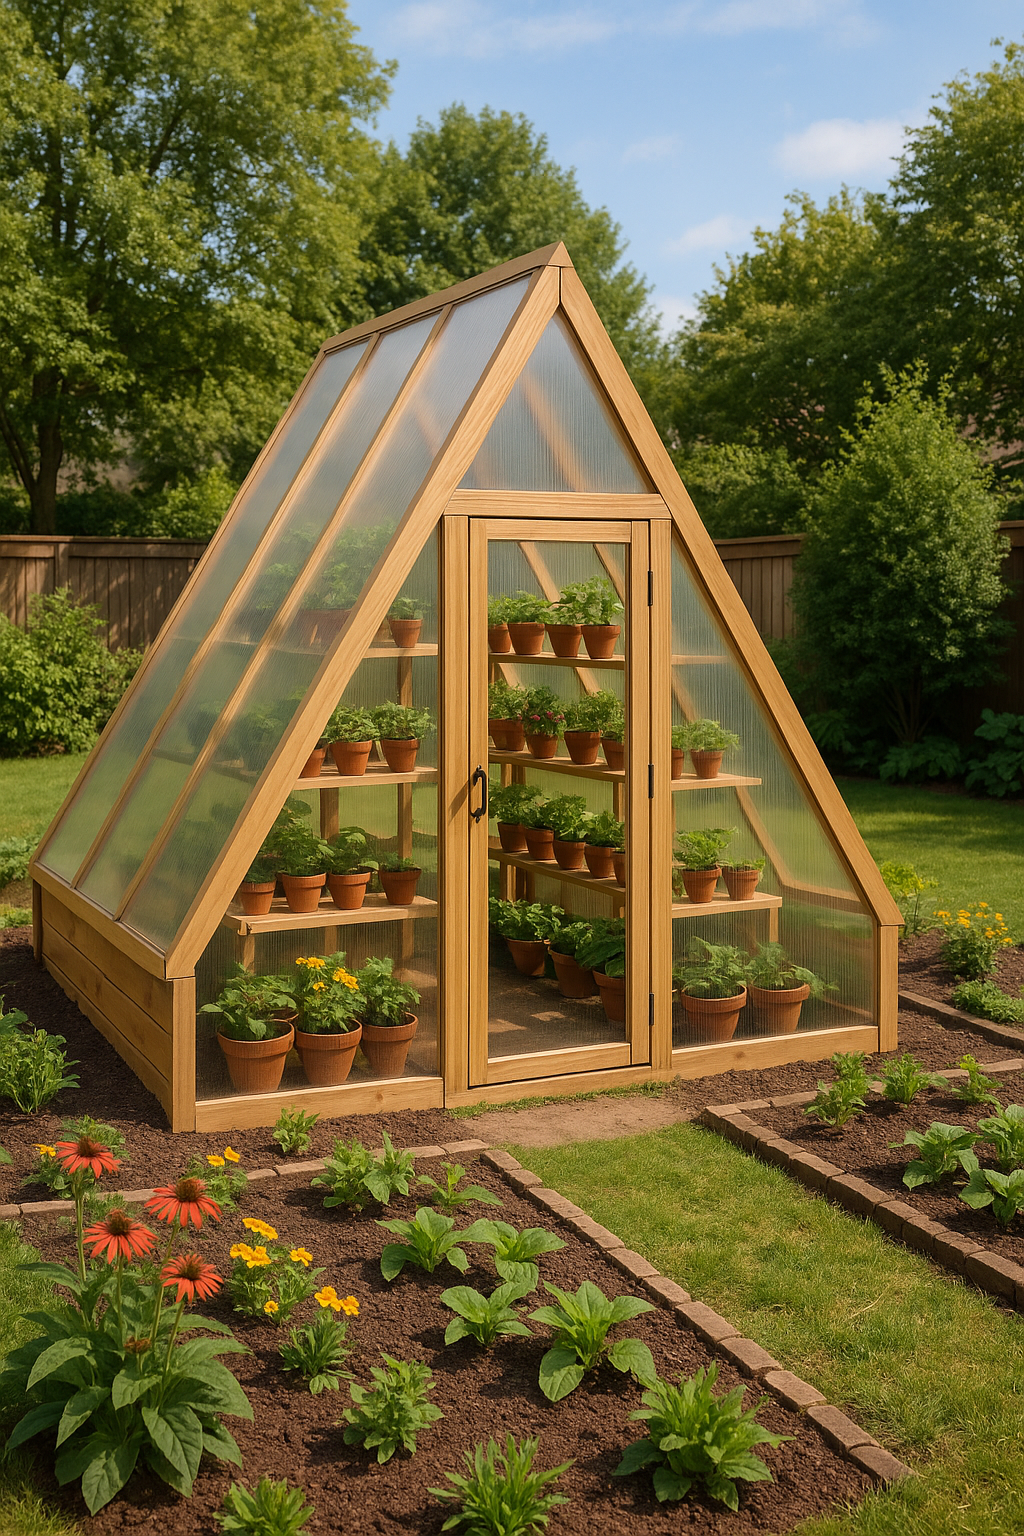
A-Frame Greenhouse
A-Frame Greenhouse 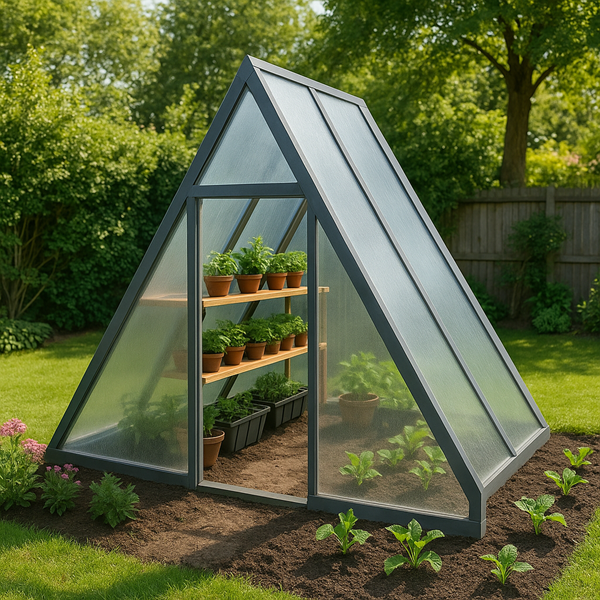
Why an A-Frame Greenhouse Is the DIY Garden Upgrade You’ve Been Waiting For
| Material | Pros | Cons | Cost |
| Wood | Easy, cheap | Needs treatment | Low |
| PVC | Light, rust-free | Not for high winds | Very Low |
| Metal | Strong, durable | Heavier, pricier | Medium |
| Plastic Sheet | Cheap, flexible | Short lifespan | Very Low |
| Polycarbonate | Insulates well | Expensive | High |
| Old Windows | Eco-friendly, cool look | Heavy, uneven sizes | Free–Med |
So, What Exactly Is an A-Frame Greenhouse?
- Design: Picture two slanted sides coming together at the top to form an “A.” That’s your basic A-frame. It’s a simple but sturdy structure covered in clear panels or plastic sheeting to let sunlight in and trap warmth inside.
- Function: Thanks to the steep pitch of the roof, snow and rain just slide right off—no collapsing under pressure here. Unlike other styles like hoop houses or lean-tos, the A-frame stands tall and strong on its own. It doesn’t need a building to lean on, and its symmetry makes it easy to scale depending on your available space.
Why Gardeners Love the A-Frame Greenhouse
- Budget-friendly: You don’t need fancy materials or complicated tools to build one. A few boards, some screws, and clear covering materials are often all it takes.
- Great use of space: The tall center section gives taller plants room to stretch, while the sloped sides are perfect for shelving or hanging baskets.
- Weather resistant: If you live in a rainy or snowy area, the angled roof ensures water and snow won’t sit on top of it.
- Portable: Easy to take apart and move, especially if you’re renting or want something seasonal.
- Customizable: You can add solar panels, use reclaimed materials, or build rainwater collection systems—the possibilities are endless.
Things to Think About Before You Start Building
- Sunlight: Choose a spot with at least six to eight hours of sun daily. Positioning it east to west maximizes daylight.
- Ground conditions: Avoid low areas that flood easily. You want level ground with good drainage.
- Climate: If you get a lot of wind, use sturdy materials and secure the greenhouse with anchors.
- Building codes: Always check local rules to make sure your greenhouse meets any zoning or HOA requirements.
What You’ll Need to Build an A-Frame Greenhouse
- Frame materials: Pressure-treated wood, metal pipes, or PVC are common choices.
- Covering materials: Polycarbonate panels, plastic sheeting, or repurposed windows that let in lots of light.
- Foundation options: Gravel, concrete blocks, or wooden beams to keep things stable and well-drained.
- Fasteners: Rust-resistant screws or nails to hold everything in place.
- Extras: Doors, vents, and shelving to customize your space. You can also add irrigation or thermal mass like water barrels for better heat control.
How to Build Your Own A-Frame Greenhouse
- Sketch your design: Choose dimensions based on your space and plant needs. A common size is 8 feet by 10 feet.
- Prepare the base: Lay and level your foundation. Use wood or concrete blocks and make sure it’s stable.
- Assemble the frame: Cut matching triangle shapes for the sides and connect them with top and bottom beams.
- Add the covering: Attach your chosen material tightly, sealing it well to keep out wind and water.
- Install doors and vents: A hinged door works great, and ventilation helps regulate temperature and humidity.
- Reinforce the structure: Inspect for weak spots, seal any gaps, and anchor everything securely—especially in windy areas.
Keeping Your Greenhouse in Tip-Top Shape
- Clean panels regularly: Wipe them down every season to keep them clear and let sunlight shine through.
- Inspect for damage: After storms or season changes, check for cracks or loose joints.
- Control pests and humidity: Use sticky traps and open vents often to keep air flowing and mold at bay.
- Tighten fasteners: Over time, screws and joints can loosen. Tighten them as needed to maintain stability.
What Grows Best in an A-Frame Greenhouse?
- Cool-weather crops: Spinach, lettuce, kale, and broccoli thrive in early spring or fall.
- Warm-season favorites: Tomatoes, peppers, eggplants, and basil do well in warmer months.
- Herbs and seedlings: Mint, thyme, and oregano grow great in containers. You can also start seeds early before moving them outdoors.
- Bonus: Raised beds and hanging baskets are easy to set up inside this structure, maximizing your growing space.
How Much Does It Cost? Let’s Talk Budget
- DIY approach: You can build one for $300–$600 using repurposed or budget-friendly materials.
- Kit option: If you prefer buying a kit, expect to spend at least $800 or more depending on size and features.
Ways to save:
- Use salvaged or reclaimed materials like old windows or leftover wood.
- Shop locally for affordable supplies.
- Team up with neighbors for bulk purchases.
Fun Ways to Customize Your Greenhouse
- Add solar panels: Use them to power fans or lights inside your greenhouse.
- Collect rainwater: Install a gutter system that funnels water into barrels for irrigation.
- Get creative with materials: Use vintage windows, painted frames, or old barn wood for a custom look.
- Build a vertical wall garden: Great for herbs or leafy greens, and it saves floor space.
Now that we have a clear understanding of the factors to consider, let’s explore some top recommendations for cold frame greenhouses that meet these criteria.
Greenhouse No 1:
6 x 14 FT Greenhouses for Outdoors, Heavy Duty Polycarbonate Greenhouse, Lockable Greenhouse Kit with Upgraded Aluminum Frame and Adjustable Roof Vent, Winter Hot Green House for Outside
- Quick and Easy Assembly: This polycarbonate greenhouse kit features a simplified installation with a user-friendly setup system, making assembly 40% faster. With an upgraded lock that installs easily and enhances stability, this greenhouse for outdoors is ready to support your gardening needs without hassle. Please make sure to install the REINFORCEMENT BAR according to the instructions provided in the manual.
- Superior Durability with Upgraded Aluminum Frame: Engineered with high-quality aluminum parts, this green house for winter is built to withstand the elements. Its reinforced, weather-resistant frame offers year-round durability, ensuring a reliable outdoor gardening environment for all seasons.
- UV-Blocking Polycarbonate Panels for Healthier Plants: Our greenhouse is equipped with UV-protected polycarbonate panels, providing a safe haven for plants by filtering harmful rays while maximizing beneficial sunlight. This setup fosters vibrant growth, perfect for green houses for outside use.
- Optimal Ventilation & Secure Access: Designed with an adjustable roof vent and a lockable door, this greenhouse kit ensures controlled ventilation for balanced airflow. Enjoy peace of mind with enhanced security, making this large greenhouse a safe and stable home for your plants.
- Spacious Multi-Use Gardening Hub: Ideal for both novice and expert gardeners, this green house provides ample space for plant cultivation. Whether used for growing vegetables, herbs, or flowers, it transforms easily into a versatile gardening area, offering room for all your planting aspirations.
- Best Used With Partial Wind Protection: Designed for areas with natural windbreaks (e.g., fences, walls, or shrubs). Not for Fully Exposed Locations – Avoid open, unsheltered spaces with strong winds. Even sturdy structures may be damaged in extreme conditions.
Greenhouse No 2:
Polycarbonate Greenhouse Kit,12x6x6 FT Outsides Aluminum Frame Heavy Duty Green House with Transparent Panels Windows Door for Backyard Garden, Outdoor Walk in Plant Greenhouses,Black Frame
- PREMIUM POLYETHYLENE GREENHOUSE– Made of high-density polyethylene material, waterproof and UV-resistant, durable and suitable for long-term outdoor use
- TRANSPARENT PANELS, PLENTY OF LIGHT– Transparent panel design ensures that plants get plenty of sunlight and promotes healthy growth
- STABLE STRUCTURE, WIND AND RAIN RESISTANT – Reinforced aluminum frame plus anti-rust coating,providing extra mounted ground screws, withstand snow 400 lbs and wind resistant to 50 MHP. Build in draining system for rainny days. Adaptable to various weather conditions
- 2 VENTS AND SWING DOOR– For the 12×6 FT greenhouse, it has 2 windows. All have 5 adjustable level for air flow. The dimension for swing door is 5.4×1.9 FT
- CONVENIENT INSTALLATION & MAINTENANCE-Modularized design, comes with detailed instructions and related video for reference, quick installation, easy to clean and maintain
- MULTI SIZE OPTIONS– We have 8x6X6 FT , 10X6X6 FT, 12X6X6 FT, 12X10X10 FT, 16X10X10 FT for you to choose by your needs
- MULTIFUNCTIONAL APPLICATION SCENARIO- Spacious room,suitable for a variety of home gardening, such as flowers /vegetables/ fruits/herbs/seedlings Growth.Or a nice outdoor place for relaxing with family in cold weather
Wrapping It All Up
An A-frame greenhouse is a smart, affordable way to garden year-round. Whether you’re growing veggies or starting flower seedlings, it makes gardening easy and fun. With some effort and creativity, your backyard can become a green oasis all year long.
🔑 Key Takeaway
A-frame greenhouses are practical, affordable, and super DIY-friendly. They’re built to handle rough weather and let you grow plants year‑round—even in a small backyard.
Frequently Asked Questions (FAQs): A-Frame Greenhouses
How do I heat an A-frame greenhouse in winter?
You have several effective options for keeping your A-frame greenhouse warm during cold months:
-
Thermal mass: Place water barrels or other heat-retaining materials inside to absorb warmth during the day and release it at night.
-
Electric space heaters: These can provide direct, adjustable heat when needed. Be sure to monitor temperature and moisture to avoid overheating or excess humidity.
-
Passive solar setups: Maximize sunlight exposure with proper orientation and glazing. Insulate with bubble wrap or double-layer panels to retain heat.
-
Compost heat: Position an active compost pile inside or near the greenhouse to take advantage of the natural warmth generated as materials decompose.
-
Seal gaps: Use caulk or weather-stripping to prevent drafts and heat loss.
Regularly check temperature and humidity to maintain a healthy environment for your plants.
Can I grow citrus or tropical plants in an A-frame greenhouse?
Yes, but extra care is needed.
-
Heating: Citrus and tropical plants require warmer conditions, especially in winter. Aim to keep nighttime temperatures above 50°F for best results.
-
Humidity: These plants thrive with higher humidity, so consider using a good humidifier or misting system if your air is dry.
-
Containers: Small citrus trees do well in pots, making it easier to move them as needed.
-
Fertilization: Regular feeding and occasional iron supplements help keep leaves green and healthy.
-
Seasonal care: Move citrus trees outdoors in summer if possible, and bring them back inside before nighttime temperatures drop.
With the proper setup, you can enjoy fresh citrus and even tropical harvests year-round.
How do I make my greenhouse more energy-efficient?
Focus on insulation, heat retention, and sealing air leaks:
-
Insulate: Use horticultural bubble wrap or twin-wall polycarbonate panels to trap heat and reduce energy loss.
-
Thermal mass: Add water barrels or stone to store heat during the day and release it at night.
-
Seal leaks: Check for and seal any cracks, gaps, or holes around doors, vents, and glazing to prevent drafts.
-
Solar panels: Install solar panels to power fans, lights, or small heaters for a sustainable boost in efficiency.
-
Design: Consider a tight structure with insulated base walls and optimal orientation for sun exposure.
These steps can lower your heating costs and help maintain stable conditions for your plants.
What’s the best door type for a greenhouse?
Lightweight hinged doors are a popular choice.
-
Easy to build: Simple framing and hardware make them a straightforward DIY project.
-
Good insulation: Hinged doors can be sealed tightly to keep heat in and cold out.
-
Accessibility: Easy to open and close, they can be built to fit openings of any size.
-
Other options: Sliding doors save space, while drop doors are useful for greenhouses built on a stem wall.
Choose a door that fits your greenhouse style and climate needs, but always ensure it closes snugly.
Can I use an A-frame greenhouse for hydroponics?
Absolutely.
-
Space: Make sure your A-frame greenhouse has enough room for your hydroponic system, whether vertical or horizontal.
-
Ventilation: Proper airflow is essential to control humidity and prevent mold or disease. Use vents or fans as needed.
-
Light: Position your system to maximize sunlight, or supplement with grow lights if necessary.
-
Flexibility: A-frame greenhouses can accommodate a range of hydroponic setups, from nutrient film technique (NFT) to vertical towers.
With the right planning, an A-frame greenhouse can be a highly productive space for hydroponic gardening.
Gothic Arch Greenhouse
Gothic Arch Greenhouse 
Why Gothic Arch Greenhouses Are a Game-Changer for Year-Round Growing
| Greenhouse Style | What It’s Good At | Where It Falls Short |
| Gothic Arch | Great for snow and wind, lots of headroom, stylish look | Costs a bit more upfront |
| Quonset | Budget-friendly, easy to build | Snow can pile up, less wall space |
| A-Frame | Simple design, good for small spaces | Sloped sides limit growing room |
| Gable Roof | Classic look, good ventilation | Not as wind-resistant, pricier |
What’s a Gothic Arch Greenhouse Anyway?
- Design: A Gothic arch greenhouse features a sleek, pointed roof that’s as functional as it is attractive. The sharp curve allows snow and rain to slide off easily, keeping the structure safe and dry.
- Materials: Most Gothic arch greenhouses are made with galvanized steel frames and covered with either polycarbonate panels or polyethylene film.
- Sizes: They come in a variety of sizes—from compact backyard kits to large commercial models.
- Interior space: The design minimizes internal supports, which means more open space for your plants and equipment.
Why the Gothic Arch Design Just Works
- Efficient water and snow management: The steep roof pitch ensures that rain and snow won’t collect on the top, helping prevent structural damage and moisture buildup.
- Better light distribution: The arch shape captures and spreads sunlight evenly, especially helpful during the darker winter months.
- Built to withstand wind: The aerodynamic design of a Gothic arch makes it highly resistant to strong gusts, making it a great option for windy locations.
- Maximized growing space: Taller sidewalls give you more room for shelves, tall plants, and growing systems compared to A-frames or Quonset models.
- Timeless appearance: These greenhouses add a touch of style and sophistication to any growing space.
Where This Style Shines
- Home gardening: Perfect for growing vegetables, flowers, or tropical plants all year long in your backyard.
- Commercial agriculture: Ideal for larger operations needing dependable, high-performing structures.
- Community and educational gardens: Great for schools, nonprofits, and public gardening programs. They’re user-friendly and adaptable.
- All-climate compatibility: With proper upgrades, they work in both hot and cold climates. Ventilation, insulation, and heating systems can make them thrive anywhere.
Installation and Customization Options to Fit Your Needs
- DIY or pro setup: Many Gothic arch greenhouses come as kits, with pre-cut frames and instructions for easy assembly. If you’re building something larger or more complex, hiring a professional might be the better choice.
- Material choices: Galvanized steel is the go-to for durability. Aluminum and PVC are also available for smaller or budget-friendly builds.
- Cover options: Polycarbonate panels offer strong insulation and longevity. Polyethylene film is more affordable but typically doesn’t last as long.
Customization features:
- Roll-up sides and auto vent systems
- Heating and cooling systems
- Shelving and storage setups
- Grow lights and irrigation systems
Simple Maintenance Goes a Long Way
- Cleaning: Wipe down panels regularly using mild soap and water to keep sunlight flowing freely.
- Inspections: Check fasteners, seals, and support frames each season. Replacing worn-out parts early prevents major damage.
- Humidity control: Proper airflow is essential to stop mold and pests. Use vents or fans, and monitor internal conditions with sensors if needed.
What You’ll Spend (and What You’ll Get in Return)
- Smaller models: Backyard greenhouses usually range from $500 to $3,000 depending on size and materials.
- Mid-size setups: These typically cost between $3,000 and $8,000 and may include upgrades like shelving, vents, or custom covers.
- Commercial units: Large-scale models range from $10,000 to $30,000 or more. They’re built for daily use and long-term performance.
- Return on investment: While not the cheapest upfront, the durability and year-round growing potential make these greenhouses a smart long-term choice.
Gothic Arch vs. Other Greenhouse Styles
- Compared to Quonset styles: Quonset greenhouses are rounder and cheaper but not as effective in snowy areas. Gothic arches shed snow better and offer more side space.
- Compared to A-frames: A-frames are simple but limit growing space near the walls. Gothic arches make better use of vertical room.
- Compared to gable roofs: Gable greenhouses offer solid ventilation but are more expensive and less aerodynamic. Gothic arches strike the best balance between form and function.
Now that we have a clear understanding of the factors to consider, let’s explore some top recommendations for cold frame greenhouses that meet these criteria.
No 1: Gothic Arch Greenhouse

Tunnel Greenhouse Garden Green House with Zippered Door and 2 Roll-up Side Windows, 70.9″x70.9″x78.7″, Clear/Green
- DISTINCTIVE GOTHIC ARCH DESIGN: The portable greenhouse’s unconventional pointed roof and arch shape lend a stylish visually appealing aesthetic and also serves a functional purpose allowing rain and snow to effortlessly slide off, reducing the risk of water accumulation.
- GENEROUS DIMENSIONS: Measuring 70.9×70.9×78.7 inch, this portable green house kit boasts a pointed tunnel design, offering ample space for cultivating a diverse range of plants including vegetables, potatoes, tomatoes, and herbs.
- CONVENIENT ACCESS & VENTILATION: The walk through tunnel greenhouse is equipped with 2 zipper doors located at the front and back, making accessing the greenhouse convenient and hassle-free. Two mesh side windows ensure proper ventilation and airflow, creating an optimal environment for plant growth in your grow tunnel.
- UNIQUE BOTTOM SANDBAGS: This high tunnel greenhouse features sandbag pockets along the bottom sides where sand, soil, rocks, or weight bags can be placed to add weight and improve stability in inclement weather. Additionally, it includes tie down ropes and upgraded ground stakes to further increase stability.
No 2: Gothic Arch Greenhouse
Walk-in Gothic Arch Greenhouse | Portable Outdoor Mini Greenhouse with UV Protection & Ventilation | Easy Assembly for Gardening Enthusiasts
- Elegant Gothic Arch Greenhouse Design: Our walk-in greenhouse features a stylish Gothic Arch design that not only adds an elegant look to your garden but also provides ample internal space. The pointed roof ensures easy runoff of rain and snow, reducing the risk of structural damage and making it a durable outdoor greenhouse solution.
- Enhanced Stability with Sandbags and Guy Ropes: Designed for stability in various weather conditions, this outdoor greenhouse comes with side sandbags that can be filled with sand, soil, or water bottles, and guy ropes for added security. Ensure your greenhouse remains steadfast with the proper tension on the ground stakes.
- Reinforced PE Cover for UV Protection and Sunlight Penetration: Protect your plants from harmful UV rays while allowing 85% of sunlight to pass through with our reinforced 140 gsm PE cover. The hemmed edging and grid reinforcement prevent tearing, extending the life of your greenhouse.
- Easy Access and Superior Ventilation: Tend to your plants with ease through the two zippered front and rear doors, and enjoy optimal air circulation with two side mesh windows. This walk-in greenhouse design promotes a healthy growing environment for your plants.
- Tool-free Assembly and Portable Construction: Assemble your greenhouse without tools thanks to the plastic joints, and the lightweight steel and PE construction makes it portable. Ideal for small green houses for outside or indoor use, setup is quick and easy, whether it’s in your patio, backyard, or any outdoor space.
Conclusion
Gothic arch greenhouses tick all the boxes—strength, style, space, and year-round performance. Whether you’re growing food for your family or managing a larger operation, this greenhouse style has your back. Its smart design not only looks good but works hard to protect your crops and support your gardening goals. With easy upgrades and solid long-term value, it’s no wonder more people are making the switch to Gothic arches.
🔑 Key Takeaway
Gothic arch greenhouses combine style, strength, and smart design, making them a top pick for serious gardeners and growers who want reliability in every season.
Frequently Asked Questions (FAQs): Gothic Arch Greenhouses
Q1. Can I move a Gothic arch greenhouse after it’s been installed?
Yes, you can move a Gothic arch greenhouse, but the process depends on its size.
- Smaller models are usually light enough to be moved with a few people. You may be able to lift or slide the structure to a new spot if the frame is sturdy and the distance isn’t too far.
- Larger greenhouses will likely need to be partially or fully disassembled before relocating. This means removing the covering, taking apart the frame sections, and then reassembling everything at the new site.
- Tip: Take photos during disassembly and label parts to make setup easier in the new location.
Q2. Is it possible to automate temperature and humidity control inside?
Yes, automation is very doable in a Gothic arch greenhouse.
- You can install thermostats to control heaters or fans for precise temperature management.
- Humidity sensors can be connected to misting systems or vents to keep humidity in the right range.
- Automatic vent openers will react to temperature changes, opening or closing roof or side vents as needed.
- These systems help you maintain a stable growing environment with less daily effort.
Q3. How do I secure the greenhouse during storms?
Anchoring your greenhouse is the best way to keep it safe during storms.
- Use rebar stakes, concrete footings, or screw-in ground anchors to firmly attach the frame to the ground.
- For extra stability, add cross-bracing or use sandbags along the base.
- Always check that doors and vents are tightly closed before a storm hits.
- Regularly inspect anchor points and tighten any loose hardware to keep your greenhouse secure all season long.
Q4. What kind of flooring works best inside?
Gravel is a top choice for greenhouse flooring.
- It provides excellent drainage, which helps prevent muddy conditions and discourages weeds.
- Gravel is easy to install and walk on, making it a practical option for most growers.
- Some people also use raised beds for planting or pavers for walkways, depending on their growing style and needs.
- Avoid solid concrete unless you need a permanent, easy-to-clean surface for heavy-duty use.
Q5. Are permits required for Gothic arch greenhouses?
That depends on your local regulations.
- In many areas, smaller Gothic arch greenhouses are considered temporary structures and don’t require a permit.
- If your greenhouse is large, has permanent utilities, or is placed in a visible or protected area, you might need approval.
- Always check with your city or county building office before starting your project to make sure you’re following local rules.
Recommended Reading
Smart Greenhouse Humidity Control: Tips for Healthy, Happy Plants Crop RH Range Quick Tip Tomatoes 65–75% Avoid rot, keep airflow up Lettuce 50–60% Too much moisture = mildew Cucumbers 70–80% Likes it moist, vent well Herbs 60–70% Lower RH keeps leaves crisp Peppers 60–70% Don’t let it swing too much Strawberries 60–75% Watch for mold … Continue reading “Greenhouse Humidity Control”
Greenhouse Watering System Parts
Greenhouse Watering System Parts Main Components of an Efficient Greenhouse Watering System An efficient greenhouse watering system consists of several key components that ensure uniform, reliable, and resource-conscious irrigation. The main components are: Water Supply: The primary source of water can be a municipal supply, a well, or a storage tank. An intermediate storage … Continue reading “Greenhouse Watering System Parts”
Greenhouse Watering System Smart Greenhouse Watering Solutions That Actually Work System Best For Pros Cons Drip Beds, rows, containers Precise, water-saving Needs setup, can clog Capillary Mats Seedlings, small pots Even moisture, no wet leaves Not for big plants, clean often Soaker Hose Rows, garden beds Easy to use, covers a lot Not super precise, … Continue reading “Greenhouse Watering System”
Best Victorian Greenhouses for Your Backyard
Introduction Best Victorian Greenhouses for Your Backyard. Victorian greenhouses are renowned for their timeless beauty and unmatched charm. These structures, popular during the Victorian era, continue to captivate gardening enthusiasts with their intricate designs and elegant features. If you’re considering adding a greenhouse to your backyard, a Victorian-style structure could be the perfect choice. In … Continue reading “Best Victorian Greenhouses for Your Backyard”
Polytunnel Greenhouse
Polytunnel Greenhouse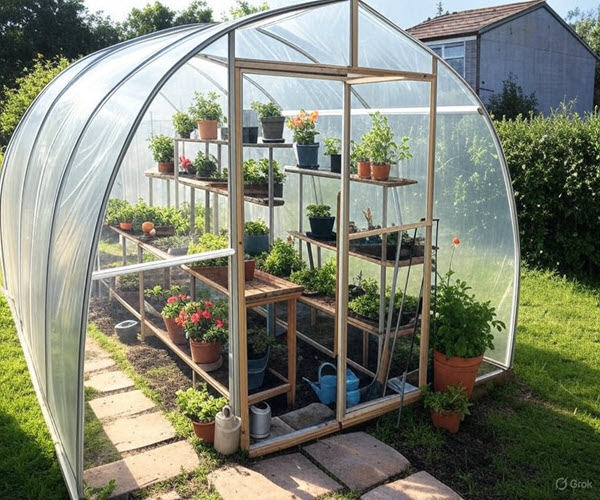
Why a Polytunnel Greenhouse Might Be the Best Garden Upgrade You’ll Ever Make
Polytunnel Greenhouse
| Feature | Polytunnel | Glass Greenhouse |
| Cost | Cheaper | Pricier |
| Setup | Quick and easy | Slower, more effort |
| Flexibility | Easy to move | Fixed in place |
| Weather | Great for wind and rain | Better winter insulation |
| Looks | Basic and practical | Sleek and classic |
| Repairs | Cheap and simple | Costlier to fix |
So, What’s a Polytunnel Greenhouse Anyway?
A Polytunnel Greenhouse—also known as a hoop house—is a curved tunnel structure made with a metal frame and covered in plastic sheeting. Think of it like a greenhouse, but more affordable and flexible. It comes in different sizes to suit all kinds of gardeners, from beginners with small spaces to pros managing full-scale farms.
What makes it so awesome? That curved design traps heat and moisture like a charm, creating a warm little microclimate for your plants. And when you take care of it properly, your polytunnel can stick around for over a decade.
Why We Love Polytunnels
You get a longer growing season: One of the biggest perks of a polytunnel is that it lets you plant earlier in the year and keep harvesting long after your neighbors have called it quits. So those juicy tomatoes and sweet peppers? You can enjoy them way beyond summer.
You control the climate: Weather can be all over the place—hot one day, freezing the next. But inside a polytunnel, it’s steady and cozy. That means no surprise frosts or heatwaves ruining your crops. Plus, your tropical-loving plants will thank you for the extra warmth.
Your plants are shielded from the elements: Rainstorms, wind, frost, hail—you name it. A polytunnel keeps it all out. Your crops stay safe, dry, and growing happily while the weather does whatever it wants outside.
Fewer bugs and diseases: Bugs and pests have a harder time getting into a sealed-up polytunnel. And with more stable humidity and airflow, you’ll deal with fewer plant diseases too. Less spraying, more harvesting!
It’s way more affordable than a glass greenhouse: Glass greenhouses look great, sure—but they come with a hefty price tag. Polytunnels offer similar benefits without draining your bank account, which makes them perfect for gardeners on a budget.
How to Choose the Right Polytunnel for You
Think about size: Before you buy, take a good look at your available space. Small polytunnels are great for tight spots, while larger ones are awesome if you want to grow a ton or walk around inside. Plan ahead for room to move, plant, and ventilate.
Pick the right frame: Steel frames are tough and weather-resistant, while aluminum ones are lightweight and easy to work with. If you live somewhere windy, you might want to go with steel for extra stability.
Get quality plastic sheeting: Go for UV-stabilized polyethylene with at least 150–200 microns of thickness. It’ll last longer and offer better insulation. Some even come with anti-drip coatings to stop annoying condensation.
Don’t skip the vents: Ventilation is key in a polytunnel. Look for options with roll-up sides, zip doors, or roof vents so you can keep the air moving and your plants breathing easy.
Balance cost and durability: Sure, you can save a few bucks up front—but better materials usually mean fewer repairs and a longer lifespan. Read reviews and look for warranties before committing.
Tips for Setting Up Your Polytunnel the Right Way
Pick the perfect spot: Find a sunny, flat area with good drainage. For best results, position your tunnel from east to west so it gets as much daylight as possible throughout the day.
Anchor it down: If you don’t secure your polytunnel, a strong wind might just turn it into a giant kite. Use proper ground anchors or foundations to keep it stable.
Tighten the cover: Pull that plastic tight so it doesn’t flap around in the wind. A loose cover can wear out faster and won’t insulate as well.
Don’t forget airflow: Even in winter, your plants need fresh air. Install roll-up sides or pop the door open during warm days to keep things circulating.
Plan the inside layout: Think about how you’ll move around inside. Create walking paths, raised beds, or shelves if needed. And if you want to make watering a breeze, consider setting up a drip irrigation system.
What Can You Grow in a Polytunnel?
You’ve got tons of options, depending on the season.
In spring and summer, try crops like:
Tomatoes
Cucumbers
Peppers
Zucchini
Strawberries
Basil and other herbs
In autumn and winter, plant things like:
Spinach
Kale
Chard
Lettuce
Carrots
Radishes
You can also grow crops outside their normal seasons. Early strawberries in March? Totally doable. Fresh salad greens in December? Yes, please!
Polytunnel vs. Greenhouse: What’s the Better Option?
Glass greenhouses might be the traditional choice, but they’re not always the best one. Here’s why polytunnels often come out ahead:
Polytunnels are:
Cheaper to build and maintain
Easier and faster to install
More flexible and portable
Simple to repair if damaged
Glass greenhouses do have their advantages, like better insulation in the dead of winter and a fancier look. But for most people, especially those focused on practicality and value, polytunnels are the smarter option.
Avoid These Common Polytunnel Mistakes
Don’t forget ventilation: If you don’t keep the air flowing, you’ll end up with mold, mildew, and unhappy plants. Open those vents regularly!
Stop overcrowding your plants: It’s tempting to squeeze in as much as you can, but give your plants room to breathe. Crowding them increases disease risk and makes harvesting a pain.
Anchor everything: We can’t stress this enough. Secure your frame properly so it doesn’t fly away in bad weather.
Rotate your crops: Planting the same thing in the same spot over and over will drain your soil and invite pests. Switch it up every season to keep things fresh and balanced.
Now that we clearly understand the factors to consider, let’s explore some top recommendations for polytunnel greenhouses that meet these criteria.
Greenhouse No.1
13x8x6.5ft Greenhouses Large Heavy Duty Walk-in Greenhouse Outdoor Tunnel Green House Portable Plant Gardening Upgraded Galvanized Steel Frame Ropes Zipper Doors 5 Crossbars Garden
- WALK-IN TUNNEL GREENHOUSES- 8 screen windows on both sides to increase air circulation, better protect your plants, equipped with drawstrings and ground pegs to effectively fix the outdoor greenhouse, We highly advised you must install the ground pegs or heavy stones to fix the greenhouse
- THICKENED PE FABRIC- 140gPE fabric is used to keep warm and prevent sun damage by blocking UV rays. Protection against the wind and bad weather. We recommend that you do not visit too valuable plants in the shed, or move valuable plants indoors in bad weather, and try to clean up the water and snow on the greenhouse to avoid collapse caused by heavy load
- UPGRADED GALVANIZED FRAME- The greenhouse is made of upgraded and thickened galvanized frame, which has greater support than ordinary powder-coated steel pipes, against the strong wind, rain and snow and other weather, prolong the service life, and better protect your plant
- SPECIALLY DESIGNED DOOR FIXING ROD- The fixed door crossbars are specially designed on both sides of the door to fix the door on the pole, making the zipper door more strong against the wind. The bottom of the greenhouse cloth has an extension design which you must put stones or sandbags to make it more stable
- ZIPPER DOOR- The greenhouse is equipped with zipper doors, you can use the zipper to lock the door to protect the plants. Safety measures and professional installation are highly recommended. Polytunnel Greenhouse
Greenhouse No.2
Premium 15×6.6×6.6FT Greenhouse for Outdoors, Large Walk-in Heavy Duty Galvanized Steel Frame, Mesh Door Screen Window Tunnel Hoop Garden Plant Winter Hot House, Side Screen Mesh, White
- [Styles In Seasons] – The unique whole-side screen on both sides and 8 roll-up screen windows allow for more cross-ventilation and heat & humidity control, which can be altered freely as needed, Moreover, the additional sun shade netting cover can resist strong rays, super suitable for summertime. The included sunshade net would reduce 80% of harmful light and prevent damage to plants.
- [3 Rows of Horizontal Crossbars Structure] – Built with galvanized steel, 3 top crossbars, 10 vertical bottom poles, and 2 diagonal poles, this hot house can withstand weather as much as possible. With ground Staples and tie ropes, you can securely fasten it to the ground. Enjoy ample space for vegetables, tropical plants, and more. Look no further than KING BIRD’s portable greenhouses.
- [Versatile for Efficient Temperature Management] – Convenient 2 entrances with multifunctional PE and zippered screen doors. Plus, 8 roll-up screen windows for cross-ventilation, temperature, and humidity control. Enhance ventilation on hot days and keep warm in winter, providing a better environment for your plants and keeping out the pets.
- [Sturdy UV Resistant PE Cover] – The 140g/sqm PE grid cover of KING BIRD portable greenhouse is reinforced, waterproof, and odorless with the UV stabilizer, a specialized addition that effectively reflects harmful rays and extends the service life of the cover. It has been designed to fit the frame closely, enhancing warmth and wind resistance in winter to protect your plants for as long as possible.
- [Join the KING BIRD Garden Family Now]–You will become part of the KING BIRD garden family. Enjoy 1 year of complimentary service or more, including replacement parts and dedicated 24/7 customer support. We’re committed to ensuring your gardening experience is successful and worry-free. (Check [Product guides and documents] below or scan the Transparency Codes on Cartons for more info/instruction/service) Polytunnel Greenhouse
Greenhouse No.3
9.7′ x 6.5′ x 6.5′ Walk-in Tunnel Greenhouse, Outdoor Green House with Anti-Tear PE Cover, Zipper Doors and Mesh Windows, White
- Extend The Growing Season: Our walk-in backyard greenhouse tent creates a large space for you to start up seeds and protects plants from fluctuating temperatures. Extend the growing season and end your winter woes in milder climates.
- Roll-Up Doors, Windows & Sidewalls: The large, zipped roll-up doors provide easy access to your green greenhouse, and the mesh windows keep out unwanted guests with wings. Multiple openings allow for cross ventilation, so temperature and humidity are in your hands.
- High-quality PE Cover: Our two-layer 140 GSM PE cover features a reinforcement grid through the middle to prevent tearing. It protects plants from UV scorching while allowing 85% of nourishing sunlight to pass through uninterrupted.
- Steel Structure: The large greenhouse is composed of seven crossbars, two diagonal braces, and a reinforcing ground frame, all made of water-safe, bend-resistant galvanized steel. Formed into an arch shape, the top prevents sagging and allows it more stability against wind and rain. For added support, bury the extended edges deep in the soil and pull guy ropes tightly from the ground stakes.
- Outdoor Greenhouse Info: Overall Dimensions: 116.25″ L x 78.75″ W x 78.75″ H. Window Dimensions: 16.5″ L x 14.25″ W. Recommended that 1-2 people assemble it. Polytunnel Greenhouse
Greenhouse No.4

Premium 15×6.6×6.6FT Greenhouse for Outdoors, Large Walk-in Heavy Duty Galvanized Steel Frame, Mesh Door Screen Window Tunnel Hoop Garden Plant Winter Hot House, with Watering Kits, White
- [All-around Watering System] – The classical KING BIRD large greenhouse completes with a 15-ft water hose (extendable) and irrigation kit that saves time and water. The copper nozzles allow for adjustable water mist size and direction, preventing water drainage and drought. Plus, the system can cool down the entire greenhouse during hot summers.
- [3 Rows of Horizontal Crossbars Structure] – Built with galvanized steel, 3 top crossbars, 10 vertical bottom poles, and 2 diagonal poles, this hot house can withstand weather as much as possible. With ground Staples and tie ropes, you can securely fasten it to the ground. Enjoy ample space for vegetables, tropical plants, and more. Look no further than KING BIRD’s portable greenhouses.
- [Versatile for Efficient Temperature Management] – Convenient 2 entrances with multifunctional PE and zippered screen doors. Plus, 8 roll-up screen windows for cross-ventilation, temperature, and humidity control. Enhance ventilation on hot days and keep warm in winter, providing a better environment for your plants and keeping out the pets.
- [Sturdy UV Resistant PE Cover] – The 150g/sqm PE grid cover of KING BIRD portable greenhouse is reinforced, waterproof, and odorless with the UV stabilizer, a specialized addition that effectively reflects harmful rays and extends the service life of the cover. It has been designed to fit the frame closely, enhancing warmth and wind resistance in winter to protect your plants for as long as possible.
- [Join the KING BIRD Garden Family Now]–You will become part of the KING BIRD garden family. Enjoy 1 year of complimentary service or more, including replacement parts and dedicated 24/7 customer support. We’re committed to ensuring your gardening experience is successful and worry-free. (Check [Product guides and documents] below or scan the Transparency Codes on Cartons for more info/instruction/service) Polytunnel Greenhouse
Conclusion: Why You’ll Love Having a Polytunnel
A polytunnel is one of the smartest investments for your garden. It helps you grow more, waste less, and protect your plants from unpredictable weather. Plus, it lets you grow what you want, when you want.
Whether you’re trying to feed your family, make a little extra at the farmers’ market, or just enjoy fresh veggies year-round, a polytunnel makes it all easier. Build it right, care for it well, and your harvests will reward you season after season.
🔑 Key Takeaway
A polytunnel greenhouse can stretch your growing season, protect your plants from rough weather and annoying pests, and help you grow your own fresh food any time of the year—all without the high price tag of a traditional greenhouse.
Frequently Asked Questions (FAQs): Polytunnels
Q1. Can I grow tropical plants in a polytunnel?
Yes!
With a bit of added insulation or passive heating, polytunnels can support tropical plants like bananas, ginger, and lemongrass—even in cooler climates. These structures create a warmer, more humid microclimate that’s perfect for tropical crops, especially during the summer months. For best results, use water barrels for thermal mass, add extra fleece or bubble wrap for insulation, and consider compost heating or double-layer plastic if you want to extend the season for heat-loving plants.
Q2. How do I keep my polytunnel cool during hot weather?
There are several effective ways to prevent overheating inside your polytunnel:
-
- Roll up the sides or open the doors to allow for maximum airflow and ventilation.
- Install shade netting over the top or inside the tunnel to block out excess sunlight and reduce temperatures.
- Use internal fans or louvres for larger tunnels to help move hot air out.
- Water the floor in the morning to increase humidity and cool the air as it evaporates.
Combining these methods helps keep temperatures manageable for your plants, even during heatwaves.
Q3. Are polytunnels safe in snowy climates?
They can be, with the right precautions.
-
- Brush off heavy snow from the roof and sides as soon as possible to prevent the weight from causing collapse or stretching the plastic.
- Choose a strong frame made from quality steel or reinforced materials to handle snow loads.
- Support the roof with temporary struts or braces during extreme weather for extra security.
- Check regularly for any sagging or damage after storms.
With these steps, polytunnels can withstand snowy winters and protect your crops year-round.
Q4. What’s the best way to organize plants inside a polytunnel?
Group your plants by height and watering needs for the best results.
-
- Taller plants should go at the back or along the sides to maximize sunlight for everything else.
- Shorter plants and those needing frequent access are best placed near the front or along main paths.
- Keep similar watering needs together to make irrigation easier and avoid over- or under-watering.
- Leave clear paths for easy movement and maintenance.
This approach helps you maximize space, improve plant health, and make daily care much simpler.
Q5. Do polytunnels attract rodents or other animals?
Sometimes, especially if you’re growing tasty crops.
-
- Keep your tunnel sealed when not in use to prevent entry.
- Avoid leaving pet food, compost, or dense clutter nearby, as these attract rodents.
- Use fine mesh or netting on vents and doors to block small animals.
- Inspect your space often for pests and eliminate hiding spots such as debris piles or unused pots.
Recommended Reading
Smart Greenhouse Humidity Control: Tips for Healthy, Happy Plants Crop RH Range Quick Tip Tomatoes 65–75% Avoid rot, keep airflow up Lettuce 50–60% Too much moisture = mildew Cucumbers 70–80% Likes it moist, vent well Herbs 60–70% Lower RH keeps leaves crisp Peppers 60–70% Don’t let it swing too much Strawberries 60–75% Watch for mold … Continue reading “Greenhouse Humidity Control”
Greenhouse Watering System Parts
Greenhouse Watering System Parts Main Components of an Efficient Greenhouse Watering System An efficient greenhouse watering system consists of several key components that ensure uniform, reliable, and resource-conscious irrigation. The main components are: Water Supply: The primary source of water can be a municipal supply, a well, or a storage tank. An intermediate storage … Continue reading “Greenhouse Watering System Parts”
Greenhouse Watering System Smart Greenhouse Watering Solutions That Actually Work System Best For Pros Cons Drip Beds, rows, containers Precise, water-saving Needs setup, can clog Capillary Mats Seedlings, small pots Even moisture, no wet leaves Not for big plants, clean often Soaker Hose Rows, garden beds Easy to use, covers a lot Not super precise, … Continue reading “Greenhouse Watering System”
Best Victorian Greenhouses for Your Backyard
Introduction Best Victorian Greenhouses for Your Backyard. Victorian greenhouses are renowned for their timeless beauty and unmatched charm. These structures, popular during the Victorian era, continue to captivate gardening enthusiasts with their intricate designs and elegant features. If you’re considering adding a greenhouse to your backyard, a Victorian-style structure could be the perfect choice. In … Continue reading “Best Victorian Greenhouses for Your Backyard”
Geodesic Dome Greenhouses
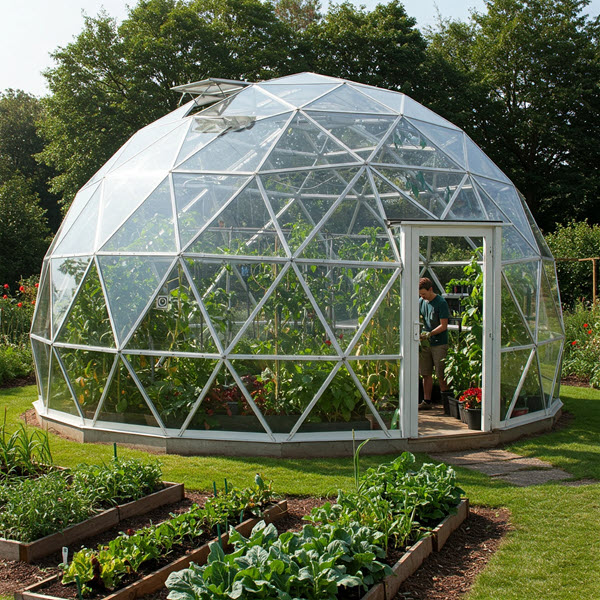
The Smart Way to Grow All Year Round
Geodesic Dome Greenhouses
| Material | Pros | Cons |
| Wood | Great look, warm | Needs upkeep |
| Steel | Super strong | Heavy, pricey |
| PVC | Light, cheap | Not long-lasting |
What’s a Geodesic Dome Greenhouse, Anyway?
- Definition: A geodesic dome greenhouse is a round structure made up of a bunch of interconnected triangles. Sounds a bit math-y, but all you need to know is that this shape is crazy strong and efficient.
- Origin: Buckminster Fuller, the inventor of the design, created it to be both practical and beautiful.
- Why the shape works: The dome’s shape helps spread weight evenly, which makes it incredibly stable, and that curved surface lets sunlight in from every direction. That’s a big win for your plants.
Why Go for a Geodesic Dome Greenhouse?
- Energy efficiency: These domes hold heat like a champ and let in sunlight from all angles, so you can cut back on artificial lights and heating. That curved shape? It’s not just for looks—it helps trap warm air, especially during chilly nights.
- Structural strength: Those triangles work together to make the whole thing tough as nails. It can stand up to wind, snow, and whatever else the weather throws at it.
- Space optimization: You get a lot of space inside, thanks to the dome’s design. The layout naturally encourages vertical growing, which means more plants per square foot.
- Natural airflow: The dome’s shape helps air circulate better, which cuts down on mold and mildew. Add in a few vents, and you’ve got a self-regulating, super-healthy environment for your plants.
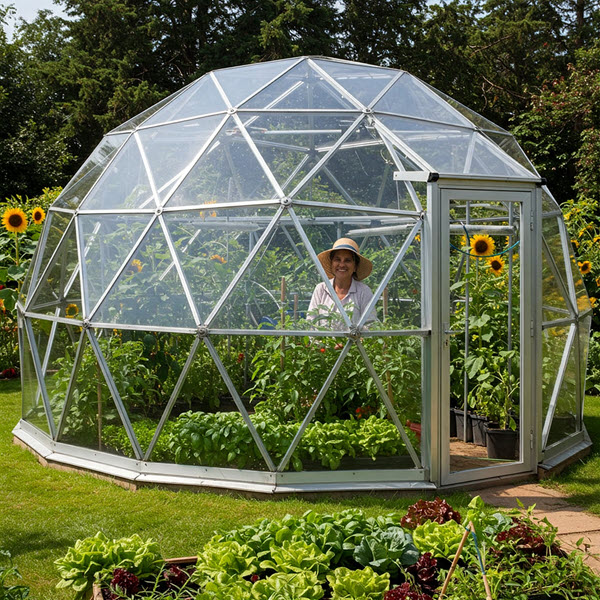
Planning and Building Your Dome
- Choosing the location: You’ll want a spot that gets plenty of sun, ideally facing south. Make sure the ground is level, drains well, and is close to water and electricity if you plan to use heaters or fans.
Frame materials:
- Wood: Looks great and insulates well, but it needs upkeep.
- Galvanized steel: Super durable and low-maintenance, but it’s heavier and more expensive.
- PVC: Lightweight and budget-friendly, though it’s not as tough in the long run.
- Covering materials:
- Polycarbonate panels: Strong, UV-resistant, and provide excellent insulation.
- Polyethylene film: Affordable and easy to work with but needs replacing every few years.
- Glass: Visually appealing and durable but heavy and fragile.
- Foundation options: Some people go with a concrete slab, while others use gravel or pressure-treated wood. Just make sure it’s solid, level, and suited to your local climate.
- Ventilation and climate control: Add in roof vents, side vents, or even automated fans. Some folks go all out with sensors and smart climate control systems.
What Can You Grow Inside?
- Leafy greens and herbs: Lettuce, kale, spinach, basil, and cilantro are fast growers and thrive in the dome’s stable environment.
- Fruits and vegetables: Tomatoes, strawberries, cucumbers, and peppers do well too, especially if you create warmer zones inside the dome.
- Tropical and exotic plants: You can grow bananas, pineapples, and even orchids with a little added heating.
- Microgreens and sprouts: These are perfect for small spaces and quick harvests—ideal if you’re using vertical shelves or tiered systems.
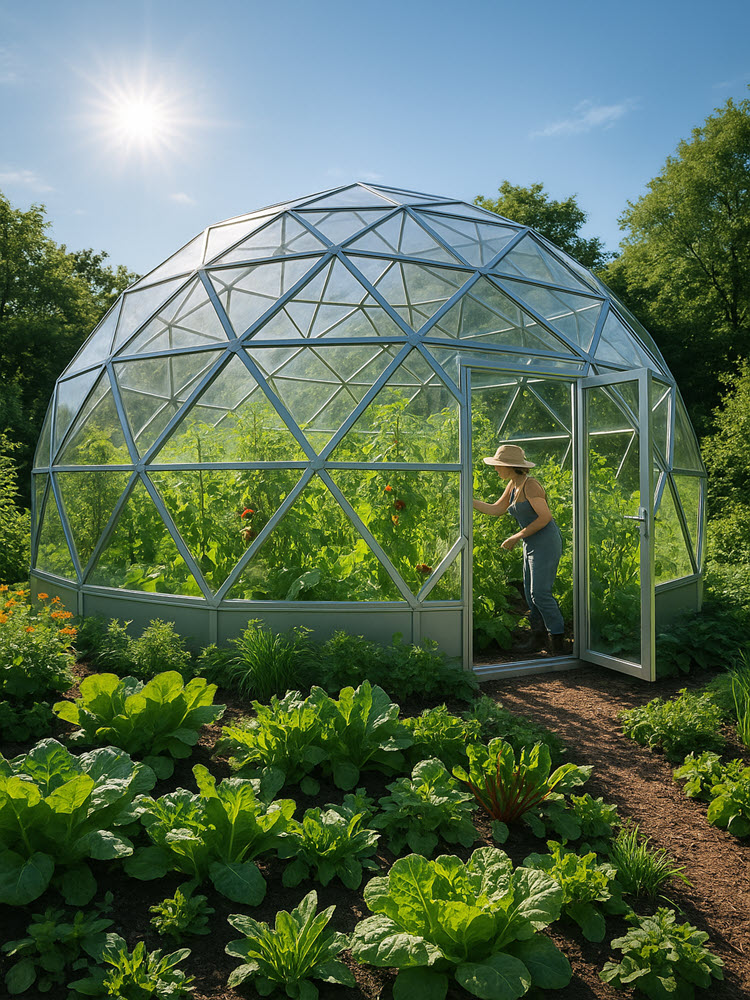
DIY vs. Buying a Kit
- Going the DIY route: If you’re handy and love a challenge, building your own dome can be a fun, rewarding project. You’ll save money and get a custom setup, but it takes time and effort.
- Buying a prefab kit: Kits come with everything you need and are a great option if you want to get growing quickly. You’ll spend more upfront, but it’s way faster and easier to set up.
- Added features in kits: Many kits offer extras like automatic vents, solar-powered fans, and built-in shelving—perfect for beginners or busy growers.
Go Green With Your Dome
- Water conservation: Install gutters around the dome to collect rainwater and use it for irrigation.
- Energy efficiency: Add solar panels for power, and use thermal mass like water barrels or stone floors to trap heat.
- Sustainable gardening: Domes are great for composting, organic gardening, and using companion planting techniques that support eco-friendly growth.
Common Issues and Easy Fixes
- Condensation problems: Domes can get foggy inside, especially in cold weather. Make sure you have good ventilation, maybe even a dehumidifier, to keep moisture in check.
- Complex builds: DIY domes can get tricky with all those triangles and angles. Use pre-made connectors or kits to make things easier.
- Pest control: While domes are pretty sealed up, pests still find their way in. Use sticky traps, physical barriers, or natural pest-repelling plants to keep them away.
- Maintenance tips: Keep an eye on seals and joints, clean the dome panels to maximize light, and do regular checkups on the structure—especially after storms or rough weather.
Is a Geodesic Dome Greenhouse Right for You?
- Budget considerations: Domes can cost more upfront, especially with quality materials, but the energy savings and durability pay off over time.
- Climate compatibility: If you live in an area with heavy snow, strong winds, or temperature swings, a dome’s strength and insulation make it a great choice.
- Gardening goals: Whether you’re growing for fun, food, or even tropical plants, domes support a wide range of growing environments.
- Space availability: Make sure your yard or property can handle the footprint and height of the dome you want.
Top Recommendations for Geodesic Dome Greenhouses
No 1: Geodesic Dome Greenhouse

12*7.2 ft Dome Tents Upgraded Geodesic Dome Greenhouse, Weatherproof Greenhouse Garden Bubble Tent , Transparent Igloo Dome House for Outdoor, Party, Backyard
- Transparent PVC: Size: 12*7.2ft (3.65*2.2m). Made from durable ABS plastic frame. Thickened highly transparent PVC screen provides a total clear 360°view. The clear dome tent has excellent sun protection, warmth preservation, and wind resistance functions, allows you to enjoy the beauty scenes and relax with your family outdoors.
- Stable& Snow-resistance: The stable frame and its own geometry shape ensure stability against strong winds (up to 40 mph), rain and snow (up to 110 pounds).Put the outdoor igloo in your yard and you won’t have to worry about it being blown away or need to move indoors. You can use it all year round.
- 2-in-1 Greenhouse Dome: The geodesic dome promotes better air circulation and even internal temperatures. It has a zippered front door and triangular windows, ensures enough air and breeze when you are relaxing inside. Meanwhile, the clear PVC cover helps protect seedlings from frost or pests and provides you with a spacious growing space. Perfect for growing plants, vegetables or flowers. Great as a plant greenhouse or relaxing room.
No 2: Geodesic Dome Greenhouse

Bubble Tent House Outdoor, Upgraded Geodesic Dome Greenhouse with Transparent PVC Cover, Weatherproof Greenhouse Suitable for Patio and Dining Places (White,
- Generous 12FT Diameter: The Garden Dome Igloo provides a spacious 12-foot diameter, offering plenty of room for various outdoor activities. Whether used as a greenhouse, a cozy outdoor lounge, or a dining area, the ample space accommodates a range of furniture or gardening setups, making it versatile for different purposes.
- Advanced Geodesic Dome Design: Featuring an upgraded geodesic dome structure, this igloo tent provides excellent stability and strength. The design evenly distributes weight, allowing it to withstand strong winds and adverse weather conditions. This innovative architecture ensures the dome remains sturdy and secure, even in challenging environment
- Transparent PVC Cover: The dome is enclosed in a transparent PVC cover that not only allows for maximum natural sunlight to penetrate but also offers a clear view of your surroundings. The cover is U/V-resistant, ensuring that plants inside receive proper sunlight for growth, while also protecting against harmful U/V rays during outdoor gatherings.
- Weatherproof and Year-Round Use: Designed for all-season use, the weatherproof dome can handle a variety of climates, from heavy rain to snow. Its construction makes it a reliable outdoor solution for year-round enjoyment, providing shelter and comfort no matter the weather conditions. Whether you’re hosting guests in the summer or creating a warm greenhouse in the winter, this structure is built to last.
- Elegant White Frame for Aesthetic Appeal: The sleek, white frame of the dome adds a modern and sophisticated look to any outdoor space. It enhances the aesthetic appeal of gardens, patios, and other outdoor areas, blending functionality with style. The frame is not only visually appealing but also durable, resistant to corrosion and wear over time.
No 3: Geodesic Dome Greenhouse

12ft Bubble Tent House Camping Tent, Upgraded Outdoor Clear Shelter Geodesic Dome 5-7 Person for Backyard Patios
- 【Specious Design】The garden igloo features an impressive 12ft diameter and towering at a maximum height of 7.3ft, which provides an exceptionally large space for your outdoor activities. With a generous base area of 107 ft², it comfortably hosts 4-7 adults, offering ample space for everyone to relax. The expansive interior easily accommodates patio furniture, making it an ideal setting for gatherings or simply unwinding in comfort.
- 【Premium Materials】Crafted with a robust ABS plastic frame & reinforced 0.4mm PVC panels, the outdoor igloo tent is designed for durability and comfort. The thickened PVC and polyester mesh provide a 360-degree panoramic view, allowing you to fully immerse yourself in the beauty of nature. Easy to ventilate in the day and great for some stargazing on a summer’s evening. No need to put them away in the winter they retain the heat, so can act like a greenhouse to protect your plants from frost.
- 【Superior Wind and Snow Protection】 The igloo tent is designed for exceptional durability, capable of withstanding harsh weather conditions. It holds strong against winds up to 31 mph and supports snow loads up to 90 lbs, making it a dependable choice for outdoor use. With plastic stakes and metal clamps for added stability, the tent offers secure shelter in various environments. However, for your safety, please avoid using the tent outdoors when wind speeds or snow loads exceed these limits.
- 【Versatile for Any Occasion】 The garden igloo serves as your ultimate outdoor retreat, whether creating a luxurious escape at home, enjoying a camping trip, attending a music festival, or relaxing in your backyard. Beyond leisure, it’s ideal for exhibitions, promotions, events, meetings, product displays, and trade shows. Make your event stand out and captivate attention with this unique and eye-catching structure that combines style and function.
No 4: Geodesic Dome Greenhouse
12ft Bubble Tent House Camping Tent, Upgraded Outdoor Clear Shelter Geodesic Dome 5-7 Person for Backyard Patios
- 【Specious Design】The garden igloo features an impressive 12ft diameter and towering at a maximum height of 7.3ft, which provides an exceptionally large space for your outdoor activities. With a generous base area of 107 ft², it comfortably hosts 4-7 adults, offering ample space for everyone to relax. The expansive interior easily accommodates patio furniture, making it an ideal setting for gatherings or simply unwinding in comfort.
- 【Premium Materials】Crafted with a robust ABS plastic frame & reinforced 0.4mm PVC panels, the outdoor igloo tent is designed for durability and comfort. The thickened PVC and polyester mesh provide a 360-degree panoramic view, allowing you to fully immerse yourself in the beauty of nature. Easy to ventilate in the day and great for some stargazing on a summer’s evening. No need to put them away in the winter they retain the heat, so can act like a greenhouse to protect your plants from frost.
- 【Superior Wind and Snow Protection】 The igloo tent is designed for exceptional durability, capable of withstanding harsh weather conditions. It holds strong against winds up to 31 mph and supports snow loads up to 90 lbs, making it a dependable choice for outdoor use. With plastic stakes and metal clamps for added stability, the tent offers secure shelter in various environments. However, for your safety, please avoid using the tent outdoors when wind speeds or snow loads exceed these limits.
- 【Versatile for Any Occasion】 The garden igloo serves as your ultimate outdoor retreat, whether creating a luxurious escape at home, enjoying a camping trip, attending a music festival, or relaxing in your backyard. Beyond leisure, it’s ideal for exhibitions, promotions, events, meetings, product displays, and trade shows. Make your event stand out and captivate attention with this unique and eye-catching structure that combines style and function.
Conclusion
Geodesic dome greenhouses aren’t just trendy—they’re incredibly practical and smart. With unbeatable strength, natural energy efficiency, and plenty of space, these domes are a solid investment for any gardener who wants to take things to the next level. Whether you’re just starting out or looking to upgrade your setup, a dome greenhouse gives you flexibility, protection, and the perfect environment to grow year-round.
🔑 Key Takeaway
A geodesic dome greenhouse offers strong, weather-resistant design, excellent energy efficiency, and an ideal growing environment—perfect for gardeners looking to grow smarter, not harder.
FAQs: Geodesic Dome Greenhouses
Q1. Can I install a geodesic dome greenhouse on uneven terrain?
It’s best to level the ground or build a solid foundation first.
-
- A flat, stable base ensures your dome stays secure and drains properly.
- For smaller domes, a compacted gravel ring on a cleared, level area is often enough.
- On sloped or uneven sites, you may need to build a platform or use concrete piers to create a level foundation.
- Proper preparation prevents shifting, improves stability, and helps your greenhouse last for years.
Q2. What is the ideal diameter for a backyard geodesic dome greenhouse?
Most backyard domes range from 16 to 26 feet across.
-
- This size provides plenty of growing space for home gardeners without taking over your yard.
- A 15- to 18-foot dome is great for individuals or couples, while 22- to 26-foot domes suit families or those wanting extra space for larger plants or year-round growing.
- Larger domes (over 26 feet) are best for community gardens or commercial use.
Q3. Do I need a building permit for a geodesic dome greenhouse?
It depends on your local regulations.
-
- Many areas consider smaller domes (typically under a certain square footage) as temporary structures and may not require a permit.
- If your dome is large, has utilities, or is in a regulated area, permits are more likely to be needed.
- Always check with your local building department before you start building, as requirements vary widely.
Q4. Can I use a geodesic dome greenhouse off-grid?
Absolutely.
-
- Geodesic domes are ideal for off-grid setups.
- You can add solar panels for power, collect rainwater, and use compost heating or thermal mass to regulate temperature.
- Many growers use passive solar design, solar-powered fans, and automated vents to maintain a stable environment year-round without relying on the grid.
Q5. How do I regulate temperature in extreme climates?
Use a combination of thermal mass, insulation, and automation.
-
- Place water barrels or an above-ground pond inside the dome to absorb heat during the day and release it at night.
- Insulate the north wall and foundation to reduce heat loss in winter.
- Install automated vents or solar-powered fans to release excess heat and bring in fresh air during hot weather.
- These strategies help keep temperatures steady and protect your plants in both hot and cold conditions.
Recommended Reading
Smart Greenhouse Humidity Control: Tips for Healthy, Happy Plants Crop RH Range Quick Tip Tomatoes 65–75% Avoid rot, keep airflow up Lettuce 50–60% Too much moisture = mildew Cucumbers 70–80% Likes it moist, vent well Herbs 60–70% Lower RH keeps leaves crisp Peppers 60–70% Don’t let it swing too much Strawberries 60–75% Watch for mold … Continue reading “Greenhouse Humidity Control”
Greenhouse Watering System Parts
Greenhouse Watering System Parts Main Components of an Efficient Greenhouse Watering System An efficient greenhouse watering system consists of several key components that ensure uniform, reliable, and resource-conscious irrigation. The main components are: Water Supply: The primary source of water can be a municipal supply, a well, or a storage tank. An intermediate storage … Continue reading “Greenhouse Watering System Parts”
Greenhouse Watering System Smart Greenhouse Watering Solutions That Actually Work System Best For Pros Cons Drip Beds, rows, containers Precise, water-saving Needs setup, can clog Capillary Mats Seedlings, small pots Even moisture, no wet leaves Not for big plants, clean often Soaker Hose Rows, garden beds Easy to use, covers a lot Not super precise, … Continue reading “Greenhouse Watering System”
Best Victorian Greenhouses for Your Backyard
Introduction Best Victorian Greenhouses for Your Backyard. Victorian greenhouses are renowned for their timeless beauty and unmatched charm. These structures, popular during the Victorian era, continue to captivate gardening enthusiasts with their intricate designs and elegant features. If you’re considering adding a greenhouse to your backyard, a Victorian-style structure could be the perfect choice. In … Continue reading “Best Victorian Greenhouses for Your Backyard”
Cold Frame Greenhouses

Cold Frame Greenhouses:
A Simple Way to Keep Your Garden Growing Longer
Cold Frame Greenhouses
| Crop | Best Season | Temp Range | Quick Note |
| Lettuce | Spring/Fall | 45–65°F | Super easy and fast grower |
| Spinach | Spring/Fall | 40–70°F | Loves the cold |
| Radishes | Spring/Fall | 50–70°F | Quick harvest, low fuss |
| Carrots | Spring/Fall | 55–75°F | Slow grower, likes cool soil |
| Kale | Fall/Winter | 40–70°F | Gets sweeter after frost |
| Chard | Spring–Fall | 50–75°F | Tough and low-maintenance |
| Arugula | Spring/Fall | 45–65°F | Fast and peppery flavor |
| Beets | Spring/Fall | 50–70°F | Good for roots and greens |
What Exactly Is a Cold Frame Greenhouse?
- Definition: A cold frame is a low, clear box that traps heat and keeps your plants cozy even when it’s chilly outside. It’s usually built from a wooden or PVC frame and topped with a clear lid—think old windows or polycarbonate panels. The lid lets sunlight in and traps the warmth, creating a mini greenhouse effect.
- Function: Cold frames rely on passive solar energy and insulation, making them perfect for gardeners who want an easy, eco-friendly way to extend their growing seasons.
Why Use a Cold Frame?
- Extended growing seasons: Cold frames let you grow veggies earlier in the spring and later into the fall, giving you more produce throughout the year.
- Hardening seedlings: They provide a safe transition zone between indoor seed starting and outdoor planting, reducing transplant shock.
- Protection: Cold frames shield your plants from frost, wind, rain, and pests.
- Budget-friendly: Unlike full greenhouses, cold frames are inexpensive to build and maintain.

Different Types of Cold Frames and What They’re Made Of
DIY vs. pre-made:
- DIY cold frames are budget-friendly and customizable.
- Pre-made options are quicker to set up but cost more and may be less adaptable to your space.
Materials:
- Frame: Wood (like cedar), brick, PVC, or even concrete blocks.
- Lid: Recycled windows, greenhouse plastic, polycarbonate sheets, or clear acrylic panels.
- Insulation: Straw bales, foam boards, bubble wrap, or old blankets.
Portability:
- Portable cold frames are easy to move and adjust based on the sun’s angle.
- Permanent cold frames are ideal for long-term garden beds.

How to Build Your Own Cold Frame Greenhouse
Step 1: Choose the right location
Pick a spot with full sun, preferably facing south. Make sure the area drains well and isn’t prone to flooding.
Step 2: Gather your materials
- Wood, brick, or PVC for the base
- Clear cover (like old windows or polycarbonate panels)
- Hinges and handle for the lid
- Tools like drill, screws, saw, and measuring tape
- Optional: insulation material and thermometer
Step 3: Construct the frame
Build a box with the back wall slightly higher than the front to create a slope. Attach the clear lid with hinges so it can be opened for ventilation.
Step 4: Prepare the soil
Loosen and enrich the soil beneath the frame with compost.
Step 5: Monitor the environment
Use a thermometer to track temperature. Vent the lid during the day and close it at night to maintain warmth.

What to Grow in a Cold Frame
Cool-season vegetables:
- Lettuce
- Spinach
- Kale
- Arugula
- Radishes
- Carrots
- Beets
- Turnips
Seed starting in early spring:
- Tomatoes
- Peppers
- Eggplants
Winter-hardy greens:
- Swiss chard
- Mâche
- Mustard greens
Keeping Your Cold Frame in Top Shape
- Ventilation: Open the lid on warm, sunny days to prevent overheating. Use a stick or automatic opener.
- Watering: Water less frequently, as cold frames retain moisture. Always water early in the day.
- Temperature control: Ideal temps range from 55°F to 75°F during the day. Add insulation during cold nights.
- Insulation techniques: Use straw bales around the outside or bubble wrap under the lid. Cover with blankets during freezing nights.
- Soil health: Rotate crops each season, add compost regularly, and avoid overplanting the same area.

Watch Out for These Common Cold Frame Mistakes
- Overheating: Leave the lid closed too long on sunny days, and you’ll risk cooking your plants.
- Bad location: If it’s too shady or poorly drained, plants won’t thrive.
- Lack of airflow: Without ventilation, mold and mildew can build up quickly.
- Weak construction: A poorly sealed or unstable lid won’t protect against wind, animals, or rain.
Budget and Cost Considerations
DIY models:
- Use salvaged materials to keep costs low.
- Expect to spend $20–$80 depending on what you have on hand.
Pre-made units:
- Prices range from $100–$300, often with extra features.
Long-term savings: Cold frames reduce the need for grow lights, heating mats, and indoor seed-starting equipment.
Now that we have a clear understanding of the factors to consider, let’s explore some top recommendations for cold frame greenhouses that meet these criteria.
No 1:
Wooden Garden Portable Greenhouse Cold Frame

2-Tier Wooden Cold Frame Garden Greenhouse Raised Flower Planter Shelf Bed Protection 6057-0160 (Natural)
- Adjustable Shelf: Easily raise or lower the shelf in this mini greenhouse to fit a wide range of plant sizes. Use the four preset screw holes or drill your own to fully customize the shelf height and meet your gardening needs.
- Openable Roof: Secure the roof in an open position with the side bolt for improved airflow. Adjust the vent size by repositioning the screws along the side rods to create a healthy ventilation system that adapts to changing weather conditions.
- Water Drainage Groove Design: Built-in grooves on the roof channel rainwater away, preventing buildup and promoting efficient drainage. This smart design lets you use the cold frame outdoors, even during wet weather.
- Stable Construction: Four sturdy metal brackets reinforce the structure, adding strength and safety to your garden greenhouse setup.
- Durable Fir Wood: Made from solid fir wood, this greenhouse features a polished finish that adds rustic charm while standing up to outdoor elements.
No 2:
Wooden Cold Frame Greenhouse

Wooden Cold Frame Greenhouse, Raised Flower Planter Shelf Protection for Outdoor Indoor Use, 0760 (Orange)
- Sturdy Structure: The cold frame greenhouse is made of fir wood which is durable and sturdy, offers long-term reliable use. And the polish and cutting workmanship on this outdoor greenhouse is smooth, allowing painting and staining on it without any other process
- Adjustable Shelf: The shelf of this mini greenhouse could be freely adjusted height to fit various types of plants, which meets all your needs. (Five screw holes preset, you can also make holes by yourself to determine the height of the shelf)
- Efficient Protection: Garden greenhouse used transparent polycarbonate panels, which have maximum light transmission function while retaining heat for early seed sprouting and for protecting plants late in the season, your plants could enjoy the sun and grow healthily
- Openable Roof: The Bolt on the side could be used to fix the top keep open, and the size of the vents can be controlled by holding the screws in different rods position, providing a healthy ventilation system to your plants in different weather
- Convenient Installation: This greenhouse kit is included clear instructions, it’s very easy to follow. Every part is clearly labeled, all tools you need are also included
No 3:
MCombo Wooden Garden Portable Greenhouse Cold Frame
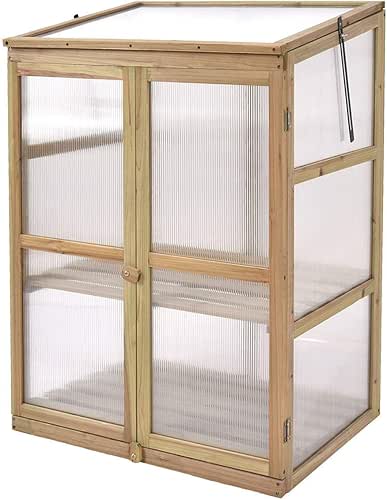
Portable Wooden Cold Frame Greenhouse Raised Flower Planter Protection (30.0″X22.4″X42.9″)
- Double Shelves — Double shelves provide more space for plants for various types of plants and elegant and simple design. You could get more room for your plant and it could give your patios, balconies, decks and gardens a touch of green, without any fuss.
- Foldable Top— Two top parts of this product could be open and close, and two bolts on the two sides which could be used to fix the top. And in the sunny day you could open it to let your plants absorb the sunlight and in rainy, you could close the top to keep it away from the rain.
- Solid Structure–Structured with heavy-duty wood for extended durability, and the structure follows the scientific principle and is strong enough to hold seed trays, pots and plant growth light.
- Easy Movement and Assembly–All parts are detachable, so you can set it up wherever you want to, and move it when the seasons shift. No tools required.
- 100% Satisfaction Guaranteed–We would try our best to give you satisfied shopping experience, if there is quality, we would make best solution to solve the problem.
No 4:
MCombo 2-Tier Wooden Cold Frame Garden Greenhouse

2-Tier Wooden Cold Frame Garden Greenhouse Raised Flower Planter Shelf Bed Protection 6057-0160 (Orange)
- Adjustable Shelf: The shelf in this mini greenhouse can be easily adjusted in height to accommodate various types of plants, meeting all your needs (It has four preset screw holes, but you can also create your own holes to customize the shelf height)
- Openable Roof: The bolt on the side can be used to secure the roof in the open position, while the size of the vents can be adjusted by placing the screws in different positions along the rods, it setup ensures a healthy ventilation system for your plants, adapting to various weather conditions
- Water Drainage Groove Design: The roof grooves of the wooden cold frame are designed to prevent rainwater from accumulating on the roof, ensuring effective drainage, this feature allows the cold frame to be used outdoors even during rainy days
- Stable Device: The garden greenhouse features four metal brackets for added stability and safety
- Fir Wood: The wooden greenhouse is crafted from pure fir wood, with a polished exterior that showcases a rustic style
No 5:
Giantex Garden Portable Wooden Cold Frame Greenhouse
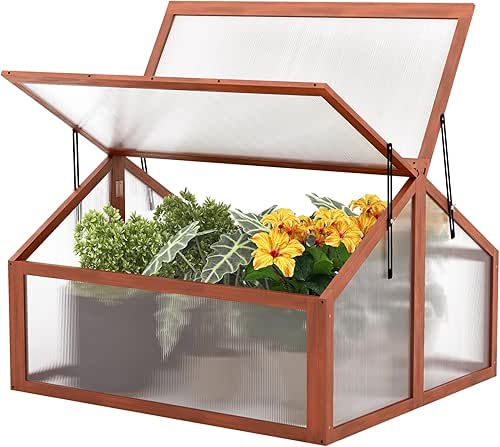
Portable Wooden Cold Frame Greenhouse Raised Flower Planter Protection (35.4″X31.3″X23.0″)
- Foldable Top— Two top parts of this product could be open and close, and two bolts on the two sides which could be used to fix the top. And in the sunny day you could open it to let your plants absorb the sunlight and in rainy, you could close the top to keep it away from the rain.
- Beautify Green Spaces and Large Capacity— Big storage capacity for various types of plants and elegant and simple design. Giving your patios, balconies, decks and gardens a touch of green, without any fuss.
- Solid Structure–Structured with heavy-duty wood for extended durability, and the structure follows the scientific principle and is strong enough to hold seed trays, pots and plant growth light.
- Easy Movement and Assembly–All parts are detachable, so you can set it up wherever you want to, and move it when the seasons shift. No tools required.
- 100% Satisfaction Guaranteed–We would try our best to give you satisfied shopping experience, if there is quality, we would make best solution to solve the problem.
Conclusion
Cold frame greenhouses are one of the smartest ways to make the most of your garden all year long. They’re easy to build, affordable, and packed with benefits. Whether you’re hardening off seedlings, extending your growing season, or overwintering hardy crops, a cold frame gives you more control and more food—without complicated systems or high costs.
🔑 Key Takeaway
Using a cold frame greenhouse is a smart, cost-effective way to extend your growing season, protect your crops, and get more out of your garden—without needing electricity or a big budget.
Frequently Asked Questions (FAQs): Cold Frames
Q1. Can I build a cold frame without any tools?
Yes, you can build a simple cold frame with no tools at all, though sturdier builds will need basic tools.
-
- No-tools method: Stack straw bales to create the sides of your frame and lay an old window, clear plastic, or glass pane on top. This setup traps heat and protects plants from wind and frost, making it perfect for quick, temporary use.
- For more durability: If you want a cold frame that lasts through multiple seasons, you’ll need to use wood or other sturdy materials. This will require basic tools like a saw, screwdriver, or drill to cut and assemble the frame.
- Tip: Even a simple, no-tools cold frame can make a big difference for early seedlings or extending your harvest in the fall.
Q2. Do I need to take my cold frame apart in the summer?
Not necessarily. You have several options for summer use or storage:
-
- Move it to the shade: If your cold frame is lightweight, simply move it to a shady spot so it doesn’t overheat.
- Leave the lid open: Prop the lid open or remove it altogether to allow airflow and prevent high temperatures from building up inside.
- Repurpose it: Use the cold frame as a mini screened enclosure to protect young plants from pests, or as a hardening-off station for seedlings before transplanting.
- Storage: If you prefer, you can disassemble and store your cold frame until cooler weather returns, but many gardeners keep theirs in use year-round by adapting it to the season.
Q3. Can I use a cold frame indoors?
Cold frames are designed for outdoor use and aren’t practical indoors.
-
- Sunlight: Cold frames rely on natural sunlight and outdoor temperature swings to create a warm microclimate for your plants.
- Indoor limitations: Inside your home, you won’t get enough direct sun, and the frame won’t provide the right environment for plant growth.
- Better alternatives: For indoor gardening, use grow lights, a seed-starting tray, or a small indoor greenhouse to provide the light and warmth your plants need.
Q4. What’s the best size for a cold frame?
A common size is 3 feet by 6 feet, but it depends on your space and what you want to grow.
-
- Why this size works: It’s wide enough for several rows of seedlings or greens, but narrow enough that you can reach the back without stepping inside.
- Custom sizing: Adjust the length or width to fit your available space or specific needs. For example, a 2×4 foot cold frame works well for small patios or balconies.
- Accessibility: Try to keep the depth (front to back) under 4 feet so you can easily reach all your plants for watering and harvesting.
Q5. Do cold frames work in very cold climates?
Yes, cold frames can be effective even in freezing temperatures, with a few extra steps:
-
- Add insulation: Line the inside walls with straw bales, foam boards, or even leaves to help retain heat.
- Bank soil: Mound soil or mulch around the outside of the frame for extra insulation.
- Double up: Use two layers of clear plastic or add a floating row cover inside the frame for additional protection on the coldest nights.
- What you can grow: Cold-hardy crops like spinach, kale, and lettuce can thrive in a well-insulated cold frame, even when it’s freezing outside.
Recommended Reading
Smart Greenhouse Humidity Control: Tips for Healthy, Happy Plants Crop RH Range Quick Tip Tomatoes 65–75% Avoid rot, keep airflow up Lettuce 50–60% Too much moisture = mildew Cucumbers 70–80% Likes it moist, vent well Herbs 60–70% Lower RH keeps leaves crisp Peppers 60–70% Don’t let it swing too much Strawberries 60–75% Watch for mold … Continue reading “Greenhouse Humidity Control”
Greenhouse Watering System Parts
Greenhouse Watering System Parts Main Components of an Efficient Greenhouse Watering System An efficient greenhouse watering system consists of several key components that ensure uniform, reliable, and resource-conscious irrigation. The main components are: Water Supply: The primary source of water can be a municipal supply, a well, or a storage tank. An intermediate storage … Continue reading “Greenhouse Watering System Parts”
Greenhouse Watering System Smart Greenhouse Watering Solutions That Actually Work System Best For Pros Cons Drip Beds, rows, containers Precise, water-saving Needs setup, can clog Capillary Mats Seedlings, small pots Even moisture, no wet leaves Not for big plants, clean often Soaker Hose Rows, garden beds Easy to use, covers a lot Not super precise, … Continue reading “Greenhouse Watering System”
Best Victorian Greenhouses for Your Backyard
Introduction Best Victorian Greenhouses for Your Backyard. Victorian greenhouses are renowned for their timeless beauty and unmatched charm. These structures, popular during the Victorian era, continue to captivate gardening enthusiasts with their intricate designs and elegant features. If you’re considering adding a greenhouse to your backyard, a Victorian-style structure could be the perfect choice. In … Continue reading “Best Victorian Greenhouses for Your Backyard”
Traditional Greenhouses
Traditional Greenhouses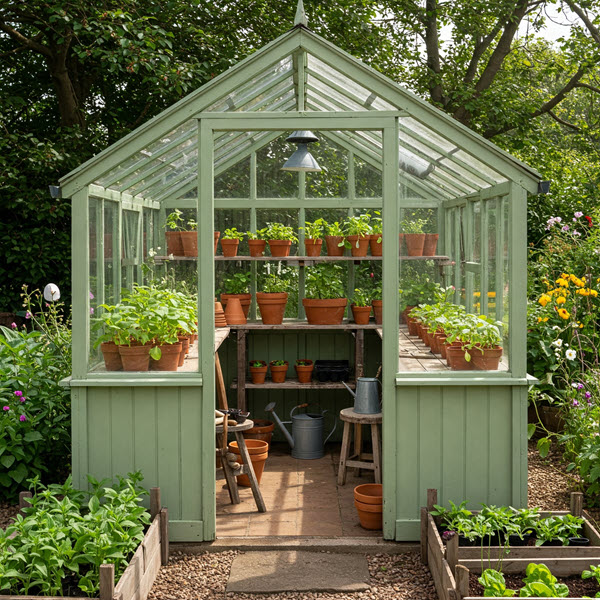
Traditional Greenhouses:
Why They’re Still a Gardener’s Best Friend
Great Traditional Greenhouses
| Crop Type | Examples | Grow Time | Quick Tip |
| Cool-Season | Lettuce, Kale, Radish | Fall–Spring | Vent well to avoid overheating |
| Warm-Season | Tomatoes, Peppers, Cucumbers | Late Spring–Summer | Keep temps steady |
| Herbs | Basil, Mint, Parsley | Year-Round | Great in containers |
| Flowers | Orchids, Begonias, Hibiscus | Year-Round | Watch humidity |
What Makes a Greenhouse ‘Traditional’?
- Structure and design: Traditional greenhouses usually feature wooden or metal frames covered with glass or transparent plastic panels. They’re designed to trap heat from the sun and keep the inside warmer than the outside.
- Manual control: What sets them apart from modern high-tech greenhouses is the lack of automation. Instead of relying on computers, you manually adjust the vents, water the plants, and control the temperature.
- Hands-on experience: This not only saves money but also connects you more deeply with your garden.
Why Gardeners Still Love Traditional Greenhouses
- Year-round growing: One of the biggest perks is being able to garden all year long. Even if there’s snow on the ground, you can still grow veggies or start your spring plants early.
- Protection from nature: Traditional greenhouses act as a shield against wind, frost, pests, and even too much rain. You won’t have to worry about birds stealing your strawberries or a cold snap wiping out your basil.
- More variety: Want to try growing a tropical plant or a heat-loving pepper that doesn’t normally thrive in your area? You can do that, thanks to the consistent environment a greenhouse provides.
- Fresh food at home: Growing your own food cuts down on store runs and gives you fresh, organic produce whenever you need it.
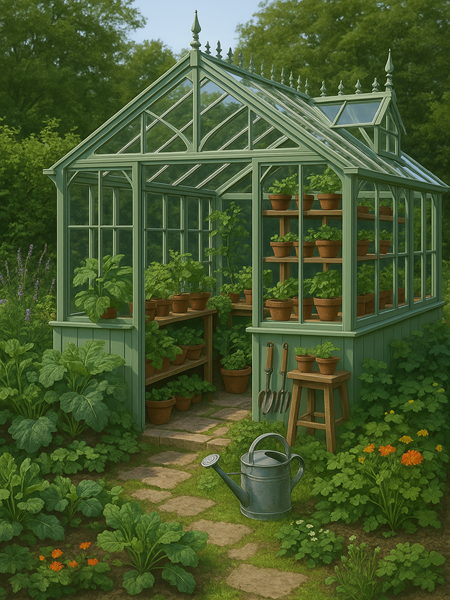
Best Plants to Grow in a Traditional Greenhouse
- Cool-weather crops: These are perfect for fall and early spring. They don’t need high temperatures and will thrive in the mild climate of a greenhouse. Great choices include lettuce, spinach, kale, and radishes.
- Warm-season veggies: Once things heat up, go for tomatoes, cucumbers, peppers, and zucchini. They love steady warmth and being protected from outdoor pests.
- Herbs: Basil, mint, parsley, and chives are easy to grow, perfect for cooking, and don’t take up much space.
- Ornamental and tropical flowers: Orchids, begonias, hibiscus, and African violets all enjoy the greenhouse environment and bring beauty to your space.
Setting Up Your Greenhouse the Right Way
- Choose a sunny spot: South or southeast-facing locations are ideal since they get the most sunlight. Avoid areas with too much shade.
- Pick the right foundation: Gravel, compacted soil, or concrete slabs all work well. A solid base helps with drainage and keeps the greenhouse stable.
- Think about ventilation: Install roof and side vents to let hot air out, especially in the summer. You might also need shade cloths or to leave doors open on hot days. In winter, a small heater helps keep things warm for sensitive plants.
- Water wisely: A drip irrigation system offers a consistent water supply without waste. You can also collect rainwater in barrels for an eco-friendly option.
- Plan your layout: Place tall plants in the back, use hanging baskets, and add shelves for herbs and small plants. It’ll help you get the most out of your space and keep air flowing.
Keeping Things in Tip-Top Shape
- Stay clean: Wipe down surfaces, clear away dead leaves, and clean pots and tools regularly to prevent disease.
- Inspect your structure: Check for cracks in the glass and loose parts in the frame. Fix small issues before they become big problems.
- Watch the climate inside: Use a thermometer and hygrometer to check temperature and humidity. Too much moisture causes mold; too little stresses plants.
- Rotate and refresh: Rotate your crops to keep pests away and add compost or organic matter to the soil every season for healthy growth.
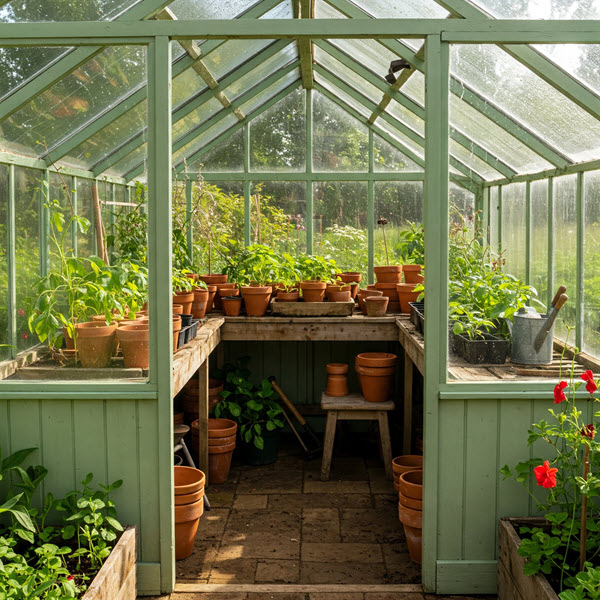
Common Greenhouse Headaches and How to Handle Them
- Too much heat in summer: Make sure there’s good airflow, open those vents, and use shading techniques like blinds or whitewashing the glass.
- Heat loss in winter: Use water barrels or stone floors to absorb and release heat, and insulate with bubble wrap or horticultural fleece.
- Water troubles: Raised beds and proper drainage help avoid soggy soil. Keep an eye on how much water your plants are actually getting.
- Pest and disease management: Inspect your plants often. Pull out any that look sick, and use organic sprays or natural predators like ladybugs to keep pests in check.
Traditional vs. Modern Greenhouses: What’s the Difference?
- Hands-on vs. high-tech: Traditional greenhouses are all about doing things yourself. You control everything from airflow to watering. Modern greenhouses usually have automated systems to do the work for you.
- Cost: Traditional setups are much more budget-friendly. Modern versions are more expensive due to technology and materials.
- Experience: If you love getting your hands dirty and learning as you go, a traditional greenhouse gives you that rewarding, hands-on connection.
Thinking of Building Your Own? Here’s How to Start
- Gather affordable materials: Repurpose old windows, reclaimed wood, or leftover construction supplies to save money.
- Stick to simple shapes: Rectangular or A-frame greenhouses are easier to build and still give you plenty of space.
- Use basic tools: A saw, hammer, drill, screws, and a level are usually enough to get the job done.
- Plan your time: Depending on size and complexity, you can finish in a weekend or a few days.
- Seal and insulate: Use caulk around windows and doors and add weather stripping to keep warmth in and drafts out.
Here are a few Options for you to enjoy
Greenhouse A:
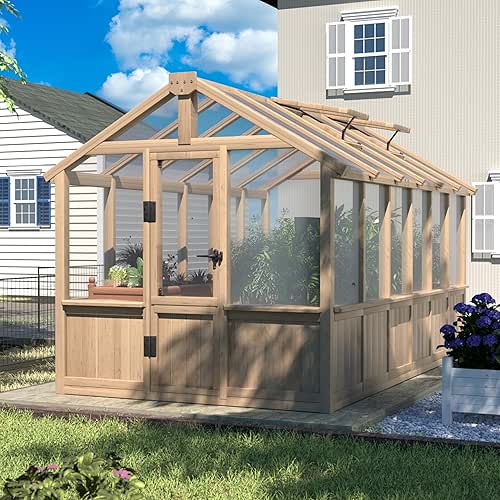
- Adjustable Ventilation Window – The greenhouses for outdoors have good heat insulation and adequate ventilation, which can keep the green house cool in warm months. You can also prevent humidity through good ventilation. The maximum adjustment angle of the ventilation opening in our wood greenhouse is 45°. VEIKOU greenhouse is suitable for both cold and hot weather, you can enjoy your favorite gardening all year round.
- Sturdy Natural Cedar Frame – Our greenhouse is made of cedar wood, which is more stable and can be well protected from moisture. Because of the weight of the green house with triangle design and sturdy construction, there is no need for too many extra wind anchors. When wood is heated by the sun during the day, it will keep this heat at night, which will be beneficial to your energy consumption in the greenhouses, especially in winter.
- Multi-Layer Polycarbonate Panel – The green house comes with multi-layer polycarbonate panels, which can provide diffuse light, and shine light on your plants from all angles. Even on cloudy days, the inside of our polycarbonate greenhouse is very bright. Our polycarbonate panel has a 7%-25% higher thermal insulation effect than the equivalent glass, scratch resistance, and excellent impact strength. VEIKOU green houses for outside provide 4 seasons of protection for your plants.
- Easy to Assemble Design – The wooden greenhouse adopts an embedded panel installation method, which can greatly reduce installation time, and the installation manual for the greenhouse is detailed and clear. In addition, our walk-in greenhouse is equipped with high-quality accessories, such as exquisite door locks and reinforced hinges.
- Dimensions – Overall size:74″W x 143.4″D x 83.5″H. Door size:23.6″W x 68.9″H. Vent size:19.7″W x 19.7″D. The greenhouse is shipped in five boxes and may be delivered at different times. Please pay attention to this.
Greenhouse B:

- Good Ventilation Design – The greenhouses for outdoors have an adjustable roof vent and the maximum adjustment angle of the ventilation opening in our wood greenhouse is 45°, which will make the wooden greenhouse have good heat insulation and adequate ventilation, even keeping the green house cool in warm months and preventing humidity through good ventilation. VEIKOU greenhouse is suitable for both cold and hot weather, you can enjoy your favorite gardening all year round
- Sturdy Construction Frame – The 8x16ft greenhouse consists of natural cedar wood, which is more stable and sturdier, and can also effectively keep heat. When wood is heated by the sun during the day, it will keep this heat at night, which will be beneficial to your energy consumption in the greenhouses, especially in winter. Because of the weight of the green house, there is no need for too many extra wind anchors
- Multi-Layer Polycarbonate Panel – The green house comes with multi-layer polycarbonate panels, which can provide diffuse light, and shine light on your plants from all angles to make your plants grow well. Besides, our polycarbonate panel has a 7%-25% higher thermal insulation effect than the equivalent glass, scratch resistance, and excellent impact strength. The inside of our polycarbonate greenhouse is also bright even on cloudy days
- Inserted PC Panels Design – The wooden greenhouse adopts an inserted PC panel installation design, which can greatly reduce installation time. With triangle design and sturdy construction, the green house is more stable and sturdy, making it withstand various weather conditions. In addition, our walk-in greenhouse is equipped with high-quality accessories, such as exquisite door locks and reinforced hinges
- Dimensions – Overall size:96″W x 190.2″D x 90.6″H. Door size: 29.1″W x 71.4″H. Vent size: 21″W x 21.6″D. The greenhouse is shipped in 5 boxes and may be delivered at different times. Please pay attention to this. VEIKOU green houses for outside provide 4 seasons of protection for your plants
Greenhouse C:

- 15.7×7.5×7.4 FT Hobby Greenhouse & Sunroom: Recommended foundation size: 17×8.5 FT. 6mm Twin-wall translucent PC panels(UV Protection 99.99%)
- Walk-in Greenhouse for Better Ventilation: Keep both 2 swing doors (with door hook)and 4 four-level adjustable roof vents open can let in more fresh air while managing excess moisture for the backyard greenhouse.
- Solid Material & Foundation: Heavy duty greenhouse has a rust-resistant aluminum frame (1.5mm). 4 corner posts & 2 middle posts help bury the greenhouse deep in soil or concrete for extra stability. Wind Rating: 60 mph; Snow Load Capacity:20 psf
- Built-in Rainage Rain Collection Device: Garden Greenhouse update 4 corners have drainage holes and attached pipes to collect and drain water, convenient for connecting Rain Barrels and maximizing the use of water resources
- Installation Tip:3 DIY enthusiasts can erect this winter greenhouse kit in 15 hours. Please use a box to hold screws and small accessories in case of missing.
Greenhouse D:
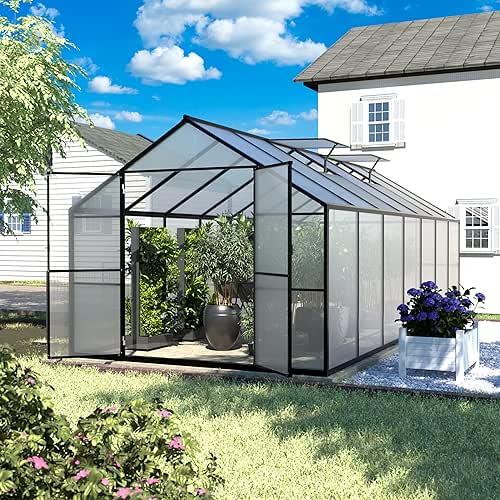
- Double Adjustzble Roof: Different from others, the roofs of our outdoor polycarbonate walk-in greenhouse are all with adjustable poles for better ventilation, which can create an ideal growth environment for your plants. The 8’ x 14’ greenhouse has a large space that can accommodate enough plants and gardening tools, you can directly enjoy the fun of growing plant after assembly.
- Sturty Frame & Solid Foundation: The walk-in greenhouse is made of a powder-coated aluminum frame that resists rust and oxidation. The unique ground base design helps bury it deep in the soil to add extra stability, ensuring outdoor greenhouse durability and reliability throughout the seasons to come. The interior of the greenhouse is also stability and enable the greenhouse to resist severe weather.
- Heavy-duty Greenhouse for Outdoor Winter: The frame of our heavy-duty walk-in greenhouse kit is made of premium corrosion resistant and weather resistant powder-coated thickened aluminum in grey finish, which is rust-resistant and more stable to deal with all kinds of weather. The thickened polycarbonate panels with diffuse patterns can provide more warmth for the interior of plants to prevent frost, absorb more sunlight, and allow plants to thrive.
- Lockable Swing Door: Unlike other polycarbonate greenhouses with sliding door, we upgraded the door for a swing-out lockable design which makes it easier for you to walk into the greenhouse for daily use.And ensure the safety of your items. The internally tight closure triangular structure can effectively improve the stability of the outdoor greenhouse to prevent it from falling apart under the harsh environment.
- Dimensions: The overall size of greenhouse: 97.3’W x 165.4’D x 90.5’H. The size of door: 49.7” W x 79.5” H. The interior dimension of greenhouse: 92.8”W x 160.9”D.
Wrapping It All Up
Traditional greenhouses are a fantastic way to grow plants in a simple, sustainable, and satisfying way. They give you the freedom to grow what you want, when you want, no matter the weather. Whether you’re building your own or maintaining one already in your backyard, a traditional greenhouse can be a cozy, productive space that pays off in fresh food, beautiful flowers, and the joy of gardening all year round.
🔑 Key Takeaway
A traditional greenhouse gives you year‑round growing power, protection from the elements, and a chance to grow plants that otherwise wouldn’t survive in your local climate—all without needing complex systems.
Frequently Asked Questions (FAQs): Traditional Greenhouses
Q1. Can I use a traditional greenhouse in really hot places?
Absolutely. Traditional greenhouses can work well in hot climates if you plan for proper cooling and shading.
-
- Ventilation: Make sure your greenhouse has roof and sidewall vents to create strong cross-ventilation. This allows for the hot air to escape while drawing in cooler air, helping to keep temperatures manageable for your plants.
- Shading: Use shade cloths or install retractable shading systems to block excess sunlight and reduce heat buildup. Exterior shade cloth is especially effective at stopping heat before it enters the greenhouse.
- Material choices: Consider using twin-wall or five-wall polycarbonate panels for glazing, as they diffuse harsh sunlight and insulate against temperature extremes. Aluminum material frames are a good choice for durability in high heat.
- Placement: Position your greenhouse so the long side faces south, and take advantage of natural shade from trees or nearby structures if possible.
With these strategies, you can successfully grow crops in a traditional greenhouse even in very warm regions.
Q2. Do I need a permit to build a greenhouse?
That depends on your local laws and the size of your greenhouse.
-
- Small greenhouses: Many cities and counties consider small, backyard greenhouses as temporary or accessory structures and may not require a permit.
- Larger or permanent greenhouses: If your greenhouse is large, has utilities (like electricity or plumbing), or is built on a permanent foundation, you’re more likely to need a building permit.
- Best practice: Always check with your local building authority before starting your project. They can tell you about any requirements for permits, setbacks, or foundation types in your area. This helps avoid fines or having to make costly changes later on.
Q3. Can I grow fruit trees in a traditional greenhouse?
Yes, you can grow fruit trees—especially dwarf varieties—in a traditional greenhouse.
-
- Dwarf trees: Choose compact varieties such as dwarf apple, citrus, or peach trees. These are well-suited for greenhouse conditions and won’t outgrow the space.
- Space and warmth: Make sure to give each tree enough room for its canopy and roots, and maintain consistent warmth and humidity for best results.
- Care Tips: Keep trees in shape with regular pruning, ensure they receive ample sunlight or grow light, and use well-draining soil to avoid root rot.
Q4. What’s a good way to heat a traditional greenhouse in winter?
You have several options for keeping your greenhouse warm during cold months:
-
- Electric or gas heaters: These provide reliable, adjustable heat and are easy to control with a thermostat.
- Passive Heating: Place water barrels or other thermal mass materials inside your greenhouse to absorb daytime heat and release it gradually at night, stabilizing temperatures.
- Insulation: Add bubble wrap or double-layer polycarbonate panels to retain heat, and seal any gaps or cracks to prevent drafts.
- Compost heating: Place a compost pile inside or near the greenhouse to take advantage of the heat generated as organic matter breaks down.
These methods can be used alone or in combination, depending on your climate and the needs of your plants.
Q5. How often should I fertilize greenhouse plants?
Fertilization frequency depends on the type of plant, but a general guideline is every 2–4 weeks with an organic fertilizer.
-
- Leafy greens and fast growers: These may benefit from feeding every two weeks during their peak growth period.
- Fruit-bearing plants and slower growers: Once every three to four weeks is usually sufficient.
- Best practice: Monitor your plants for signs of nutrient deficiency (like pale leaves or slow growth) and adjust your schedule as needed.
- Tip: Over-fertilizing can harm plants, so stick to recommended rates and flush the soil occasionally to prevent salt buildup.
A regular feeding routine helps keep your greenhouse crops healthy, vigorous, and productive.
Recommended Reading
Smart Greenhouse Humidity Control: Tips for Healthy, Happy Plants Crop RH Range Quick Tip Tomatoes 65–75% Avoid rot, keep airflow up Lettuce 50–60% Too much moisture = mildew Cucumbers 70–80% Likes it moist, vent well Herbs 60–70% Lower RH keeps leaves crisp Peppers 60–70% Don’t let it swing too much Strawberries 60–75% Watch for mold … Continue reading “Greenhouse Humidity Control”
Greenhouse Watering System Parts
Greenhouse Watering System Parts Main Components of an Efficient Greenhouse Watering System An efficient greenhouse watering system consists of several key components that ensure uniform, reliable, and resource-conscious irrigation. The main components are: Water Supply: The primary source of water can be a municipal supply, a well, or a storage tank. An intermediate storage … Continue reading “Greenhouse Watering System Parts”
Greenhouse Watering System Smart Greenhouse Watering Solutions That Actually Work System Best For Pros Cons Drip Beds, rows, containers Precise, water-saving Needs setup, can clog Capillary Mats Seedlings, small pots Even moisture, no wet leaves Not for big plants, clean often Soaker Hose Rows, garden beds Easy to use, covers a lot Not super precise, … Continue reading “Greenhouse Watering System”
Best Victorian Greenhouses for Your Backyard
Introduction Best Victorian Greenhouses for Your Backyard. Victorian greenhouses are renowned for their timeless beauty and unmatched charm. These structures, popular during the Victorian era, continue to captivate gardening enthusiasts with their intricate designs and elegant features. If you’re considering adding a greenhouse to your backyard, a Victorian-style structure could be the perfect choice. In … Continue reading “Best Victorian Greenhouses for Your Backyard”
Lean-to Greenhouse
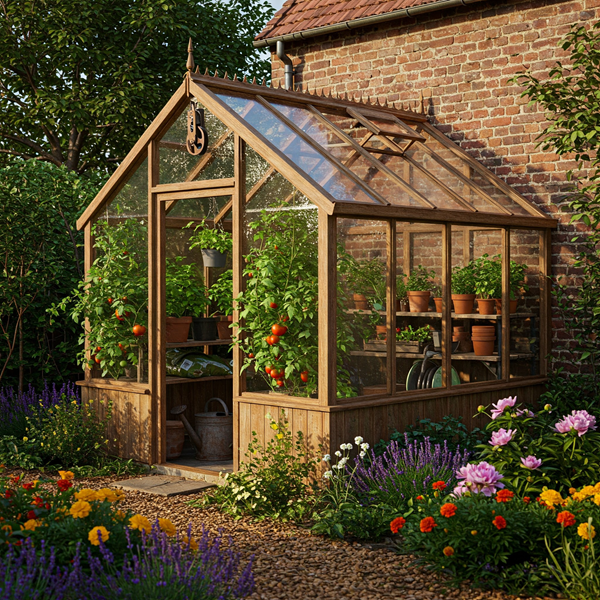
Lean-to Greenhouse:
The Smart Way to Garden When Space is Tight
Lean-to Greenhouse
| Material | Pros | Cons |
| Aluminum | Light, rust-free, low maintenance | Not very strong-looking |
| Wood | Stylish, insulates well | Needs regular upkeep |
| Steel | Super strong | Heavy, harder to install |
| Glass | Clear, lots of light | Breakable, poor insulation |
| Polycarbonate | Tough, insulates well | Not crystal clear |
| Acrylic | Durable, shatterproof | Scratches easier, pricier |
What’s a Lean-to Greenhouse, Anyway?
Think of a lean-to greenhouse as a greenhouse with a shortcut. Instead of standing on its own, it leans against one of your existing walls—like your home, garage, or shed. It only needs three walls of its own, and it uses your existing wall for extra support and insulation. That makes it super efficient when it comes to heat retention and material use. These greenhouses come in all shapes and sizes. Some are long and narrow, perfect for lining a side wall, while others stretch across the back of a house. Whether you go the custom-built route or grab a ready-made kit, they’re a smart way to make the most of your available space.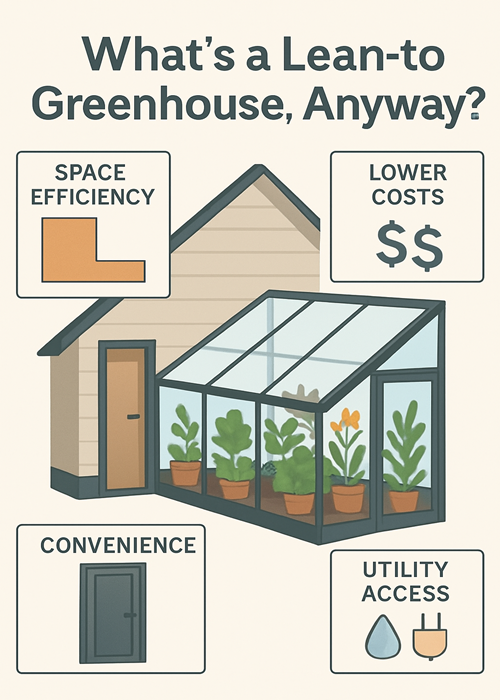
Why Pick a Lean-to Greenhouse?
- Space efficiency: Lean-to greenhouses are awesome for small yards, patios, or even balconies because they don’t take up as much room as freestanding greenhouses.
- Lower costs: Since they borrow one of your existing walls, they save on materials, and that wall helps trap warmth—especially handy during cooler months.
- Convenience: With the structure so close to your home, you can check on your plants without bundling up or walking far.
- Utility access: You can tap into your home’s water or power lines more easily, cutting down on setup hassles and costs.
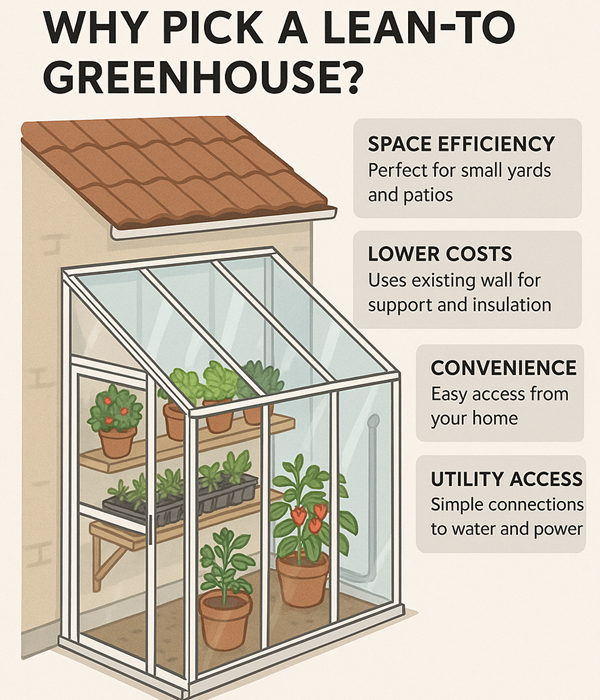
Things to Think About Before You Build
- Sunlight: You’ll want to position your greenhouse so it gets at least six hours of direct sun every day. In most places, that means attaching it to a south-facing wall. East or west walls can also work.
- Ventilation: Even in winter, greenhouses can get hot fast. Add roof vents, side vents, or a small exhaust fan to regulate temperature and airflow.
- Water and drainage: Make sure you’ve got a nearby water supply and that the floor drains well to avoid soggy soil and mold.
- Insulation: For year-round growing, use double-pane panels, weather stripping, and thermal curtains to trap heat.
- Permits: Depending on your location, you might need a permit—especially if it connects to your house. Always check with your local building department first.
Choosing the Right Materials
Framing materials:
- Aluminum: Lightweight, rust-resistant, and low maintenance.
- Wood: Attractive and well-insulating but needs more upkeep.
- Galvanized steel: Strong and rust-proof, great for bigger builds.
Glazing materials:
- Glass: Offers great clarity but is heavier and more fragile.
- Polycarbonate: Light, durable, and great for insulation.
- Acrylic: Clear and shatterproof, a solid all-around choice.
Flooring options:
- Gravel: Cheap and drains well.
- Concrete: Durable and easy to clean.
- Pavers: More polished-looking, good drainage.
- Packed soil: Budget-friendly, though less durable.
DIY vs. Prefab: Which Way to Go?
DIY lean-to greenhouse:
- Full control over the design.
- Cost-effective if you have tools and know-how.
- Takes more time and effort.
Prefab kits:
- Quicker to assemble with all parts pre-cut.
- More expensive upfront but easier to install.
- Look for modular kits so you can expand later.

Design Ideas to Make the Most of It
- Use vertical space: Add shelves, wall racks, and hanging baskets.
- Add thermal mass: Use water barrels or rocks to store and release heat.
- Set up rainwater collection: Use a gutter on the roof to fill barrels.
- Install smart tools: Try timers, sensors, and auto-watering systems.
Common Pitfalls to Avoid
- Shady placement: Don’t build your greenhouse where it won’t get enough sun.
- Poor airflow: Lack of ventilation leads to heat and humidity problems.
- Underinsulating: One-layer plastic might not cut it in winter.
- Skipping the foundation: Uneven or soggy flooring creates problems later.
What to Grow in Your Lean-to Greenhouse
Cool-season crops:
- Lettuce
- Spinach
- Kale
- Swiss chard

Warm-season plants:
- Tomatoes
- Cucumbers
- Eggplants
- Peppers
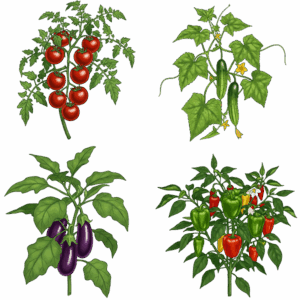
Herbs and ornamentals:
- Basil
- Mint
- Thyme
- Orchids
- African violets
- Succulents

Keeping Your Lean-to Greenhouse in Great Shape
- Clean panels regularly: Keep sunlight flowing by washing off dirt and algae monthly.
- Watch for pests: Inspect plants before bringing them in and seal openings.
- Organize tools: Use shelves and hooks to save space and stay efficient.
Make seasonal changes:
- In winter: Add heat, insulation, and thermal blankets.
- In summer: Increase airflow and add shade cloth.
Now that we have a clear understanding of the factors to consider, let’s explore some top recommendations for Lean-to Greenhouses that meet these criteria.
Top Recommendations for Lean-to Greenhouses
Greenhouse A:
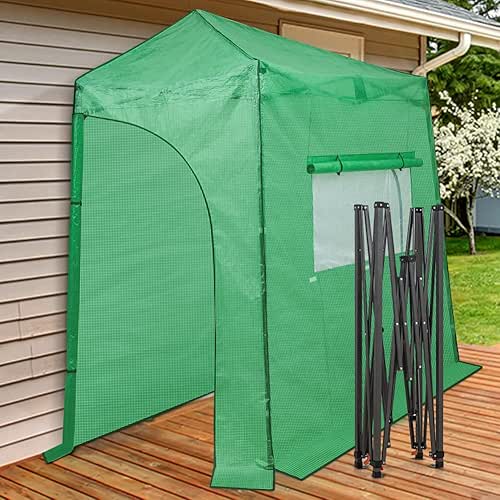
Features and Benefits About the EAGLE PEAK Lean-to Greenhouse: Superior Craftsmanship: EAGLE PEAK’s greenhouse is built to last. The sturdy powder-coated steel frame promises longevity, while its UV-protected and water-resistant cover ensures your plants get sunlight and humidity without excess moisture.
Easy Accessibility: Featuring two expansive roll-up zipper doors, this greenhouse ensures simple access to your plants and fosters optimal air circulation for a healthier growth environment. Included Shelving: Elevate your gardening experience with an included flower rack. With EAGLE PEAK, setting up your greenhouse is a breeze, no tools needed – have it ready in mere minutes.
Generous Gardening Space: Enjoy a spacious gardening environment in this walk-in greenhouse, measuring L 10 ft x W 5 ft x H 7 ft. Thoughtfully designed, it’s ideal for placement beside your barn, garage, or shed door, optimizing your outdoor space.
The EAGLE PEAK Commitment: We stand by our products. Benefiting from a 1-year limited warranty from the purchase date, you’re ensured quality and durability. For any inquiries, our expert service team is eager to assist. EAGLE PEAK’s greenhouse seamlessly combines functionality with durability, ensuring a superior gardening experience. Embrace the joy of gardening with EAGLE PEAK!
Greenhouse B:

Features and Benefits
-
- Virtually unbreakable 4 mm twin-wall polycarbonate roof panels block up to 99.9% of UV rays and diffuse sun light eliminating the risk of plant burn and shade areas
- STURDY THOUGHTFUL CONSTRUCTION WILL LAST A LIFETIME – Chosen by Better Homes and Gardens as the Best Overall Greenhouse Kit of 2024. Panels block harmful UV rays to protect plants from sun overexposure. The sturdy, oxidation resistant powder coated aluminum frame includes a galvanized steel base to add structural stability.
- Rust resistant aluminum frame extends 7′-5″ from floor to peak
- Kit Includes adjustable roof vent, rain gutters, lockable hinged door with magnetic catch, aluminum frame, polycarbonate panels and a galvanized steel base
- Withstands winds up to 47 mph and supports snow loads of up to 15.4 lbs. per sq. ft.
🔑 Key Takeaway
A lean-to greenhouse helps you garden efficiently in tight spaces. It saves energy, keeps your plants close, and extends your growing season without taking over your yard.
Conclusion
A lean-to greenhouse is perfect for gardeners with limited space. It’s convenient, energy-efficient, and makes year-round growing possible. With the right setup and planning, you can create a cozy plant paradise right outside your door. Whether you’re a beginner or experienced, it’s an ideal space for growing both your garden and skills. Key Takeaway: A lean-to greenhouse helps you garden efficiently in tight spaces. It saves energy, keeps your plants close, and extends your growing season without taking over your yard.
Frequently Asked Questions (FAQs): Lean-To Greenhouses
Q1. Can I add a lean-to greenhouse to my garage or shed?
Yes, you can attach a lean-to greenhouse to a garage, shed, or almost any solid wall that gets good sunlight.
-
- Why it works: Lean-to greenhouses are designed to use an existing wall as one side of the structure, saving space and materials. Garages and sheds are great options as long as the wall is sturdy and faces the sun for most of the day.
- Things to consider: Make sure the wall is in good condition and free from leaks or rot. South- or west-facing walls are ideal for maximum sunlight.
- Benefits: This setup saves money on construction, makes use of underutilized space, and can even provide easy access to utilities or storage inside your garage or shed.
Q2. Is it okay to use solar panels to power fans or heaters inside?
Yes, solar panels are a smart and sustainable way to power greenhouse systems.
-
- How It Helps: Solar panels power lights, fans, and small heaters, boosting energy efficiency and cutting down your dependence on the grid.
- Off-grid advantage: This is especially useful if your lean-to is far from your home’s electrical supply or if you want an eco-friendly, off-grid solution.
- What to know: The number of panels you need depends on the power requirements of your equipment. For fans and LED lights, a small solar setup is often enough. For heaters in cold climates, you may need a larger system or a backup power source for cloudy days.
Q3. Can I use grow lights in a lean-to greenhouse?
Yes, grow lights can be very helpful, especially in winter or cloudy regions.
-
- Why use them: Lean-to greenhouses sometimes get less light due to their location or the angle of the sun, especially in winter.
- How to use: Install LED grow lights or fluorescent fixtures above your plants to supplement natural sunlight. This ensures your crops get enough light for healthy growth and strong yields.
- Tips: Use a timer to mimic natural day length, and choose lights with a spectrum suitable for the types of plants you’re growing.
Q4. What’s the best way to heat a lean-to greenhouse?
Combine electric heaters with thermostats or passive heating systems like water barrels for best results.
-
- Electric heaters: Small electric heaters with built-in thermostats provide steady, reliable warmth and are easy to control.
- Passive heating: Place water barrels or other thermal mass materials inside the greenhouse. They absorb heat during the day and release it at night, helping to moderate temperature swings.
- Insulation: Add bubble wrap or insulated panels to the glazing and seal any gaps to keep heat in and cold out.
- Efficiency: Proper insulation and passive heat storage make any heating system more effective and help lower energy costs.
Q5. Can I build one against a brick wall?
Yes, brick walls are actually one of the best choices for lean-to greenhouses.
-
- Thermal Power of Brick: During the day, brick stores solar heat and slowly releases it after dark, reducing temperature swings inside the greenhouse.
- Durability: Unlike wood, brick won’t warp or rot from the humidity inside the greenhouse.
- Extra tip: If you’re planting directly into the ground, make sure moisture doesn’t collect at the base of the wall to avoid any long-term issues with your foundation.
Recommended Reading
Smart Greenhouse Humidity Control: Tips for Healthy, Happy Plants Crop RH Range Quick Tip Tomatoes 65–75% Avoid rot, keep airflow up Lettuce 50–60% Too much moisture = mildew Cucumbers 70–80% Likes it moist, vent well Herbs 60–70% Lower RH keeps leaves crisp Peppers 60–70% Don’t let it swing too much Strawberries 60–75% Watch for mold … Continue reading “Greenhouse Humidity Control”
Greenhouse Watering System Parts
Greenhouse Watering System Parts Main Components of an Efficient Greenhouse Watering System An efficient greenhouse watering system consists of several key components that ensure uniform, reliable, and resource-conscious irrigation. The main components are: Water Supply: The primary source of water can be a municipal supply, a well, or a storage tank. An intermediate storage … Continue reading “Greenhouse Watering System Parts”
Greenhouse Watering System Smart Greenhouse Watering Solutions That Actually Work System Best For Pros Cons Drip Beds, rows, containers Precise, water-saving Needs setup, can clog Capillary Mats Seedlings, small pots Even moisture, no wet leaves Not for big plants, clean often Soaker Hose Rows, garden beds Easy to use, covers a lot Not super precise, … Continue reading “Greenhouse Watering System”
Best Victorian Greenhouses for Your Backyard
Introduction Best Victorian Greenhouses for Your Backyard. Victorian greenhouses are renowned for their timeless beauty and unmatched charm. These structures, popular during the Victorian era, continue to captivate gardening enthusiasts with their intricate designs and elegant features. If you’re considering adding a greenhouse to your backyard, a Victorian-style structure could be the perfect choice. In … Continue reading “Best Victorian Greenhouses for Your Backyard”