Knowledge
Knowledge
Greenhouse Seasonal Planting

Mastering Greenhouse Seasonal Planting: A Year-Round Guide to Thriving Harvests
| Tool | What It Does | When to Use | Tip |
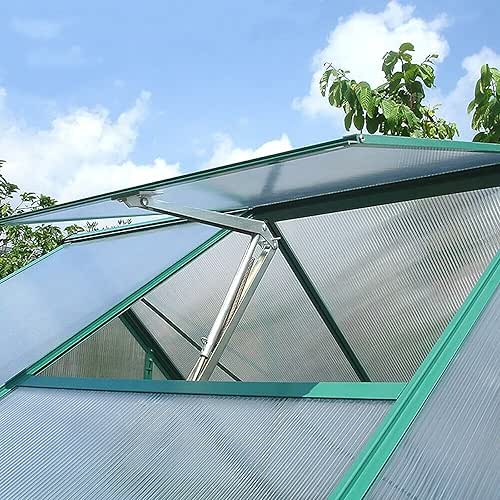
| Vents | Releases moist air | Warm days | Open midday |
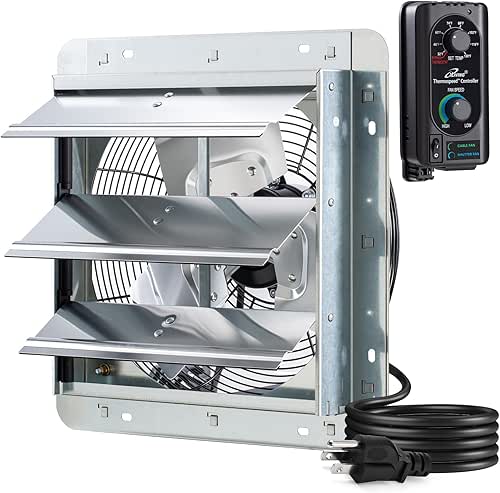
| Exhaust Fans | Pulls out humid air | Hot, humid times | Use with intake vents |
| Circulation Fans | Moves air around | All year | Point at plant level |
| Heaters | Lowers RH by warming air | Cold, damp weather | Place low near doors |
| Dehumidifiers | Removes air moisture | Humid climates | Run at night |
| Hygrometers | Tracks humidity levels | Always | Use in different spots |
| Misters | Adds moisture to air | Dry conditions | Set on timer |
| Drip System | Waters roots, not air | Regular watering | Keeps leaves dry |
Why Seasonal Planning Is Crucial Inside a Greenhouse
Though greenhouses offer protection from frost, wind, and erratic weather patterns, internal conditions still respond to external seasonal changes. Sunlight duration, angle, intensity, and even pest behavior vary throughout the year. If we fail to adapt our planting schedules, crops may struggle, become stunted, or bolt prematurely.
Seasonal planning also supports:
- Crop rotation, reducing soil-borne diseases and nutrient depletion
- Balanced humidity levels to prevent fungal issues
- Efficient energy use, especially for supplemental lighting and heating
Smart seasonal planting in greenhouses creates harmony between crop needs and environmental cues, setting the foundation for robust yields year-round.
Spring Greenhouse Planting: Cultivating Momentum
As daylight hours stretch and temperatures rise, spring becomes an ideal season to kickstart growth. This is a time to embrace cool-season crops that germinate well in slightly lower soil temperatures and thrive in steady warmth.
Best crops for spring:
- Lettuce
- Spinach
- Kale
- Beets
- Carrots
- Swiss chard
- Turnips
- Green onions
📌 Key Strategies
- Start early: Seed trays placed under grow lights or heat mats in late winter can be transplanted once greenhouse temperatures stabilize.
- Watch for condensation: The clash between cold nights and warming days can increase humidity. Ventilate early mornings to prevent mildew.
- Maximize sunlight: Clean greenhouse panels to ensure full sun penetration for young seedlings.
Spring is also the time to start warm-season crops like tomatoes, peppers, and cucumbers indoors for transplanting later when the conditions are just right.
Summer Greenhouse Planting: Managing Heat and Productivity
Summer offers abundant light and warmth—ideal for fast-growing, heat-loving vegetables. However, we must pay close attention to temperature regulation, as greenhouses can easily overheat.
Top performers for summer:
- Tomatoes
- Peppers
- Cucumbers
- Zucchini
- Eggplants
- Basil
- Beans
🌞 Essential Practices
- Shading: Use shade cloths or whitewash paint to reduce sun intensity and prevent leaf scorch.
- Ventilation: Roof vents, fans, and louvered side vents should run continuously to maintain airflow.
- Hydration: Water more frequently but avoid overwatering. Morning watering is ideal to reduce fungal risks.
- Pollination support: In a sealed greenhouse, hand-pollination or using pollinator-attracting plants like marigolds helps ensure fruit set.
We also recommend incorporating companion planting to naturally deter pests and optimize plant health.
Fall Greenhouse Planting: Extending the Bounty
As outdoor gardens wind down, the greenhouse enters a second prime planting window. Fall crops often mirror spring selections but offer the added benefit of fewer pest pressures and more stable humidity levels.
Ideal crops for fall:
- Radishes
- Broccoli
- Cabbage
- Cauliflower
- Mustard greens
- Arugula
- Endive
✅ Pro Tips
- Plan backward: Calculate the first frost date and plant accordingly, allowing enough time for crops to mature.
- Transition carefully: Remove summer crops gradually to prevent shocking the microclimate.
- Use thermal mass: Place water barrels or stones to absorb heat during the day and release it at night.
- Cover beds: Floating row covers help retain warmth and shield tender transplants from cool breezes.
Fall planting is about balance—making use of residual warmth while preparing for colder nights.
Winter Greenhouse Planting: Growing Through the Cold
Contrary to popular belief, winter doesn’t spell the end of growing. With strategic insulation and crop selection, greenhouses remain productive even in frigid conditions.
Resilient winter crops:
- Spinach
- Mâche (corn salad)
- Pak choi
- Tatsoi
- Mizuna
- Garlic (for spring harvest)
- Parsley
🏆 Success Strategies
- Insulation: Bubble wrap walls, seal cracks, and use double glazing where possible.
- Supplemental heat: Use propane heaters or electric radiant heat selectively to maintain minimum thresholds.
- Row covers within the greenhouse: A “greenhouse inside a greenhouse” effect helps trap additional warmth.
- Light management: Install LED grow lights to offset shorter days and promote strong leaf development.
Even with minimal growth rates, winter planting sets the stage for an early spring harvest—especially for leafy greens and overwintered root crops.
Year-Round Greenhouse Tips for Seasonal Success
- Maintain a planting calendar: Organizing your schedule by seed-starting dates, transplant times, and harvest windows keeps production consistent. Update this calendar based on results and observations each year to refine future plans.
- Adjust lighting and heating as needed: Though passive solar energy does much of the work, certain crops—especially in winter—require supplemental light and warmth to meet their growing demands. Install timers and thermostats for energy efficiency.
- Rotate crops and amend soil: Avoid planting the same crop families in the same soil season after season. Use compost, organic fertilizers, and microbial inoculants to rebuild soil health between rotations.
- Practice cleanliness and pest control: Remove spent crops promptly, sterilize tools, and inspect for pests like aphids, whiteflies, and spider mites. Introduce beneficial insects or use neem oil for eco-friendly control.
- Keep detailed logs: Track planting dates, growth patterns, temperature fluctuations, and yield. These records are invaluable for identifying patterns and optimizing future
Conclusion
Mastering greenhouse seasonal planting is a blend of knowledge, timing, and responsiveness. While the greenhouse grants us extended growing seasons and improved climate control, seasonal awareness still plays a vital role in ensuring plant success. From the crisp greens of spring to the hardy herbs of winter, the greenhouse is a year-round powerhouse—when approached with strategy and care.
Through each seasonal transition, our greenhouse becomes not just a shelter, but a thriving micro-ecosystem that delivers fresh, nutritious produce in every month of the year. When we plant with purpose and precision, every season becomes an opportunity for abundance.
🌿 Key Takeaway
Even with temperature control, seasonal changes in light, humidity, and plant cycles affect greenhouse performance. Strategic seasonal planting is essential for optimal health and productivity.
FAQs: Greenhouse Fruit Growing and Soil Health
Can I grow fruits like strawberries and melons in a greenhouse year-round?
Yes, you can grow strawberries and melons year-round in a greenhouse, but each has different requirements.
-
- Strawberries: These are well-suited for year-round production. They thrive best in controlled environments where you can maintain steady temperatures (ideally 60–75°F), provide 12–16 hours of light, and ensure good air circulation. Most varieties are self-pollinating, but gentle shaking or using a small electric fan can help with pollination.
- Melons: Growing melons year-round is possible but more challenging. They need consistently warm temperatures (above 70°F), high light levels, and plenty of space for vines to spread. Hand pollination is often necessary, as natural pollinators may not be present indoors. Both crops benefit from regular feeding and attentive watering.
How do I prevent diseases that build up over time in greenhouse soil?
Preventing soil-borne diseases requires proactive management:
-
- Crop rotation: Change the type of crop grown in each bed or container every season to disrupt pest and disease cycles.
- Soil solarization: Cover moist soil with clear plastic during hot months to heat it up and kill pathogens.
- Add compost: Incorporate well-aged compost to boost beneficial microbes that outcompete harmful organisms.
- Introduce beneficial microbes: Use commercial inoculants or compost teas to populate soil with disease-fighting bacteria and fungi.
- Good practices: Avoid overwatering, which promotes fungal growth, and improve airflow by spacing plants and ventilating the greenhouse.
Should I sterilize the greenhouse between seasons?
Yes, thorough cleaning between growing seasons is important for pest and disease control.
-
- Deep clean: Remove all plant debris and weeds. Wash benches, walls, trays, and tools with a mild disinfectant or soap solution.
- Inspect and repair: Check for cracks or crevices where pests might hide and repair as needed.
- Sanitize containers: Clean and disinfect pots and trays before reusing them to avoid transferring pathogens.
- Let it dry: Allow the greenhouse to air out and dry completely before starting new crops.
Is it better to use containers or plant directly in greenhouse beds?
Both methods have their own advantages—choose based on your needs and crops:
-
- Containers: Offer flexibility, are easy to rearrange, and reduce the risk of soil-borne diseases. They’re ideal for crops that need special soil mixes or if you want to isolate plants.
- Greenhouse beds (raised or in-ground): Provide more root space and better water retention, which is beneficial for larger or deep-rooted crops. They also make it easier to grow in bulk.
- Decision factors: Consider your greenhouse size, the crops you want to grow, and your ability to manage soil health.
How can I maintain optimal humidity in different seasons?
Monitoring and adjusting humidity is key to healthy greenhouse crops:
-
- Monitor: Use a hygrometer to track relative humidity (RH) levels.
- Ventilation: Open vents or use fans to reduce humidity, especially after watering or during humid weather.
- Shade cloths: Lower internal temperatures and help prevent excess humidity buildup in summer.
- Misting systems: Increase humidity during dry periods, especially in winter or arid climates.
- Mulching: Helps maintain soil moisture and moderates humidity swings.
- Seasonal adjustments: In winter, limit watering and ventilate during the warmest part of the day to reduce condensation; in summer, increase airflow and use shading as needed.

Why is Soil Health Important
Why is Soil Health Important for Greenhouse Gardeners
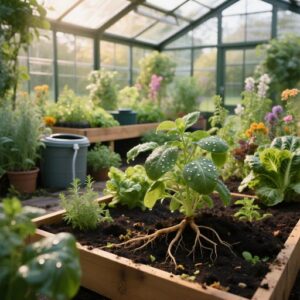
Why is Soil Health Important? In the unique, controlled environment of a greenhouse, soil isn’t just dirt—it’s the living foundation for plant success. Unlike outdoor gardens where natural processes often regenerate soil, greenhouse plants are entirely reliant on the ecosystem you create and maintain. Healthy greenhouse soil impacts nutrient uptake, disease resistance, water efficiency, and overall plant vigor—making it the most critical factor for vibrant growth and sustainable yields.
The Hidden Powerhouse Beneath Your Plants
When you admire your flourishing greenhouse, it’s easy to focus on the lush leaves and ripening produce. But the real magic lies below—in your soil. Far from being inert dirt, it’s a complex, living ecosystem that fuels plant life.
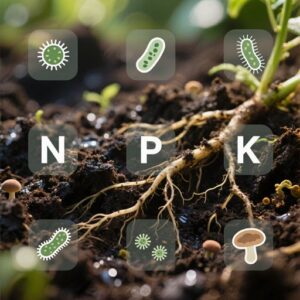
Why soil is your plant’s ultimate support system:
- Nutrient Central: Stores and delivers essential nutrients.
- Water Management Maestro: Retains needed moisture while preventing waterlogging.
- Root Anchor: Provides stability and a platform for root exploration.
- Microbial Metropolis: Teems with beneficial bacteria and fungi that aid nutrient cycling and disease resistance.
- Temperature Buffer: Protects roots from extreme temperature swings.
Why Soil Health is More Crucial in Greenhouses
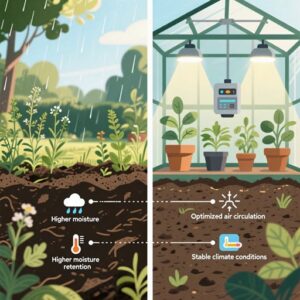
Unlike outdoor gardens, greenhouses are closed systems. That means:
- Intensified Growing: Year-round planting demands constant nutrient replenishment.
- Closed-System Challenge: No natural rain to flush salts or aerate soil.
- You Are the Ecosystem Manager: All inputs come from you.
- Magnified Problems & Solutions: Small issues escalate quickly—but healthy soil magnifies benefits too.
💡 Pro Tip: In a greenhouse, you’re not just planting—you’re managing an ecosystem from the ground up.
Fueling Growth: How Healthy Soil Boosts Plant Performance

Healthy soil directly translates into:
- Nutrient Delivery on Demand
- Stronger, Deeper Root Systems
- Reduced Stress = More Energy for Growth
- Better Produce Quality & Resilience
Your Plants’ Best Defense: Soil-Driven Disease Resistance

Healthy soil acts as a natural disease shield:
- The Microbial Militia: Beneficial organisms outcompete pathogens, produce natural antibiotics, and trigger plant immune responses.
- Fortified Plant Defenses: Strong, well-fed plants resist infections better.
- Physical Barriers: Proper soil structure prevents root rot.
- Stress Reduction: Less stress = stronger immunity.
Soil Health Element → Benefit
| Element | Role in Disease Resistance |
|---|---|
| Organic Matter | Feeds beneficial microbes, improves structure, prevents waterlogging. |
| Microbial Diversity | Crowds out pathogens, triggers plant defenses. |
| Good Drainage | Avoids anaerobic, pathogen-friendly conditions. |
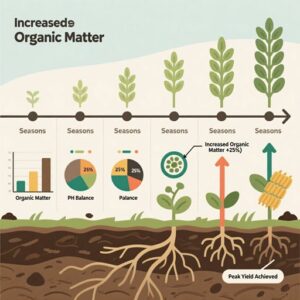
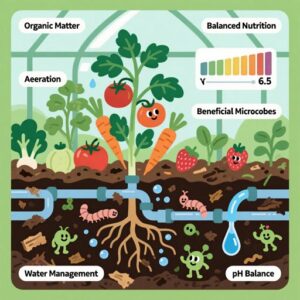
The Six Pillars of Healthy Greenhouse Soil
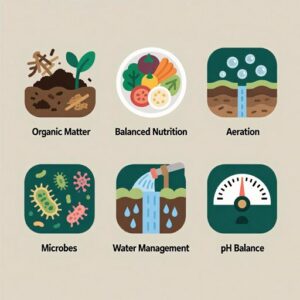
- Organic Matter: Compost, mulch, cover crops.
- Balanced Nutrition: Soil testing + slow-release organic fertilizers.
- Optimal Aeration & Drainage: Prevent compaction, use raised beds or quality potting mixes.
- Thriving Microbial Life: Feed microbes, avoid harsh chemicals, use compost teas.
- Consistent Water Management: Deep, infrequent watering with efficient irrigation.
- pH Balance: Maintain 6.0–7.0 for nutrient availability.
Practical Steps for Thriving Greenhouse Soil

- Soil Test First – Know your starting point.
- Add Organic Matter Regularly – Compost + mulch.
- Water Smart – Deep, infrequent watering; ensure good drainage.
- Protect Microbes – Avoid harsh chemicals, minimize disturbance.
- Rotate Crops – Prevent disease build-up, balance nutrients.
- Observe & Adapt – Watch plant health, smell soil, monitor changes.
Sustainable Success: Long-Term Benefits
Healthy soil gives you:
- Reduced fertilizer & pesticide costs.
- Consistent, high-quality yields.
- Greater resilience to stress.
- A sustainable, low-maintenance system.
- Long-term fertility without soil replacement.
Mastering Soil Health for Greenhouse Success
- Unlock the secrets to thriving plants and bountiful harvests.
- Discover how healthy soil contributes to higher yields and stronger plants.
- Learn essential soil health practices for optimal greenhouse gardening.
- Understand the importance of soil health in creating a sustainable gardening system.
- Protect your greenhouse plants from diseases and pests through improved soil health.
Frequently Asked Questions: Greenhouse Soil Care
Q1: How often should I test my greenhouse soil?
-
Ideally, test your soil at the start of each growing season, and then periodically throughout the year—especially if you notice problems like yellowing leaves or stunted growth. Regular testing lets you track changes in nutrient levels and pH, ensuring your soil stays balanced and supports healthy plants.
Q2: What are the best ways to improve drainage in my greenhouse soil?
-
Improve drainage by mixing in organic matter such as compost or peat moss, which loosens soil and increases air flow. Setting up raised beds also helps water move more freely. When growing in containers, choose a high-quality, well-draining potting mix to prevent soggy roots.
Q3: Can I reuse soil in my greenhouse?
-
Yes, but always refresh it by adding new compost and organic material. If you’ve had issues with disease or pests, sterilize the soil before reuse to protect your plants. Soil testing each time will help you target any nutrients that need to be replenished.
Q4: Why is organic matter so important for greenhouse soil health?
-
Organic matter feeds beneficial soil microbes, improves the soil’s structure, and helps it hold onto moisture without becoming waterlogged. It’s essential for building a stable, healthy soil ecosystem and is the foundation of productive, resilient plants.
Healthy greenhouse soil starts with regular care—test often, improve drainage, recycle responsibly, and always prioritize rich, organic amendments!
Recommended Reading
Smart Greenhouse Humidity Control: Tips for Healthy, Happy Plants Crop RH Range Quick Tip Tomatoes 65–75% Avoid rot, keep airflow up Lettuce 50–60% Too much moisture = mildew Cucumbers 70–80% Likes it moist, vent well Herbs 60–70% Lower RH keeps leaves crisp Peppers 60–70% Don’t let it swing too much Strawberries 60–75% Watch for mold … Continue reading “Greenhouse Humidity Control”
Greenhouse Watering System Parts
Greenhouse Watering System Parts Main Components of an Efficient Greenhouse Watering System An efficient greenhouse watering system consists of several key components that ensure uniform, reliable, and resource-conscious irrigation. The main components are: Water Supply: The primary source of water can be a municipal supply, a well, or a storage tank. An intermediate storage … Continue reading “Greenhouse Watering System Parts”
Greenhouse Watering System Smart Greenhouse Watering Solutions That Actually Work System Best For Pros Cons Drip Beds, rows, containers Precise, water-saving Needs setup, can clog Capillary Mats Seedlings, small pots Even moisture, no wet leaves Not for big plants, clean often Soaker Hose Rows, garden beds Easy to use, covers a lot Not super precise, … Continue reading “Greenhouse Watering System”
Best Victorian Greenhouses for Your Backyard
Introduction Best Victorian Greenhouses for Your Backyard. Victorian greenhouses are renowned for their timeless beauty and unmatched charm. These structures, popular during the Victorian era, continue to captivate gardening enthusiasts with their intricate designs and elegant features. If you’re considering adding a greenhouse to your backyard, a Victorian-style structure could be the perfect choice. In … Continue reading “Best Victorian Greenhouses for Your Backyard”
Closing Thought
By making soil health your priority, you create a resilient, self-sustaining greenhouse ecosystem. The plants above the surface will always reflect the care you’ve invested below.
Greenhouse Humidity Control
Smart Greenhouse Humidity Control: Tips for Healthy, Happy Plants
| Crop | RH Range | Quick Tip |
| Tomatoes | 65–75% | Avoid rot, keep airflow up |
| Lettuce | 50–60% | Too much moisture = mildew |
| Cucumbers | 70–80% | Likes it moist, vent well |
| Herbs | 60–70% | Lower RH keeps leaves crisp |
| Peppers | 60–70% | Don’t let it swing too much |
| Strawberries | 60–75% | Watch for mold in high RH |
| Orchids | 70–85% | Thrives in tropical moisture |
Understanding What Humidity Means for Your Greenhouse
Humidity is basically water vapor floating in the air. In greenhouses, we talk about relative humidity, or RH, which tells us how full the air is with moisture at a certain temperature. Most plants like RH levels between 50% and 85%, depending on what you’re growing. Tomatoes and cucumbers thrive around 65% to 75%, leafy greens like it a bit lower—closer to 50% to 60%, and tropical plants feel most at home around 70% to 85%.
When humidity gets out of hand, it leads to disease and rot. But if it’s too dry, your plants can shrivel up and stop growing properly. Finding that sweet spot is the goal.

What Affects Humidity Inside a Greenhouse
- Temperature swings play a big role. Warm air holds more moisture, so as it heats up, the RH drops unless you add water to the air. When temperatures fall, RH can suddenly spike, which leads to condensation.
- Plants themselves contribute, too. They release moisture through a process called transpiration. So, the more plants you have—and the more densely packed they are—the more humidity you’ll deal with.
- Watering methods can also throw off humidity. Overhead watering and puddles on the floor will release extra moisture into the air, especially if things aren’t drying out fast enough.
- Air circulation and ventilation are your best friends. Without them, water vapor just sits there, and that leads to all sorts of problems.
- Outside conditions matter as well. If the weather is humid, your greenhouse will follow suit. Cold, rainy days are also prime time for indoor condensation.
Why You Really Need to Keep Humidity in Check
- Mold and mildew risk: When RH stays too high, you’re basically inviting gray mold (Botrytis), powdery mildew, and other nasty stuff to move in.
- Healthier plants: Keeping RH balanced helps your plants stay strong and productive. It lets them breathe, absorb nutrients, and keep photosynthesis humming along.
- Better harvests: Balanced humidity means bigger yields and better-looking produce—especially important if you’re selling what you grow.
- Lower energy costs: When you avoid excess moisture and condensation, your heating and maintenance bills don’t climb so high.
How to Take Control of Humidity in Your Greenhouse
- Keep air moving with ventilation: If you’re using natural ventilation, think about adding roof vents or side panels. Let hot, moist air rise and escape naturally. This works great when outside air conditions are cooler and drier than what’s inside.
- For mechanical ventilation, invest in exhaust and circulation fans. They help create a steady airflow, keeping humidity levels in check.
- Automation makes it even easier. Hook up sensors to fans and let the system adjust on its own based on real-time conditions. It’s efficient and hands-free once you set it up.
- Add heat or dehumidifiers when needed: During colder months, heating your greenhouse not only keeps your plants warm—it also lowers RH. That’s because warmer air can hold more water, so heating it up helps dry things out.
- Dehumidifiers are a lifesaver if you’re in a very humid region or dealing with sealed greenhouses where ventilation just isn’t enough. They pull water straight out of the air and help you maintain balance.
Pro tip: Put heaters near doors or lower wall areas where cold air tends to sneak in. That’ll help stop condensation before it starts.
- Watch your watering habits: How and when you water makes a big difference in humidity levels.
- Bottom watering is a great way to give plants what they need without adding extra moisture to the air. Drip systems, mats, or even simple trays all work well.
- Try to water in the morning. That gives everything a chance to dry out before RH naturally rises later in the day. Avoid watering late in the day or right before it gets dark—wet surfaces at night are asking for mold problems.
- Make sure your greenhouse has good drainage, too. Standing water is just excess humidity waiting to happen.
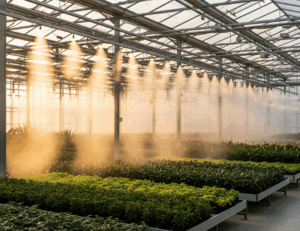
- Use misting and fogging the smart way: Sometimes, especially in dry regions or during hot spells, you’ll need to raise the humidity.
- That’s where misting systems come in. They add moisture to the air but need to be carefully timed. If you overdo it, you’ll create more problems than you solve.
- Fogging systems offer a more even distribution without soaking plant leaves. These are great when connected to climate sensors that tell them exactly when to kick in.
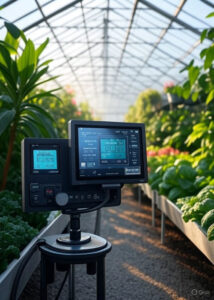
- Keep track with monitoring tools: You can’t control what you can’t see. That’s why monitoring your RH levels is so important.
- Start with a few basic hygrometers—cheap, easy to place, and useful for spotting problem spots. You’ll want to check different areas of your greenhouse, including high and low spaces.
- If you’re serious about getting precision, smart sensors are the way to go. They not only read RH and temperature but can also connect to your ventilation, heating, and irrigation systems to make automatic adjustments.
- Recording the data over time also helps you spot trends and prepare for seasonal shifts.
Everyday Tips for Keeping Humidity Balanced
- Check RH levels every day. This is especially important during season changes, since RH can change quickly.
- Keep things clean. Wipe down surfaces, sweep up debris, and don’t let algae or mold take hold.
- Avoid overcrowding plants. Give them room to breathe so air can circulate and RH doesn’t build up around dense foliage.
- Seal leaks and drafts. Cold, humid air from outside can mess with your setup, so keep everything tight and insulated.
Watch Out for These Common Mistakes
- Overwatering without ventilation is one of the biggest issues. If you’re adding water to your plants but not letting the air dry it up, you’re in trouble.
- Ignoring microclimates can lead to problems too. Areas near walls or in the shade can trap more moisture, so check your entire space regularly.
- Relying only on misting or fogging isn’t a complete strategy. These tools are helpful but should be part of a larger system that includes airflow, monitoring, and smart watering.
Wrapping It All Up
Humidity control might not be the most glamorous part of greenhouse growing, but it’s definitely one of the most important. Keeping the right balance keeps your plants strong, reduces your chances of dealing with rot or disease, and helps your entire operation run smoother.
With good ventilation, strategic watering, proper heating, and the right monitoring tools, you can keep things in balance without breaking a sweat. Your plants will thank you—and your harvest will show it.
💡 Key Takeaway
Managing greenhouse humidity takes a little effort and a lot of awareness. With the right airflow, heating, watering schedule, and monitoring tools, you can keep your plants healthy and your yields high—all year round.
FAQs: Greenhouse Humidity Management
Q1. Is it better to vent a greenhouse at night to control humidity?
In most cases, keep vents closed at night to conserve heat, but monitor humidity levels.
Heat retention: Closing vents helps maintain warmth, which is crucial for plant health overnight.
High humidity: If you notice condensation or excessively high humidity, introduce a bit of nighttime airflow—either by slightly opening vents or using low-speed fans.
Best practice: Use fans to gently circulate air and prevent moisture buildup without significant heat loss.
Q2. Can using shade cloth affect greenhouse humidity?
Yes, shade cloth can impact humidity by lowering internal temperatures.
Temperature effect: Since shade cloth reduces sunlight and heat in a greenhouse, it can also raise the relative humidity if you don’t adjust your ventilation.
Pair with airflow: Always combine shade cloth with adequate ventilation or fans to prevent humidity from rising too high.
Tip: Monitor both temperature and humidity when using shade cloth, and adjust airflow as needed.
Q3. Do mulch or ground covers impact greenhouse moisture?
Definitely—mulch and ground covers influence soil and air moisture levels.
Evaporation: In dry environments, mulch is beneficial because it retains soil moisture by limiting evaporation.
Surface moisture: In humid climates, mulch can trap moisture near the soil surface, potentially raising relative humidity.
Observation: Use mulch carefully in high-humidity settings and regularly check relative humidity (RH) to avoid excess moisture buildup.
Q4. Should I use a humidifier in a greenhouse?
Only use a humidifier in dry climates or during particularly dry periods.
When to use: If your greenhouse’s RH is consistently low and plants show signs of stress (wilting, dry tips), a humidifier or fogger can help.
Risks: Using humidifiers too much can overly increase humidity, raising the risk of mold and fungal diseases.
Balance: Always monitor RH and adjust humidification to maintain optimal plant health.
Q5. Can humidity control reduce pest problems?
Yes, stable humidity levels help prevent many common greenhouse pests.
Pest preferences: Many pests, such as spider mites and fungus gnats, thrive in specific humidity ranges.
Prevention: Keeping RH within an optimal range for your crops makes the environment less favorable for these pests.
Integrated approach: Combine humidity management with good sanitation and monitoring for best pest control results.
Greenhouse Organic Fertilizers
The Secret to Thriving Crops: Greenhouse Organic Fertilizers
| Fertilizer | Made From | Best For | Use Method |
| Compost | Scraps, yard waste | General soil health | Mix into soil |
| Vermicompost | Worm castings | Nutrients, microbes | Top-dress or mix in |
| Cow Manure | Aged cow waste | Leafy growth | Mix into topsoil |
| Chicken Manure | Aged poultry waste | Fruits, flowers | Use sparingly, composted |
| Seaweed Extract | Seaweed | Minerals, roots | Spray or water in |
| Fish Emulsion | Fish byproducts | Fast nitrogen boost | Dilute and apply |
| Rock Phosphate | Mined rock | Root strength | Blend into soil |
| Greensand | Marine sediment | Potassium, micros | Mix into beds |
Let’s Talk About Organic Fertilizers
- Definition: Organic fertilizers come from natural sources like compost, plant materials, and animal waste. They work by slowly releasing nutrients that feed both your plants and the soil.
Sources:
- Compost made from kitchen scraps or garden waste
- Manure from cows, chickens, or horses
- Seaweed, soybean meal, or alfalfa meal
- Rock phosphate, greensand, or gypsum
These fertilizers improve soil texture, retain moisture, and support microbial life that helps plants thrive.
Why Organic Fertilizers Work So Well in Greenhouses
- Soil improvement: Organic fertilizers help maintain soil structure, improving drainage and moisture retention.
- Microbial support: They feed the living organisms in the soil, making nutrients more available to plants.
- Reduced chemical buildup: In an enclosed environment like a greenhouse, synthetic fertilizers can cause salt buildup. Organic options avoid that issue entirely.
- Eco-friendly choice: They’re more sustainable and better for the planet because they’re made from renewable, biodegradable materials.
Organic Fertilizer Options for Your Greenhouse
- Compost and vermicompost: Compost adds nutrients and beneficial microbes, while vermicompost (worm castings) takes it up a notch with more concentrated nutrients and enzyme activity.
- Animal-based fertilizers: Cow manure is nitrogen-rich, great for leafy growth. Chicken manure offers high phosphorus, which is ideal for flowers and fruit. Always use composted manure to avoid burning roots.
- Plant-based fertilizers: Seaweed extract delivers minerals and natural growth hormones. Soybean and alfalfa meals promote strong root systems and soil health.
- Mineral-based fertilizers: Rock phosphate boosts phosphorus for root development. Greensand supplies potassium and micronutrients. Gypsum improves calcium and sulfur without changing soil pH.
- Liquid organic fertilizers: These include compost tea, fish emulsion, and molasses-based mixes. They’re great for foliar sprays and fertigation systems to deliver quick nutrients and boost soil life.
How to Apply Organic Fertilizers in Your Greenhouse
- Soil amendment: Before planting, mix compost or manure into the top 6–8 inches of soil.
- Top-dressing: Sprinkle fertilizer around the base of your plants. Water helps it soak into the roots.
- Fertigation: Mix liquid fertilizers into your irrigation system for even coverage.
- Foliar spraying: Apply diluted liquid fertilizer directly to the leaves for fast absorption.
Timing and frequency:
- Young plants need a balanced mix of nitrogen and phosphorus
- Flowering and fruiting plants do best with more phosphorus and potassium
- Apply solid fertilizers every 4–6 weeks
- Apply liquid fertilizers every 1–2 weeks depending on plant needs
Tips to Get the Most Out of Your Organic Fertilizers
- Test your soil: Check for nutrient levels and pH to understand what your soil needs.
- Balance nutrients naturally: Avoid loading too much nitrogen into the soil. Stick to balanced inputs.
- Rotate crops: Helps maintain soil nutrients and reduce disease and pest buildup.
- Observe your plants: Yellow leaves or stunted growth could be signs you need to adjust your feeding routine.
- Pair with organic pest control: Neem oil, beneficial insects, and garlic sprays can work alongside organic fertilizers for a healthier greenhouse.
Homemade Organic Fertilizers You Can Use in a Greenhouse
- Banana peel tea: Chop up 2–3 banana peels and soak them in a liter of water for 48 hours. The potassium-rich water is great for flowering plants.
- Eggshell calcium powder: Dry eggshells, grind them into powder, and sprinkle around your plants to boost calcium.
- Molasses microbial booster: Mix 1 tablespoon of unsulfured molasses into a liter of water and pour it into the soil weekly to energize soil microbes.
Common Issues and How to Solve Them
- Nutrient inconsistency: Organic inputs vary in strength. Mix different types to balance nutrients better.
- Odor problems: Some fertilizers, especially manures, can smell. Use well-composted materials and store them properly.
- Shelf life concerns: Liquid fertilizers spoil over time. Store in a cool, dark place and make small batches you can use quickly.
- Over-fertilization: Even organics can be overdone. Stick to a feeding schedule and adjust based on plant feedback.
Conclusion
Going organic in your greenhouse is one of the best moves you can make. From feeding your soil to improving plant health, organic fertilizers offer long-term benefits without the downsides of chemicals. Whether you use compost, seaweed extract, or a homemade banana peel tea, you’re setting your plants up for success. With the right application and a little observation, your crops will reward you with vibrant growth and nutrient-rich yields.
🔑 Key Takeaway
Organic fertilizers enrich your greenhouse environment by building healthier soil, feeding beneficial microbes, and delivering natural nutrients to your plants—all without synthetic chemicals.
FAQs: Organic Fertilizers and Soil Health in Greenhouse Growing
Q1. Can I use organic fertilizers in a hydroponic greenhouse?
Yes, you can use organic fertilizers in hydroponics, but choose the right type and monitor your system.
Liquid organic fertilizers, such as fish emulsion, seaweed extract, or compost tea, are commonly used in hydroponic setups.
Filtration matters: Organic fertilizers can introduce particles or residues that may clog pumps or emitters. Make sure your filtration system is robust enough to handle organic inputs.
System hygiene: Regularly clean reservoirs and lines to prevent buildup and biofilm from organic matter.
Q2. What makes vermicompost better than regular compost?
Vermicompost, produced by worms, is richer in nutrients and beneficial enzymes than standard compost.
Nutrient content: Vermicompost contains higher levels of plant-available nutrients, growth hormones, and beneficial microbes.
Soil health: It improves soil structure, water retention, and disease resistance more effectively than traditional compost.
Application: Use vermicompost as a soil amendment, in potting mixes, or to brew nutrient-rich teas for foliar feeding or root drenching.
Q3. Is it okay to use organic fertilizers on seedlings?
Definitely—just dilute them well to protect delicate roots.
Dilution: Seedlings need gentle nutrition. Mix organic fertilizers at half or quarter strength to avoid burning young roots.
Application: Apply as a light drench or gentle foliar spray. Lightly drench or mist seedlings, then check for stress or nutrient burn.
Q4. How should I store homemade organic fertilizers?
Proper storage keeps your fertilizers effective and safe for use.
Dry mixes: To prevent moisture and clumping, keep this product sealed in airtight containers in a cool, dry place.
Liquid mixes: Keep in dark, cool areas (like a cupboard or basement) to slow down decomposition. Use within a few weeks for best results, as organic liquids can ferment or spoil over time.
Labeling: Always label containers with contents and date of preparation.
Q5. Can I bury kitchen scraps directly into greenhouse soil?
It’s better to compost kitchen scraps before adding them to greenhouse soil.
Why compost first: Raw scraps can attract pests (like rodents or flies) and may harbor pathogens harmful to plants.
Composting: Convert scraps into finished compost or vermicompost before use. This process stabilizes nutrients and eliminates most pathogens.
Alternative: Use a bokashi bin or digester to pre-ferment scraps if you want to speed up the process.
Greenhouse Pest Management
Greenhouse Pest Management 
Keep Pests Out: Your Go-To Guide for Greenhouse Pest Management
| Pest | Signs | Quick Fix |
| Aphids | Curled, sticky leaves | Water spray, ladybugs |
| Whiteflies | Tiny white fliers | Sticky traps, parasitic wasps |
| Spider Mites | Speckled leaves, webs | More humidity, predatory mites |
| Thrips | Silvery streaks | Blue traps, lacewings |
| Fungus Gnats | Flies near soil | Dry soil, nematodes |
| Mealybugs | White cottony spots | Alcohol swab, water rinse |
Get to Know Your Greenhouse Pests
Before you can stop pests, you need to know who you’re dealing with. Aphids, for example, suck the life out of plants—literally—causing leaves to curl and growth to stall. Whiteflies are sneaky, multiplying fast and leaving behind sticky residue that attracts mold. Spider mites like it dry and will leave leaves speckled and shriveled. Then there are thrips, which create silvery streaks and tiny black specks on leaves and flowers. Fungus gnats might not look scary, but their larvae can do serious damage underground. And mealybugs? They look like fluffy white specks but feed on plant juices and love to hide in joints.
Signs to watch for: Yellowing leaves, wilting, sticky residue, visible insects on leaf undersides, webbing, or slow plant growth.
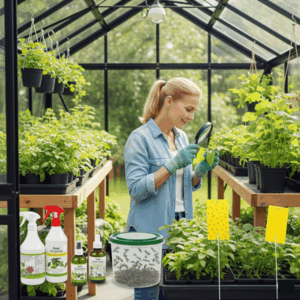
Stay Ahead with Smart Prevention
- Sanitize regularly: Keep your greenhouse clean by removing dead leaves, plant debris, and used containers. Don’t let anything linger that could be hiding pests or eggs.
- Inspect new plants: Always check new plants thoroughly before bringing them into the greenhouse. Look at the leaves—both sides—and check the soil. Quarantine questionable plants for a few days.
- Control climate conditions: Keep humidity levels in check and ensure there’s good airflow. Avoid overwatering. Warm, moist environments are pest heaven.
- Use resistant plants: Choose plant varieties that are naturally resistant to common pests.
- Manage weeds: Keep the outside perimeter of your greenhouse free from weeds and debris that can attract insects.
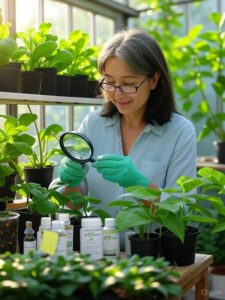
Catch Them Early with Monitoring Tools
- Sticky traps: Use yellow or blue sticky cards to trap flying pests. Place them near entry points and among your plants.
- Regular inspections: Check your plants twice a week. Use a magnifying glass if needed, and focus on the undersides of leaves and soil surfaces.
- Keep records: Track what you find—pest types, dates, locations. This helps identify trends and prepare better each season.
- Pheromone traps: These attract specific pests like thrips or moths and can alert you to population spikes.
-


Put Nature to Work with Biological Controls
- Ladybugs: Great for taking down aphids quickly and efficiently.
- Green lacewings: Their larvae are aggressive predators, especially effective on spider mites and whiteflies.
- Parasitic wasps (Encarsia formosa): These lay their eggs inside whiteflies, killing them from the inside out.
- Predatory mites (Phytoseiulus persimilis): A favorite for tackling spider mite infestations.
- Beneficial nematodes (Steinernema feltiae): Perfect for attacking fungus gnat larvae in the soil.
- How to make them effective: Release them early in the crop cycle, make sure pesticide residues are cleared beforehand, and provide nectar or pollen-rich plants nearby to keep them active and healthy.
Try Simple Mechanical and Physical Fixes
- Install mesh screens: Cover vents and doorways with fine mesh to keep flying pests out while maintaining ventilation.
- Remove pests by hand: Use a spray of water or alcohol-dipped cotton swabs to dislodge pests like aphids and mealybugs.
- Sterilize soil: Steam or solarize your potting soil before planting to eliminate soil-borne pests.
- Use row covers: Protect young or sensitive plants during early growth stages to prevent pest access.
- Vacuum pests: Use handheld battery-powered vacuums to collect flying pests like whiteflies or thrips.
Use Chemicals Only When You Have To
- Pick the right product: Choose targeted, greenhouse-safe pesticides that won’t harm beneficial insects.
- Time your sprays: Apply in the early morning or late evening when temps are cooler and beneficial insects aren’t active.
- Rotate chemicals: Use different chemical classes to prevent pests from developing resistance.
- Apply properly: Spray both the top and bottom of leaves thoroughly. Don’t skip personal protective equipment—use gloves, goggles, and masks for safety.
Put It All Together with Integrated Pest Management (IPM)
- What IPM means: It’s a strategy that combines all your tools—monitoring, sanitation, biological controls, mechanical barriers, and pesticides—used only when necessary.
- Focus on thresholds: Only act when pest populations reach a level that could impact your plants or profits.
- Long-term mindset: You’re not trying to wipe out every bug—just keep their numbers low enough that they don’t do any real damage.
- Train your team: Make sure everyone working in your greenhouse can identify pests, understand treatment protocols, and follow safety practices.
Conclusion
Greenhouse pest management isn’t about finding one magic fix—it’s about layering smart strategies to create a strong, consistent defense. Cleanliness, early detection, beneficial insects, simple physical tools, and careful use of chemicals all play a role. When you use these methods together under an IPM approach, you’re giving your plants the best shot at staying healthy and thriving all year long. Greenhouse Pest Management
🔍 Early detection +
🚧 Prevention +
🐞 Natural helpers +
⚗️ Targeted pesticides
All wrapped in a 🌱 Smart IPM Strategy
Frequently Asked Questions (FAQs): Organic Greenhouse Pest Management
What’s the best way to get rid of pests in organic greenhouses?
The most effective organic approach combines biological controls, strict hygiene, and physical barriers.
-
- Biological controls: Release beneficial insects like ladybugs, lacewings, predatory mites, and parasitic wasps. These natural predators feed on pests such as aphids, whiteflies, thrips, and mites, helping to keep populations in check without chemicals. For best results, introduce beneficials early in the crop cycle and continue releases at regular intervals if needed.
- Strict hygiene: Remove plant debris, dead leaves, and weeds from inside and around the greenhouse. Clean benches, tools, and walkways regularly to eliminate pest hiding spots and breeding grounds.
- Physical barriers: Use sticky traps to monitor and reduce flying pest populations, and install insect netting or row covers to keep new pests out.
- Homemade sprays: For spot treatments, organic sprays made from soap, kelp, garlic, or chili can help manage outbreaks on specific plants.
Combining these methods creates a robust, chemical-free defense that supports healthy crops and a balanced ecosystem.
Can pests become resistant to pesticides in greenhouses?
Yes, pests can develop resistance if the same type of pesticide is used repeatedly.
-
- How resistance develops: When a pesticide with the same mode of action is used over and over, some pests survive and pass their resistance genes to the next generation. Over time, the population becomes harder to control with that chemical.
- Prevention: Rotate between different classes of pesticides, and only use them when monitoring shows it’s necessary. Integrated pest management (IPM) strategies—combining biological controls, physical barriers, and targeted pesticide use—help slow resistance and reduce overall chemical use.
- Best practice: Monitor pest populations closely, use pesticides as a last resort, and always follow label instructions for rotation and application timing.
How can I reduce pest entry from the outside environment?
Sealing entry points and maintaining a clean perimeter are key to keeping pests out.
-
- Physical barriers: Install insect netting or fine mesh over vents, doors, and windows to block flying pests and crawling insects.
- Weed control: Keep the area around your greenhouse free of weeds and tall grass, as these can harbor pests and provide a bridge into your greenhouse.
- Good habits: Avoid leaving doors open unnecessarily, and check that all screens and seals are intact. Clean boots, tools, and containers before bringing them inside to avoid introducing pests.
- Regular inspections: Walk the perimeter regularly and patch any holes or gaps as soon as you find them.
Are yellow sticky traps enough to control an infestation?
Sticky traps are best for monitoring and early detection—not for controlling large infestations.
-
- How they work: Yellow sticky traps attract and capture flying pests like whiteflies, aphids, fungus gnats, and thrips. They provide a visual record of pest activity and help you spot problems before they get out of hand.
- Limitations: Sticky traps mainly catch adult flying insects and won’t affect pests in soil, on stems, or in larval stages. They’re most useful as an early warning system, allowing you to take action before an infestation grows.
- Integrated approach: For serious infestations, combine sticky traps with biological controls, sanitation, and targeted treatments for a comprehensive solution.
How often should I introduce beneficial insects in a greenhouse?
Release beneficial insects early and continue at regular intervals based on pest pressure and season.
-
- Timing: Introduce beneficial insects at the first sign of pests or when you know pest populations typically start to increase. Early releases are more effective because beneficials can keep pest numbers low before they become a problem.
- Frequency: Most growers release beneficials every one to three weeks, depending on the crop, pest pressure, and recommendations from suppliers.
- Environment: Make sure the greenhouse conditions (temperature, humidity, and food sources) support the survival and activity of beneficial insects.
- Ongoing monitoring: Use sticky traps and visual checks to track pest and beneficial populations, adjusting your release schedule as needed for best results.
Greenhouse Pest Management
Recommended Reading
Why is Soil Health Important for Greenhouse Gardeners Why is Soil Health Important? In the unique, controlled environment of a greenhouse, soil isn’t just dirt—it’s the living foundation for plant success. Unlike outdoor gardens where natural processes often regenerate soil, greenhouse plants are entirely reliant on the ecosystem you create and maintain. Healthy greenhouse soil impacts […]
Smart Greenhouse Humidity Control: Tips for Healthy, Happy Plants Crop RH Range Quick Tip Tomatoes 65–75% Avoid rot, keep airflow up Lettuce 50–60% Too much moisture = mildew Cucumbers 70–80% Likes it moist, vent well Herbs 60–70% Lower RH keeps leaves crisp Peppers 60–70% Don’t let it swing too much Strawberries 60–75% Watch for mold […]
Greenhouse Ventilation Smart Greenhouse Ventilation Solutions That Truly Work Type How It Works Good For Pros Cons Natural Vents + outdoor air Mild weather Cheap, simple Needs good wind Mechanical Fans + controls Hot/larger setups Strong, reliable Costs more Why Good Greenhouse Ventilation Really Matters Ventilation is essential: Without it, your greenhouse can overheat, stay […]
Gothic Arch Greenhouse Why Gothic Arch Greenhouses Are a Game-Changer for Year-Round Growing Greenhouse Style What It’s Good At Where It Falls Short Gothic Arch Great for snow and wind, lots of headroom, stylish look Costs a bit more upfront Quonset Budget-friendly, easy to build Snow can pile up, less wall space A-Frame Simple design, […]
Greenhouse Temperature Control
Greenhouse Temperature Control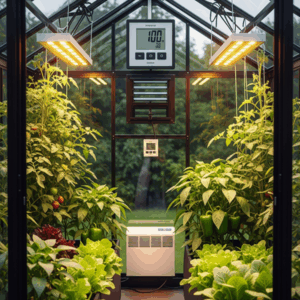
How to Keep Your Greenhouse at the Perfect Temperature Year-Round
| Crop | Day Temp (°F) | Night Temp (°F) | Notes |
| Tomatoes | 70–85 | 60–70 | Loves warmth, needs airflow |
| Peppers | 75–85 | 65–70 | Sensitive to cold nights |
| Cucumbers | 75–85 | 60–70 | Needs consistent warmth |
| Lettuce | 60–70 | 50–60 | Prefers cooler climates |
| Spinach | 50–70 | 40–60 | Tolerates lower temps well |
| Broccoli | 65–75 | 55–65 | Grows best in mild temps |
Why Greenhouse Temperature Control Really Matters
When you think about what makes plants grow, temperature is right up there with light and water. Too much heat can scorch leaves and slow growth, while too much cold can shock or even kill sensitive crops. The key is consistency—keeping things within a range that matches the needs of your plants. It keeps them happy, healthy, and growing strong.
What’s the Ideal Temperature for Different Crops?
Different plants like different temperatures, and getting that balance right makes a big difference in how well they grow.
- Warm-season crops: Tomatoes grow best when the daytime temps sit between 70 and 85°F, and drop to around 60 to 70°F at night. Peppers enjoy similar conditions, with a slight bump in night temps. Cucumbers are also heat lovers, preferring 75 to 85°F during the day and around 60 to 70°F at night.
- Cool-season crops: Lettuce prefers days around 60 to 70°F and nights a little cooler at 50 to 60°F. Spinach can handle a wider range but does best in the 50 to 70°F window. Broccoli likes it in the 65 to 75°F range during the day and a bit cooler at night.
What Affects the Temperature Inside a Greenhouse?
- External climate: The outside weather directly affects how much work your greenhouse systems have to do.
- Sunlight: It can heat your greenhouse fast, which is useful in winter but can be dangerous in the summer.
- Airflow: Proper ventilation ensures that hot air doesn’t build up in one spot and allows for a more even temperature throughout the space.
- Materials: Glass, polycarbonate, or polyethylene each insulate differently. Your material choice impacts heat retention or loss.
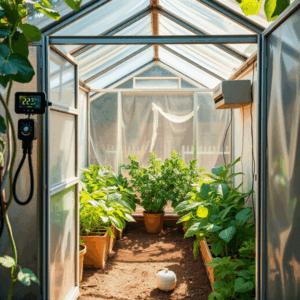
Smart Ways to Manage Temperature Without Electricity
You don’t always need fancy gadgets to keep your greenhouse comfy. Some old-school tricks still work great and don’t cost much.
- Natural ventilation: Roof vents, side vents, and openable panels let hot air escape and cooler air come in. Louvered openings give you better airflow control while keeping pests out.
- Shade cloths: Available in different densities, they block sunlight and reduce internal heat. A 50% shade cloth is a solid choice for hotter areas.
- Thermal mass: Water barrels or stone floors absorb heat during the day and release it at night, helping to even out temperature changes.
Here are a few choices for your greenhouse:
Auto Vent Opener Automatic
-

Wall Mounted Shutter Exhaust Fan
Solar Powered Fan

High-Tech Ways to Take Control
When you need more precision—or you’re managing a larger setup—it’s time to bring in the tech.
Heating systems:
- Electric heaters work well for smaller greenhouses and offer quick warmth.
- Gas or propane heaters are better for large spaces and long heating cycles.
- Hydronic heating uses warm water through pipes beneath your plants for consistent, moisture-friendly heating.
Cooling systems:
- Evaporative coolers pull hot air through wet pads to drop the temperature.
- Exhaust fans push hot air out and bring fresh air in.
- Misting systems cool the air using evaporation but require good ventilation to prevent humidity buildup.
Automated systems: These use sensors and thermostats to adjust fans, heaters, and vents automatically. Some even let you manage everything from your phone, adjusting on the go as weather conditions change.
Tools to Keep an Eye on Conditions
If you’re serious about maintaining a stable temperature, you’ve got to track what’s going on.
- Thermometers and hygrometers: Must-haves to measure temperature and humidity levels accurately.
- Wireless sensors: Place them throughout your greenhouse—at plant level and canopy height—to capture microclimate differences.
- Data loggers: Great for identifying trends by recording temperature data over time.
- Smart controllers: React to your readings and adjust your systems automatically to maintain the ideal climate.
Seasonal Shifts and What You Need to Adjust
- Summer: Use reflective insulation, whitewash glass, or shade cloths to reduce sunlight. Increase airflow with fans and vents. Misting systems help reduce temperature during the day.
- Winter: Seal up cracks and insulate entryways. Use bubble wrap or thermal screens on the walls and ceilings. Set heaters to kick in at night when temperatures drop. Increase thermal mass where possible.
- Spring and fall: The most unpredictable seasons. Use systems that can heat or cool as needed. Keep a close eye on forecasts and adjust your schedule often.
How to Save Energy While Controlling the Climate
- Use renewable energy: Solar panels or biomass heaters offer sustainable energy solutions.
- Insulate wisely: Double-pane glass, thermal screens, and sealing gaps go a long way in saving energy.
- Time your venting: Open vents during cooler hours in the morning and shut them before the day gets too hot. Automated systems make this easier.
- Layer systems: Don’t rely on just one method. Combine passive tools (like thermal mass and shading) with active ones (like smart fans and heaters) for efficient regulation.
Mistakes to Watch Out For
- Overheating: It’s easy to go overboard with insulation and forget to vent, especially on sunny days.
- Cold nights: Nighttime temperatures can drop quickly and catch you off guard. Make sure you’re ready with a heating plan.
- Not monitoring enough: A daily check isn’t enough. Real-time monitoring is essential to avoid sudden changes.
- Skipping maintenance: Fans, vents, and heaters need regular care. Dust and wear can affect performance and cause breakdowns when you need them most.
Frequently Asked Questions (FAQs): Greenhouse Temperature Control
Maintaining the right temperature is vital to a thriving greenhouse. Below, we answer some of the most common questions about keeping your greenhouse warm, efficient, and easy to manage—without breaking the bank.
1. How can I keep my greenhouse warm at night without using electricity?
Recommended Methods:
- Use thermal mass (e.g., water barrels, stone flooring) to absorb heat during the day and release it at night.
- Insulate your greenhouse with bubble wrap, foam panels, or double glazing to reduce heat loss.
- Install thermal curtains or shade cloths to trap warmth after sunset.
Tip:
Place water barrels where they’ll receive maximum sunlight during the day for best heat absorption.
2. Is it better to use glass or plastic for temperature control?
Comparison:
Glass:
- Excellent light transmission for plant growth.
- Durable but can be expensive and fragile.
Polycarbonate Plastic:
- Superior insulation, helping maintain stable temperatures.
- Diffuses light, reducing hot spots and sunburn.
- Lightweight and more impact-resistant than glass.
Tip:
For most hobby greenhouses, double-wall polycarbonate panels offer the best balance of insulation, durability, and cost.
3. Can I automate greenhouse temperature control on a budget?
Short Answer:
Yes! Affordable automation options are available.
Options:
- Smart plugs and programmable thermostats can control fans and heaters.
- Basic temperature controllers can automate vent openers or shade systems.
- Many budget-friendly devices are compatible with Wi-Fi for remote monitoring.
Tip:
Start small—automate one device at a time and expand as your needs grow.
4. How often should I adjust temperature settings?
Recommended Frequency:
Check and adjust temperature settings at least weekly, especially during seasonal changes.
Best Practices:
- Monitor local weather forecasts and greenhouse sensors.
- Adjust ventilation, heating, or shading as needed to stay ahead of temperature swings.
Tip:
Use weather apps and real-time sensor data for timely adjustments.
5. What’s the best way to deal with sudden cold snaps?
Preparation & Response:
- Ensure your heating system is functional and ready to use.
- Add emergency insulation—such as bubble wrap, thermal blankets, or row covers—to retain heat.
- Close off unused sections of the greenhouse to concentrate warmth where it’s needed most.
Tip:
Keep extra insulation materials on hand for quick deployment during unexpected cold weather.
Summary Table
| Question | Key Takeaway | Pro Tip |
|---|---|---|
| Keep greenhouse warm without electricity? | Use thermal mass and insulation | Place water barrels for max sun exposure |
| Glass or plastic for temperature control? | Polycarbonate insulates better than glass | Double-wall polycarbonate is a great choice |
| Automate temp control on a budget? | Smart plugs and basic controllers work well | Start small and expand as needed |
| How often to adjust settings? | At least weekly, more during transitions | Use weather apps and sensors for guidance |
| Deal with sudden cold snaps? | Prep heating, add emergency insulation | Keep bubble wrap and blankets ready |
Conclusion:
With the right materials and a few smart strategies, you can maintain optimal greenhouse temperatures year-round—even on a budget. Regular monitoring, good insulation, and simple automation will help your plants thrive in any season. Make sure your heating system is ready to go and monitor temps closely. You can add emergency insulation with bubble wrap or thermal blankets and close off unused sections to conserve heat. Greenhouse Temperature Control
Recommended Reading
1. Why is Soil Health Important
Why is Soil Health Important for Greenhouse Gardeners Why is Soil Health Important? In the unique, controlled environment of a greenhouse, soil isn’t just dirt—it’s the living foundation for plant success. Unlike outdoor gardens where natural processes often regenerate soil, greenhouse plants are entirely reliant on the ecosystem you create and maintain. Healthy greenhouse soil impacts […]
2. Greenhouse Humidity Control
Smart Greenhouse Humidity Control: Tips for Healthy, Happy Plants Crop RH Range Quick Tip Tomatoes 65–75% Avoid rot, keep airflow up Lettuce 50–60% Too much moisture = mildew Cucumbers 70–80% Likes it moist, vent well Herbs 60–70% Lower RH keeps leaves crisp Peppers 60–70% Don’t let it swing too much Strawberries 60–75% Watch for mold […]
Greenhouse Pest Management Keep Pests Out: Your Go-To Guide for Greenhouse Pest Management Pest Signs Quick Fix Aphids Curled, sticky leaves Water spray, ladybugs Whiteflies Tiny white fliers Sticky traps, parasitic wasps Spider Mites Speckled leaves, webs More humidity, predatory mites Thrips Silvery streaks Blue traps, lacewings Fungus Gnats Flies near soil Dry soil, nematodes […]
Greenhouse Watering System Smart Greenhouse Watering Solutions That Actually Work System Best For Pros Cons Drip Beds, rows, containers Precise, water-saving Needs setup, can clog Capillary Mats Seedlings, small pots Even moisture, no wet leaves Not for big plants, clean often Soaker Hose Rows, garden beds Easy to use, covers a lot Not super precise, […]
Greenhouse Watering System Parts
Greenhouse Watering System Parts 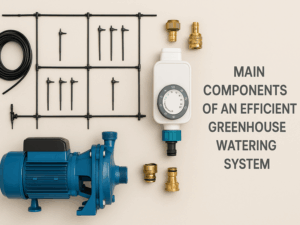
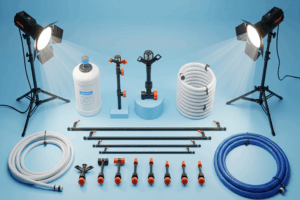
Main Components of an Efficient Greenhouse Watering System
An efficient greenhouse watering system consists of several key components that ensure uniform, reliable, and resource-conscious irrigation. The main components are:
Water Supply:
The primary source of water can be a municipal supply, a well, or a storage tank. An intermediate storage tank may be used to buffer supply and allow for water tempering or heating if needed7.
Pump and Pressure Regulation:
A pump (if not using gravity or municipal pressure) delivers water throughout the system. Pressure regulators ensure consistent and appropriate water pressure for different system types (e.g., drip vs. sprinkler).
Filtration System:
Filters remove debris and particulates from the water to prevent clogging of emitters and pipes, especially important in drip and micro-irrigation systems.
Main Lines, Submains, and Laterals:
Main Line:
Distributes water from the supply to different areas of the greenhouse.
Submains/Manifolds:
Branch off the main line to serve specific zones or beds.
Laterals:
Smaller pipes or tubes that deliver water directly to the emitters or sprinklers.
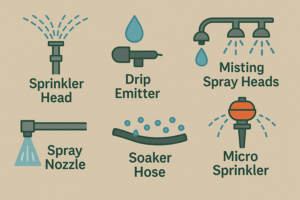
Emitters/Delivery Devices: These include:
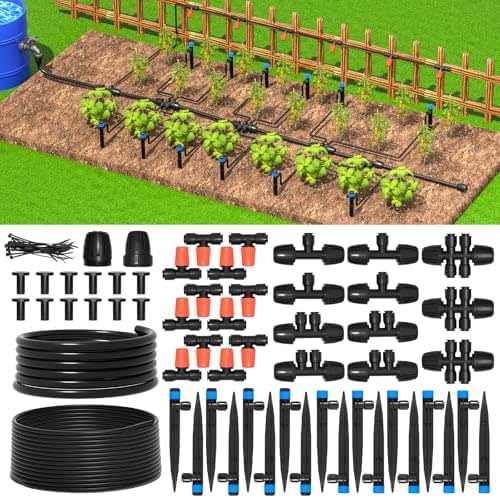
Drip Emitters:
Deliver water directly to plant roots with high efficiency.
Greenhouse Micro Drip Irrigation Kit
-
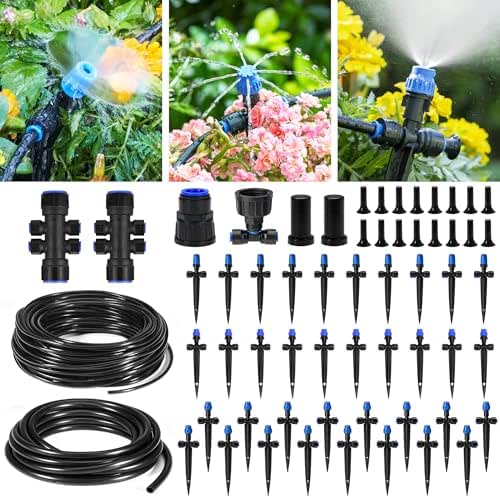
Micro-Sprinklers or Sprayers:
Provide overhead or targeted foliar watering, useful for humidity-loving plants or propagation.
Garden Watering Automatic Sprinkler Kit
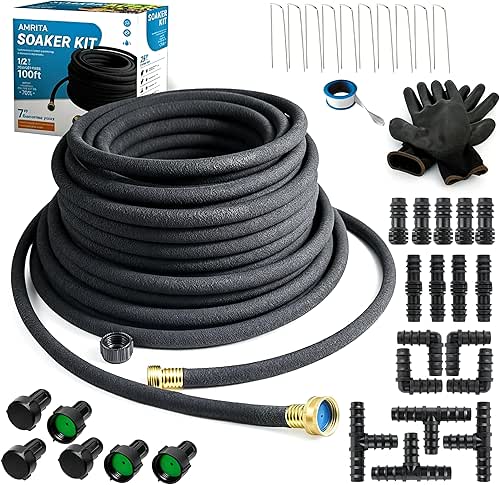
Soaker Hoses:
Permeable hoses for even watering along rows or beds.
Soaker Hose KIT,1/2inch
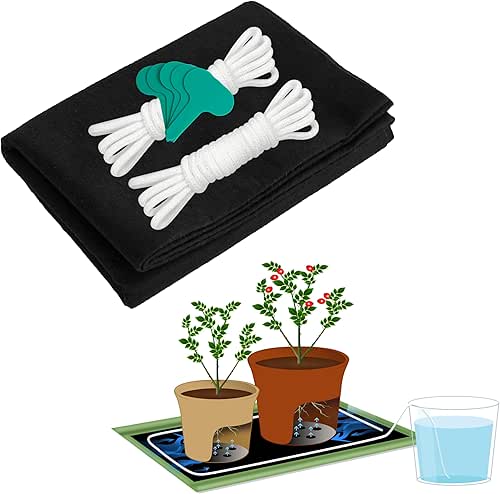
Capillary Mats:
For bottom-watering potted plants and seedlings.
Capillary Mats for Seed Starting Kit
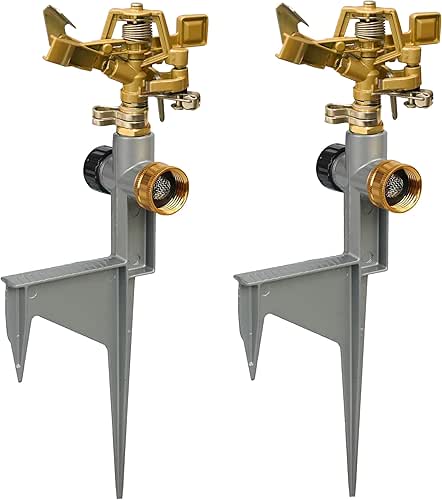
Sprinkler Heads:
For broad, overhead coverage in large greenhouses.
Pulsating Water Sprinkler Head
Automation and Controls:
Timers/Controllers:
Automate watering schedules for consistency and labor savings.
6-Station Indoor/Outdoor Sprinkler Timer/Controller

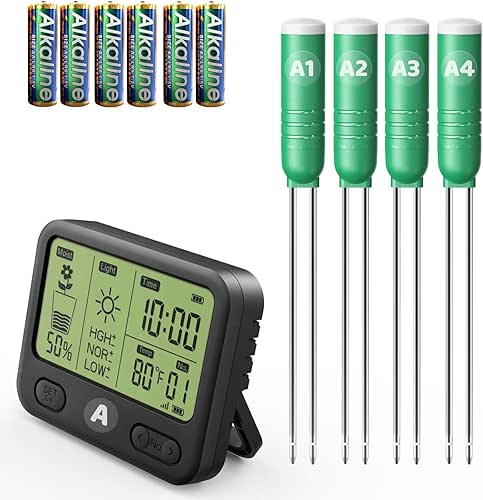
Sensors:
Soil moisture and environmental sensors can optimize watering frequency and duration.
Soil Moisture Sensor Meter

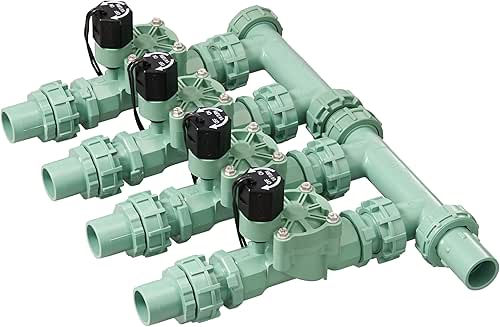
Zone Valves:
Allow for different sections of the greenhouse to be watered independently.
4-Valve Preassembled Sprinkler Manifold
Fertilizer Injector (Optional):
Delivers nutrients directly through the irrigation water for fertigation, increasing efficiency and reducing labor.
Adjustable Fertilizer Injector

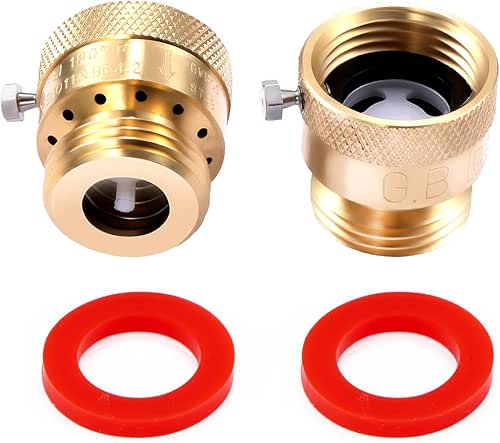
Backflow Prevention Valve:
Prevents contaminated water from flowing back into the main supply, protecting water quality.
Backflow Preventer Vacuum Breaker
Monitoring Equipment:
Water flow meters and pressure gauges help track system performance and detect issues early.
4in1 Plant Soil Moisture Meter
Efficient greenhouse watering systems use these components to deliver water exactly when and where you need it, promote healthy plant growth, conserve resources, and cut down on labor.
Types of Irrigation Systems
| System Type | Description | Best Use Cases |
|---|---|---|
| Drip Irrigation | Delivers water directly to the root zone via emitters; low pressure, precise | Pots, raised beds, row crops |
| Misting Irrigation | Simulates rainfall with fine mist; higher pressure, covers foliage | Propagation, humidity control |
| Sprinkler/Overhead | Waters from above; can be automated or manual | Large areas, seedlings |
| Ebb and Flow/Trough | Floods benches or trays with nutrient solution; drains and recycles water | Containerized crops, hydroponics |
Conclusion
Selecting the proper components and maintaining your irrigation system will help ensure consistent, efficient watering for your greenhouse. Pumps, correct tubing size, compatible accessories, and regular filtration are all key to a trouble-free setup.
An efficient greenhouse watering system integrates a reliable water supply, filtration, pressure regulation, and precise delivery mechanisms—all controlled by automation and supported by monitoring tools. Choosing the right components and system type ensures healthy plants, maximizes water efficiency, and supports sustainable greenhouse management.
Click Here to see more about Greenhouse Sprinkler Systems
Frequently Asked Questions (FAQs): Greenhouse Irrigation Systems
Choosing the right components for your greenhouse irrigation setup is crucial for efficient watering and healthy plants. Below, we address some of the most common questions to help you design and maintain a reliable system.
1. Will gravity-fed water work with irrigation systems?
Short Answer:
Gravity-fed systems typically do not provide enough water pressure for most drip or irrigation systems.
Why?
- Most irrigation components require consistent pressure to operate efficiently.
- Low pressure from gravity-fed sources can result in uneven watering and clogged emitters.
Recommended Solution:
Install a pump to boost water pressure and ensure proper flow throughout your system.
Tip:
If using rain barrels or tanks, position them as high as possible to maximize gravity pressure, but a pump is still usually necessary for best results.
2. What size supply line should I use?
General Guidance:
Match your supply line size to your greenhouse’s water demand.
Recommendations:
- For most small to medium greenhouses, ½” tubing (up to 240 gallons per hour) works well.
- For larger systems or higher water needs, upgrade to ¾” or larger tubing to prevent flow restrictions.
Tip:
Measure the total length of your irrigation lines and consider the number of emitters when selecting tubing size to avoid pressure drops at the far end.
3. Can I use a siphon mixer with a gardener kit?
Short Answer:
Siphon mixers are generally not compatible with most gardener kits.
Why?
- Siphon mixers require full, unrestricted flow and minimal backpressure.
- Many gardener kits create backpressure or use fittings that restrict flow, preventing the siphon mixer from working properly.
Tip:
If you need to inject fertilizer or nutrients, consider alternative methods designed for low-pressure systems.
4. Do I need a filter?
Recommendation:
A filter is highly recommended for all irrigation systems.
Why?
- Filters remove debris and particulates that can clog emitters and pipes.
- Especially important when using non-city water sources (e.g., rainwater, pond water).
Tip:
Check and clean your filter regularly to maintain optimal water flow and extend the life of your irrigation components.
Summary Table
| Question | Key Takeaway | Pro Tip |
|---|---|---|
| Will gravity-fed water work? | Usually insufficient pressure—use a pump | Elevate tanks for more pressure, but pump best |
| What size supply line? | ½” for most, ¾” or larger for big systems | Consider total length and number of emitters |
| Siphon mixer with gardener kit? | Generally incompatible due to backpressure | Use alternatives for low-pressure systems |
| Do I need a filter? | Yes, especially with non-city water | Clean filter regularly to prevent clogs |
Recommended Reading
Why is Soil Health Important for Greenhouse Gardeners Why is Soil Health Important? In the unique, controlled environment of a greenhouse, soil isn’t just dirt—it’s the living foundation for plant success. Unlike outdoor gardens where natural processes often regenerate soil, greenhouse plants are entirely reliant on the ecosystem you create and maintain. Healthy greenhouse soil impacts […]
Greenhouse Watering System Smart Greenhouse Watering Solutions That Actually Work System Best For Pros Cons Drip Beds, rows, containers Precise, water-saving Needs setup, can clog Capillary Mats Seedlings, small pots Even moisture, no wet leaves Not for big plants, clean often Soaker Hose Rows, garden beds Easy to use, covers a lot Not super precise, […]
Polytunnel Greenhouse Why a Polytunnel Greenhouse Might Be the Best Garden Upgrade You’ll Ever Make Polytunnel Greenhouse Feature Polytunnel Glass Greenhouse Cost Cheaper Pricier Setup Quick and easy Slower, more effort Flexibility Easy to move Fixed in place Weather Great for wind and rain Better winter insulation Looks Basic and practical Sleek and classic Repairs […]
Cold Frame Greenhouses: A Simple Way to Keep Your Garden Growing Longer Cold Frame Greenhouses Crop Best Season Temp Range Quick Note Lettuce Spring/Fall 45–65°F Super easy and fast grower Spinach Spring/Fall 40–70°F Loves the cold Radishes Spring/Fall 50–70°F Quick harvest, low fuss Carrots Spring/Fall 55–75°F Slow grower, likes cool soil Kale Fall/Winter 40–70°F Gets […]
Greenhouse Watering System
Greenhouse Watering System 
Smart Greenhouse Watering Solutions That Actually Work
| System | Best For | Pros | Cons |
| Drip | Beds, rows, containers | Precise, water-saving | Needs setup, can clog |
| Capillary Mats | Seedlings, small pots | Even moisture, no wet leaves | Not for big plants, clean often |
| Soaker Hose | Rows, garden beds | Easy to use, covers a lot | Not super precise, clogs |
| Misting | Humid-loving plants | Boosts humidity, easy cooling | Can overdo it, needs timing |
| Hydroponics | Greens, compact crops | Fast growth, no soil needed | Costly, needs know-how |
| Smart Tools | Any setup | Auto-adjusts, remote control | Expensive, needs Wi-Fi |
Understanding What Your Greenhouse Really Needs
Before diving into systems and gadgets, it’s important to know what your plants actually need. Watering isn’t a one-size-fits-all situation. Different plant types, the size of your greenhouse, the soil you use, and even your local climate can make a huge difference.
Seedlings might need daily hydration, while mature plants could get by with less frequent watering. Sandy soil dries fast and needs more water, whereas clay holds onto moisture longer. Don’t forget about humidity and ventilation—these can speed up how fast things dry out. And if you’re growing in containers, keep in mind that pots dry out quicker than beds in the ground.
Checking the soil regularly with a moisture meter or your finger helps prevent over- or under-watering. Greenhouse Watering System.

Why Smart Watering is a Game-Changer
Setting up an efficient watering system isn’t just about convenience—it can seriously boost your greenhouse game.
- Water savings: Efficient systems deliver moisture right where it’s needed—at the root zone—cutting down on waste.
- Healthier plants: Consistent watering promotes steady growth and better yields.
- Fewer weeds: By only watering targeted areas, you reduce the chances of weed growth.
- Disease control: Less water on foliage means less chance for mold and fungal problems.
- Less manual work: Automating your setup saves time and effort.
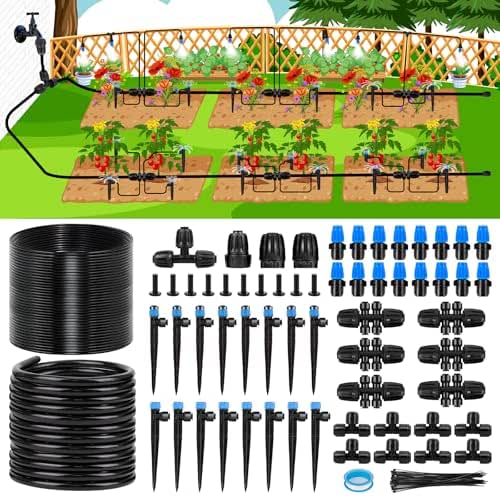
Drip Irrigation: Simple, Smart, and Super Efficient
Drip irrigation is like the MVP of greenhouse watering. It’s a system of tubes and small emitters that slowly drip water directly onto the soil around your plants. What’s great about it is how little water it wastes. Since it targets only the roots, there’s almost no evaporation, and weeds don’t get a free drink.
It works well with timers, sensors, and all sorts of automation. Raised beds, containers, and plant rows are all perfect for this method. Just remember to flush the system now and then so it doesn’t clog. Add a pressure regulator and a filter, and you’ll have a long-lasting, low-maintenance setup.
Quick-Connect Drip Irrigation System Kit
Capillary Mats: Gentle Watering for Potted Plants
If you’re working with lots of small pots or seed trays, capillary mats are a lifesaver. They work by soaking up water from a reservoir, then slowly feeding that moisture into the bottom of your plant containers.
These mats are ideal for delicate plants and seedlings that don’t want water on their leaves. They keep the soil evenly moist without overwatering the roots. Make sure to use pots with flat bottoms so they sit evenly on the mat, and clean the mats occasionally to prevent algae or mold buildup.
Soaker Hoses: The Lazy Grower’s Best Friend
Soaker hoses are exactly what they sound like—hoses that slowly “soak” the soil through tiny pores. They’re awesome for long rows or garden beds because they let water ooze out along the entire length of the hose.
They’re super easy to install and use, and when you bury them under mulch, they hold in moisture even better. Just watch out for kinks or bends, which can block the water flow. Give them a quick inspection at the start of the season and swap them out if they’re looking worn.
Soaker Hose KIT
-
Overhead Misting: Great for High Humidity Crops
Some plants love getting their leaves misted. If you’re growing tropicals, leafy greens, or propagating cuttings, misting systems can really shine.
They spray a fine mist over your plants, cooling the air and boosting humidity. You’ll want to use misting systems with fine nozzles and short bursts to avoid soaking the plants too much. Setting them on a timer helps you keep things under control. Clean those nozzles often—they’re prone to clogging with mineral deposits.
Misting System with Filter

Hydroponics: The Future of Watering (Without Soil)
If you’re ready to level up, hydroponics might be your jam. These systems ditch soil altogether and use a water-and-nutrient solution to grow your plants.
Why hydroponics works:
- Water is recycled and reused, so there’s minimal waste.
- You have complete control over nutrients, pH, and oxygen.
- Plants grow faster and often produce higher yields.
Click Here to See More about Hydroponic Systems
You can try out systems like Nutrient Film Technique (NFT), Deep Water Culture (DWC), or ebb and flow setups. If you’re new to hydroponics, start simple and expand as you learn the ropes.
Smart Tools and Automation: Let Tech Do the Work
Let’s be real—manually watering every day is a hassle. That’s where smart watering tools come in. These systems use sensors and timers to water your plants only when they actually need it.
Helpful features include:
- Soil moisture and temperature monitoring
- Weather forecast syncing
- App-based control with alerts and scheduling
The best part? You’ll stop wasting water and your plants will thank you for the consistency.
Reusing Water: Good for the Planet and Your Wallet
Water’s a precious resource, so it makes sense to reuse as much of it as you can. Collecting and recycling water helps you cut down on bills and reduce your environmental impact.
- Rainwater: Use gutters and barrels to catch it off your greenhouse roof. Just make sure you’re filtering it before using it on edible crops.
- Greywater: Use lightly used water from sinks or cooling systems. It’s best for non-edible plants unless it’s been properly filtered.
Natural filtration setups using sand and charcoal work well for purifying reused water.
Pro Tips for Getting the Most Out of Every Drop
Even the best system needs some love and attention. Follow these habits to boost efficiency:
- Water early in the morning or late in the day to reduce evaporation.
- Mulch your beds to lock in moisture and keep soil temperatures stable.
- Group similar plants together so they receive the same amount of water.
- Check your watering system regularly to spot leaks or clogs.
- Fix issues as soon as they come up—drips can waste gallons over time.
Common Mistakes You’ll Want to Avoid
It’s easy to think more water equals better results—but that’s not always true. Here’s what you should steer clear of:
- Relying too much on manual watering without checking soil moisture
- Laying out your system poorly, leading to dry spots or pooling
- Failing to adjust your watering based on seasonal changes
- Forgetting to clean filters, emitters, or misting nozzles
- Ignoring leaks or system malfunctions for too long

Conclusion
Getting your greenhouse watering right makes everything else easier. With the right system in place—whether that’s drip irrigation, capillary mats, misting systems, or smart automation—you’ll be saving water, time, and energy. Plus, your plants will grow stronger, healthier, and more productive.
Feel free to experiment with different setups until you find what works for your space. A well-watered greenhouse is a thriving one.
Click Here to See More about Sprinkler System Equipment and Parts
🔑 Key Takeaway
Dialing in your greenhouse watering system helps you grow healthier plants, conserve water, and cut down on daily chores, all while making your setup more sustainable and productive.
Frequently Asked Questions (FAQs): Greenhouse Watering & Growing Systems
When setting up a greenhouse, choosing the right watering method and growing system can make all the difference—especially for beginners. Below, we answer some of the most common questions to help you get started with confidence.
1. What’s a good low-maintenance watering option for beginners?
Recommended Option:
Drip irrigation is ideal for beginners looking for a “set-it-and-forget-it” system.
Why?
- Automates watering, reducing daily chores.
- Delivers water directly to plant roots, minimizing waste.
- Compatible with timers for even greater convenience.
- Reduces risk of overwatering or underwatering.
Tip:
Once installed, just check occasionally for clogged emitters to keep the system running smoothly.
2. Is rainwater safe to use in a greenhouse?
Short Answer:
Yes, rainwater is generally safe for greenhouse use.
What to Watch For:
- Always filter rainwater before using it, especially for edible crops.
- Filtering removes debris, insects, and potential contaminants.
- Regularly clean gutters and collection barrels to prevent buildup.
Tip:
Test rainwater for pH and pollutants if you live in an area with heavy air pollution.
3. How often should I check my system for maintenance?
Recommended Schedule:
A quick check every couple of weeks during the growing season is usually sufficient.
Key Tasks:
- Inspect filters and clean them as needed.
- Unclog drip emitters to ensure even watering.
- Look for leaks or signs of wear in hoses and fittings.
Tip:
Set a calendar reminder for routine checks—preventing small issues from becoming big problems.
4. Can I use greywater in my greenhouse?
Short Answer:
Greywater can be used, but only with caution.
Safe Practices:
- Use greywater only on non-edible plants unless it’s been thoroughly filtered and treated.
- Avoid greywater that contains harsh chemicals, soaps, or cleaners.
- Monitor for salt buildup, which can harm plant roots over time.
Tip:
Label irrigation lines if using both potable and greywater to avoid cross-contamination.
5. What’s the best system for growing lettuce or greens?
Top Choice:
Hydroponics—especially the Nutrient Film Technique (NFT)—is excellent for leafy greens.
Why?
- Provides rapid, uniform growth.
- Allows precise control of nutrients.
- Uses less water than soil-based systems.
- Minimizes waste and reduces pest issues.
Tip:
Start with a small NFT system to learn the basics before scaling up for larger harvests.
Summary Table
| Question | Key Takeaway | Pro Tip |
|---|---|---|
| Low-maintenance watering? | Drip irrigation automates the process | Check emitters for clogs |
| Is rainwater safe? | Yes, if filtered properly | Test pH if in polluted areas |
| How often to check system? | Every 2 weeks during growing season | Set calendar reminders |
| Can I use greywater? | Only on non-edibles, unless well filtered | Label lines to avoid mix-ups |
| Best system for lettuce/greens? | Hydroponics (NFT) for fast, clean growth | Start small, scale up as you learn |
Recommended Reading
Why is Soil Health Important for Greenhouse Gardeners Why is Soil Health Important? In the unique, controlled environment of a greenhouse, soil isn’t just dirt—it’s the living foundation for plant success. Unlike outdoor gardens where natural processes often regenerate soil, greenhouse plants are entirely reliant on the ecosystem you create and maintain. Healthy greenhouse soil impacts […]
Smart Greenhouse Humidity Control: Tips for Healthy, Happy Plants Crop RH Range Quick Tip Tomatoes 65–75% Avoid rot, keep airflow up Lettuce 50–60% Too much moisture = mildew Cucumbers 70–80% Likes it moist, vent well Herbs 60–70% Lower RH keeps leaves crisp Peppers 60–70% Don’t let it swing too much Strawberries 60–75% Watch for mold […]
Greenhouse Pest Management Keep Pests Out: Your Go-To Guide for Greenhouse Pest Management Pest Signs Quick Fix Aphids Curled, sticky leaves Water spray, ladybugs Whiteflies Tiny white fliers Sticky traps, parasitic wasps Spider Mites Speckled leaves, webs More humidity, predatory mites Thrips Silvery streaks Blue traps, lacewings Fungus Gnats Flies near soil Dry soil, nematodes […]
Greenhouse Temperature Control
Greenhouse Temperature Control How to Keep Your Greenhouse at the Perfect Temperature Year-Round Crop Day Temp (°F) Night Temp (°F) Notes Tomatoes 70–85 60–70 Loves warmth, needs airflow Peppers 75–85 65–70 Sensitive to cold nights Cucumbers 75–85 60–70 Needs consistent warmth Lettuce 60–70 50–60 Prefers cooler climates Spinach 50–70 40–60 Tolerates lower temps well Broccoli […]
Greenhouse Watering System
Water Flow Through Pipe Calculator
Water Flow Through Pipe Calculator 
Why is pipe sizing critical for optimal water pressure and flow in greenhouse systems
Proper pipe sizing is critical for maintaining optimal water pressure and flow in greenhouse systems because it directly impacts friction loss, flow velocity, and overall efficiency. Here’s how these elements interconnect:
Friction Loss and Pressure Drop
Click Here for our Greenhouse Pipe Sizing Calculator
- Small pipes increase friction: Narrower pipes create more resistance as water moves, resulting in notable pressure loss over long runs. For example, a 1-inch pipe carrying 20 GPM may lose about 19 psi over 200 ft, whereas a 1.25-inch pipe carrying the same flow drops only around 5 psi.
- Meeting pressure requirements: Irrigation devices—like sprinklers or drip emitters—need specific pressures to operate correctly. Pipes that are too small can leave the farthest emitters starved for pressure, causing uneven irrigation.
Flow Velocity and System Longevity
- Velocity limits: When water flows too fast (e.g., above 5 ft/s), it causes noise, accelerates erosion-corrosion inside the pipe, and shortens service life. For instance, copper pipes carrying hot water should stay below 3 ft/s, while cold-water lines can handle up to 8 ft/s safely.
- Low-velocity risks: Conversely, oversized pipes let water move too slowly, encouraging sediment buildup and stagnant pockets, which can clog emitters or promote biofilm.

Optimal Pipe Sizing Guidelines
| Flow Rate (GPM) | Recommended Pipe Size | Max Velocity (ft/s) |
| 3 – 7 | ¾ inch | 2.6 – 5.0 |
| 8 – 11 | 1 inch | 2.6 – 5.0 |
| 12 – 20 | 1¼ inch | 2.6 – 5.0 |
| 21 – 28 | 1½ inch | 2.6 – 5.0 |
(Based on Schedule 80 PVC and typical friction-loss limits.)
Click Here for our Greenhouse Pipe Sizing Calculator
Consequences of Improper Sizing
-
Undersized pipes:
- Lower pressure at emitters.
- Extra strain on pumps, driving up energy costs.
- Turbulent flow can stir debris, increasing clog risks.
-
Oversized pipes:
- Higher material and installation expenses upfront.
- Slow flow means sediment may settle, leading to blockages or microbial growth.
Design Best Practices
- Calculate total flow demand: Add up the GPM requirements of all emitters, sprinklers, or irrigation zones to determine peak flow.
- Prefer plastic piping: PVC or polyethylene has a smoother interior compared to metal, which reduces friction loss.
- Incorporate pressure regulators: Especially in systems mixing drip and sprinklers, regulators keep each zone at the proper pressure.
- Aim for balanced velocity: Target a flow rate between 2 and 5 ft/s to minimize friction losses while avoiding erosion or stagnation.
💡 Key Insight
Properly sized piping balances friction loss, flow velocity, and pressure, ensuring uniform water delivery, lowering energy use, and extending equipment life. By matching pipe diameter to flow requirements, greenhouse growers safeguard efficient water distribution, conserve resources, and promote consistent plant health.
Frequently Asked Questions (FAQs): Pipe Sizing for Optimal Water Pressure and Flow in Greenhouse Systems
How do I determine the right pipe size for my greenhouse irrigation system?
Calculate your system’s total flow rate (GPM or L/h) and desired pressure, then use pipe sizing charts to match these needs.
- Flow rate: Add the flow requirements of all emitters, sprinklers, or nozzles in your system. For example, a zone with ten 1 GPM emitters needs a 10 GPM flow rate.
- Pressure: Aim for 30–50 PSI at the water source to account for friction loss and elevation changes.
- Pipe charts: Use tables to select a pipe size that keeps flow velocity between 2–5 feet per second (FPS). This balances efficiency and minimizes friction loss.
| Pipe Size (inches) | Max Flow Rate (GPM) | Friction Loss (PSI per 100 ft) |
|---|---|---|
| 3/4 | 8 | 5.8 |
| 1 | 12 | 4.4 |
| 1-1/4 | 22 | 3.1 |
-
Example: For a 15 GPM system, a 1-1/4 inch pipe reduces friction loss compared to a 1-inch pipe.
What happens if I use pipes that are too small for my greenhouse system?
Undersized pipes cause excessive friction loss, leading to pressure drops and uneven watering.
- Pressure loss: A 3/4-inch pipe supplying two 5/8-inch hoses may drop pressure to 21 PSI (vs. the required 30 PSI for sprinklers).
- Pump strain: Low pressure forces pumps to work harder, increasing energy costs and wear.
- Plant impact: Emitters at the end of the line may fail to deliver enough water, stunting plant growth.
Can pipes be too large for a greenhouse watering system?
Yes. Oversized pipes reduce velocity, risking sediment buildup and higher costs.
- Stagnation: Flow below 2 FPS allows debris to settle, clogging emitters and fostering biofilm.
- Cost: Larger pipes (e.g., 2-inch vs. 1-1/4-inch) use more material without improving performance.
- Solution: Use pressure regulators or flow control valves to optimize oversized systems.
Why does pipe length matter when sizing pipes for irrigation?
Longer pipes increase friction loss, requiring larger diameters to maintain pressure.
- Friction loss: A 100-foot 1-inch pipe loses 4.4 PSI, but a 200-foot run loses nearly 9 PSI at 12 GPM.
- Design tip: For long greenhouse rows, use a larger mainline (e.g., 1-1/4-inch) and reduce to smaller lateral pipes near emitters.
- Elevation: Add 0.433 PSI per foot of elevation gain. A 10-foot rise requires ~4.3 PSI compensation.
How often should I check or adjust my pipe sizing as my greenhouse operation grows?
Re-evaluate pipe sizing during expansions, new zones, or flow increases.
- Signs to watch: Pressure drops at emitters, uneven plant growth, or pump cycling indicate undersized pipes.
- Upgrade steps: If adding 10+ emitters, recalculate flow rates and consult friction loss charts to resize pipes.
- Preventive checks: Monitor pressure gauges monthly and flush lines seasonally to detect clogs or wear.
Summary Table: Pipe Sizing Guidelines
| Issue | Solution | Key Benefit |
|---|---|---|
| Undersized pipes | Use charts to match flow/pressure needs | Prevents pressure drops and pump strain |
| Oversized pipes | Add regulators or reduce diameter | Avoids sediment buildup and saves costs |
| Long pipe runs | Increase mainline diameter | Maintains pressure across the greenhouse |
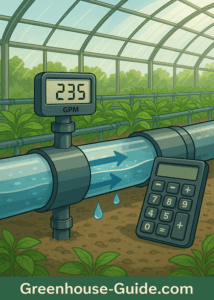
Click Here for our Greenhouse Pipe Sizing Calculator
Recommended Reading
Why is Soil Health Important for Greenhouse Gardeners Why is Soil Health Important? In the unique, controlled environment of a greenhouse, soil isn’t just dirt—it’s the living foundation for plant success. Unlike outdoor gardens where natural processes often regenerate soil, greenhouse plants are entirely reliant on the ecosystem you create and maintain. Healthy greenhouse soil impacts […]
Smart Greenhouse Humidity Control: Tips for Healthy, Happy Plants Crop RH Range Quick Tip Tomatoes 65–75% Avoid rot, keep airflow up Lettuce 50–60% Too much moisture = mildew Cucumbers 70–80% Likes it moist, vent well Herbs 60–70% Lower RH keeps leaves crisp Peppers 60–70% Don’t let it swing too much Strawberries 60–75% Watch for mold […]
Greenhouse Ventilation Smart Greenhouse Ventilation Solutions That Truly Work Type How It Works Good For Pros Cons Natural Vents + outdoor air Mild weather Cheap, simple Needs good wind Mechanical Fans + controls Hot/larger setups Strong, reliable Costs more Why Good Greenhouse Ventilation Really Matters Ventilation is essential: Without it, your greenhouse can overheat, stay […]
Gothic Arch Greenhouse Why Gothic Arch Greenhouses Are a Game-Changer for Year-Round Growing Greenhouse Style What It’s Good At Where It Falls Short Gothic Arch Great for snow and wind, lots of headroom, stylish look Costs a bit more upfront Quonset Budget-friendly, easy to build Snow can pile up, less wall space A-Frame Simple design, […]
Water Flow Through Pipe Calculator
Greenhouse Ventilation
Greenhouse Ventilation
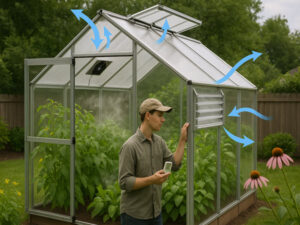
Smart Greenhouse Ventilation Solutions That Truly Work
| Type | How It Works | Good For | Pros | Cons |
| Natural | Vents + outdoor air | Mild weather | Cheap, simple | Needs good wind |
| Mechanical | Fans + controls | Hot/larger setups | Strong, reliable | Costs more |
Why Good Greenhouse Ventilation Really Matters
- Ventilation is essential: Without it, your greenhouse can overheat, stay too humid, or become a breeding ground for pests and disease. Hot air needs a way out, and fresh air needs a way in. That’s how you keep the temperature stable and prevent humidity from getting out of hand.
- CO₂ is critical: Plants need a steady supply of carbon dioxide to fuel photosynthesis. If your greenhouse is sealed up tight, CO₂ levels drop and growth slows down.
- Airflow prevents problems: Better airflow reduces the chances of fungus and insects taking hold in your growing space.
Natural Ventilation: Low-Tech, High-Impact
- Using nature’s tools: Natural ventilation takes advantage of wind and temperature differences to keep your greenhouse cool. If your area has decent airflow and mild weather, this could work well.
How it works:
- Roof vents let hot air rise and escape.
- Sidewall vents bring in cooler air from outside.
- Louvered openings give you control over how much air flows through.
- Best for: Medium to large greenhouses in places where the weather isn’t too extreme. It’s simple, affordable, and effective under the right conditions.
Mechanical Ventilation: When You Need Power and Precision
- When nature isn’t enough: In areas with high temperatures or little natural wind, mechanical ventilation does the heavy lifting.
Components of mechanical ventilation:
- Exhaust fans pull hot, stale air out from one end of the greenhouse.
- Intake louvers open up to let cooler air in when fans are running.
- Circulation fans keep air moving inside to eliminate stagnant pockets.
- Best for: Year-round greenhouses, commercial setups, or climates that demand more precision and power.
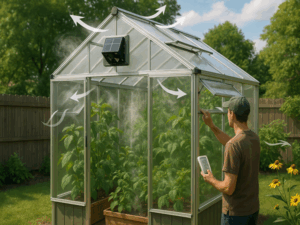
How to Choose the Right Ventilation for Your Greenhouse
- One size doesn’t fit all: Every greenhouse is different, so your setup should match your specific needs.
What to consider:
- Size and layout: Small hobby greenhouses may only need passive vents. Larger or commercial spaces usually need powered fans and smart controls.
- Climate: Hot areas need stronger cooling systems. Cooler climates benefit from humidity control and CO₂ balance.
- Plant types: Some crops need more humidity; others need it dry and warm.
- Automation: Automated vents, thermostats, and sensors are great if you’re away often or managing multiple greenhouses.
- Budget: Mechanical systems cost more but offer control and reliability. Passive systems are cheaper but need the right conditions to work.
Building a Ventilation Setup That Works
- Balance is key: A successful system needs to move air efficiently in and out. For every bit of air you push out, you need to bring in the same amount.
What to include:
- Thermostats and controllers: These automate fans and vents based on internal readings.
- Shading systems: Reduce the heat entering the greenhouse, lowering the demand on ventilation.
- Sensors: Measure temperature, humidity, and CO₂ so the system can react in real time.
DIY vs. Commercial Ventilation Setups
- Going the DIY route: This works well for growers on a budget or those who like to build things themselves. Manual vents and basic fans can work fine in smaller, milder climates.
- Commercial systems: These are built for high performance. They’re automated, durable, and handle extreme temperatures or dense planting. While they cost more upfront, they save time and provide consistent results.
Common Ventilation Mistakes You’ll Want to Avoid
- Don’t overlook airflow requirements: Using undersized fans or vents means you’re not moving enough air.
- Avoid bad fan placement: Poorly placed fans can leave hot or humid pockets where problems develop.
- Seasonal changes matter: What works in the summer might not be right for winter. Adjust your setup as the seasons shift.
- Keep it clean and maintained: Dirty or broken fans and stuck vents reduce efficiency and can cause system failure.
- Don’t overventilate in cold months: Too much airflow in winter can chill your plants or dry them out too much.
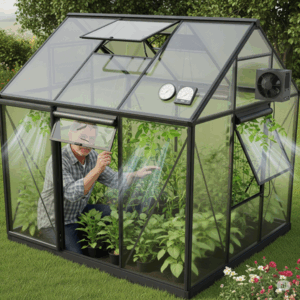
Going Green with Sustainable Ventilation
-
Solar-powered fans: These cut down electricity use and are perfect for remote or off-grid greenhouses.
-
Thermal vent openers: These use wax that expands with heat to open vents—no electricity needed.

-
Smart systems: IoT-connected devices track and control airflow based on live data, which makes your system more responsive and efficient.
-
Evaporative cooling pads: These cool incoming air using water and take pressure off your fans when it’s especially hot.

🔑 Key Takeaway
A well-ventilated greenhouse keeps temperatures balanced, humidity in check, and plants breathing happy—all of which add up to stronger, healthier growth
Frequently Asked Questions (FAQs): Greenhouse Ventilation & Air Quality
Ventilation plays a key role in overall plant well-being.. Here, we address common questions about maintaining, automating, and optimizing your greenhouse ventilation system.
1. How often should I replace the filters in my greenhouse fans?
Recommended Schedule:
Check fan filters monthly during peak growing seasons.
Why?
- Clogged filters reduce airflow, impacting ventilation efficiency.
- Clean or replace filters when you notice a drop in airflow or visible debris buildup.
- Some filters, such as carbon filters, may need replacement after 1–3 years of use, depending on manufacturer recommendations and intensity of use.
Tip:
Regular checks and cleaning extend filter life and keep your ventilation system running efficiently.
2. Can I run my ventilation system on a timer instead of sensors?
Short Answer:
Yes, timers can control ventilation, but sensors provide more precise, real-time adjustments.
Comparison:
- Timers: Simple, set schedules for fans or vents to operate at specific times.
- Sensors: React to actual temperature, humidity, or CO₂ levels, ensuring optimal conditions automatically.
Tip:
If budget allows, consider adding temperature or humidity sensors for smarter, more efficient ventilation control.
3. Is it okay to keep the greenhouse sealed during the winter?
Best Practice:
Do not keep your greenhouse completely sealed, even in winter.
Why?
- Some air exchange is necessary to prevent humidity buildup and water condensation, which can lead to mold and plant diseases.
- Use low-speed fans or partially open vents to maintain air movement and exchange.
Tip:
Monitor humidity levels and adjust ventilation as needed to balance warmth and moisture.
4. Do I need to ventilate at night?
Recommendation:
Yes, maintain some ventilation at night, though less aggressively than during the day.
Why?
- Plants continue to release moisture at night, and stagnant air can lead to high humidity and disease.
- Gentle airflow helps prevent these issues without significant heat loss.
Tip:
Use low-speed circulation fans or short ventilation cycles to keep air fresh overnight.
5. What’s the best way to add CO₂ if ventilation reduces it?
Options:
- Use CO₂ generators or tanks to enrich air in tightly sealed greenhouses.
- Balance CO₂ supplementation with necessary ventilation to avoid wasting added CO₂.
Tip:
Automate CO₂ injection to coincide with periods when vents are closed, maximizing efficiency.
Summary Table
| Question | Key Takeaway | Pro Tip |
|---|---|---|
| How often to replace fan filters? | Check monthly; clean or replace as needed | Replace carbon filters every 1–3 years |
| Timer vs. sensor for ventilation? | Timers work, but sensors give better control | Upgrade to sensors for real-time adjustments |
| Keep greenhouse sealed in winter? | No, always allow some air exchange | Use low-speed fans or crack vents |
| Ventilate at night? | Yes, but less aggressively | Use circulation fans for gentle airflow |
| Add CO₂ with ventilation? | Use CO₂ tanks/generators in sealed spaces | Inject CO₂ when vents are closed |
Conclusion:
Ventilation plays a huge role in how your greenhouse performs. It controls temperature, balances humidity, and gives plants the oxygen and CO₂ they need to thrive. Whether you go the natural route, install powered fans, or combine both approaches, the key is to match your system to your plants, climate, and greenhouse size. Do it right, and your plants will thank you with healthier growth, fewer pests, and better yields.
Consistent maintenance and smart automation of your greenhouse ventilation system will ensure healthy air quality and optimal growing conditions year-round. Regular filter checks, balanced air exchange, and thoughtful CO₂ management are key to success.
Recommended Reading
Smart Greenhouse Humidity Control: Tips for Healthy, Happy Plants Crop RH Range Quick Tip Tomatoes 65–75% Avoid rot, keep airflow up Lettuce 50–60% Too much moisture = mildew Cucumbers 70–80% Likes it moist, vent well Herbs 60–70% Lower RH keeps leaves crisp Peppers 60–70% Don’t let it swing too much Strawberries 60–75% Watch for mold … Continue reading “Greenhouse Humidity Control”
Greenhouse Watering System Parts
Greenhouse Watering System Parts Main Components of an Efficient Greenhouse Watering System An efficient greenhouse watering system consists of several key components that ensure uniform, reliable, and resource-conscious irrigation. The main components are: Water Supply: The primary source of water can be a municipal supply, a well, or a storage tank. An intermediate storage … Continue reading “Greenhouse Watering System Parts”
Greenhouse Watering System Smart Greenhouse Watering Solutions That Actually Work System Best For Pros Cons Drip Beds, rows, containers Precise, water-saving Needs setup, can clog Capillary Mats Seedlings, small pots Even moisture, no wet leaves Not for big plants, clean often Soaker Hose Rows, garden beds Easy to use, covers a lot Not super precise, … Continue reading “Greenhouse Watering System”
Best Victorian Greenhouses for Your Backyard
Introduction Best Victorian Greenhouses for Your Backyard. Victorian greenhouses are renowned for their timeless beauty and unmatched charm. These structures, popular during the Victorian era, continue to captivate gardening enthusiasts with their intricate designs and elegant features. If you’re considering adding a greenhouse to your backyard, a Victorian-style structure could be the perfect choice. In … Continue reading “Best Victorian Greenhouses for Your Backyard”